Turn Old Tires into Colorful Garden Planters for $10
Two hours, two cans of spray paint, and the boldest planters on your street
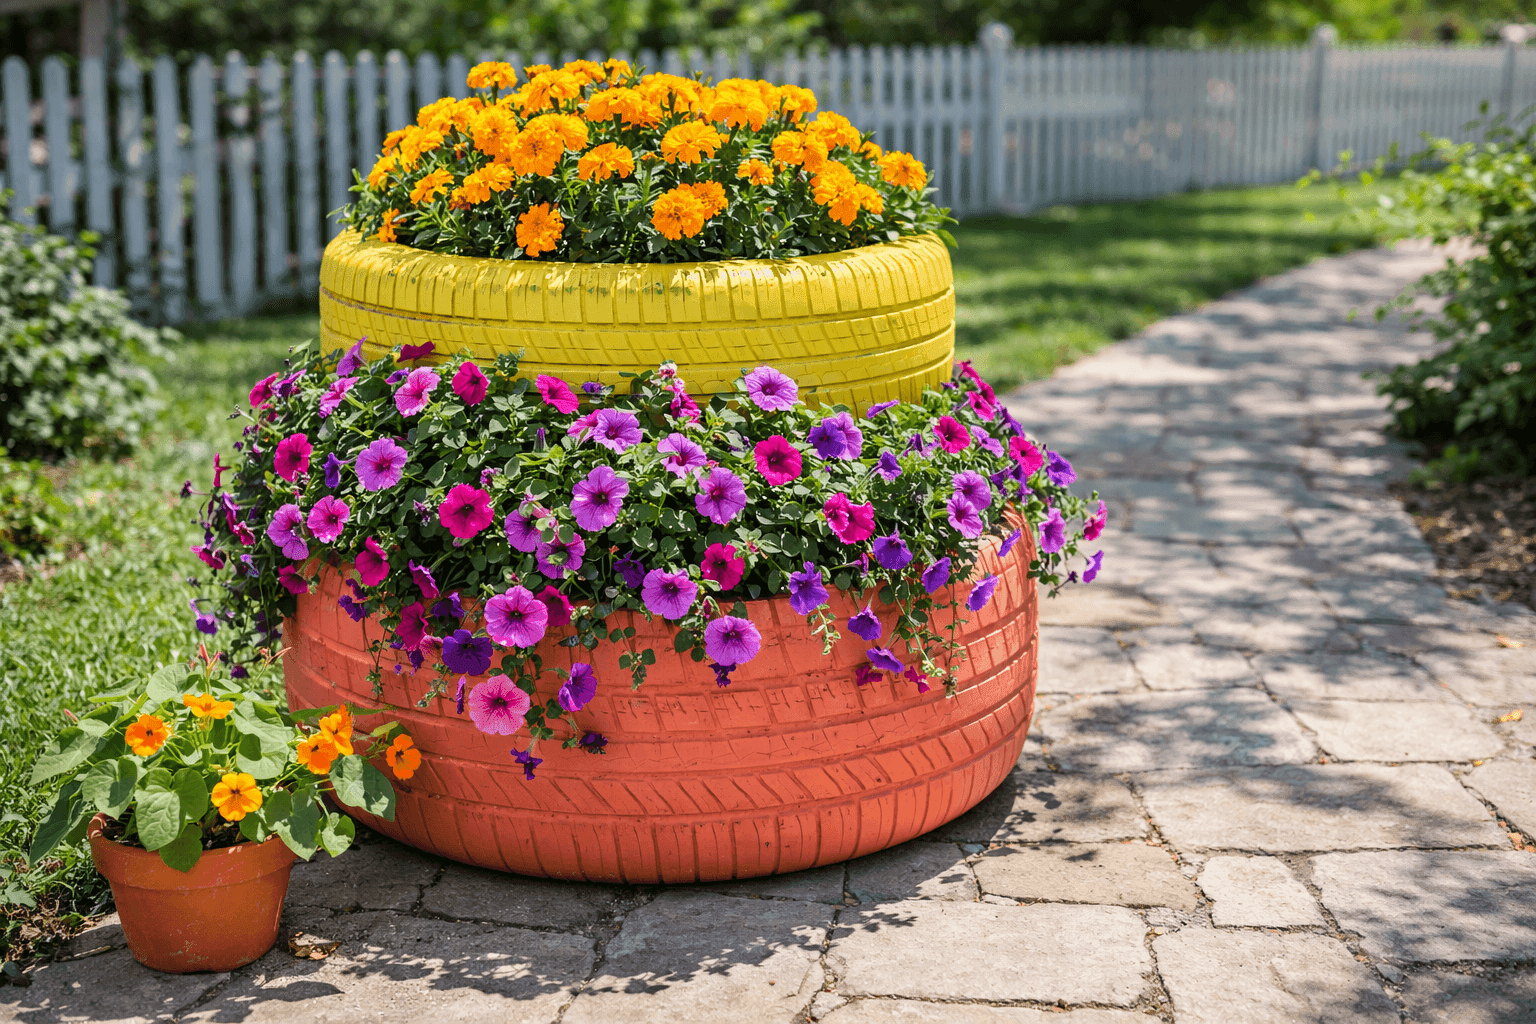
There is something deeply satisfying about turning an object destined for the landfill into the most cheerful thing in your yard — and old tires are one of the best raw materials for bold, budget garden planters that money essentially cannot buy. Two cans of bright exterior spray paint at about $10 total are all it takes to transform tires you already have, or tires a local garage will hand over for free just for asking, into stacked tiered planters that stop foot traffic and make your garden look like someone with genuine design instincts lives there. The rubber holds up through seasons of weather without cracking or fading the way terracotta and cheap plastic inevitably do, the dark interior absorbs heat and extends your growing season on both ends, and the sheer size of a tire planter lets you go big with trailing and mounding flowers in a way that small pots simply cannot match. Two hours from cleaning to planting, and your front yard earns compliments for years.
What You Need
- Old tires, qty 2 or more — passenger car tires work best for stacking; ask local garages or tire shops, who often give them away free to avoid disposal fees
- Exterior spray paint in your chosen colors — Rust-Oleum 2X Coverage or similar; two cans covers two tires with a full coat (~$5 per can)
- Dish soap and a stiff scrub brush — for cleaning road grime and tire release agent off the rubber surface before painting
- Drop cloth or cardboard sheets — to protect the ground surface while spraying
- Landscape fabric or a layer of newspaper — to line the tire base and prevent soil from washing out through the open center
- Potting mix — enough to fill your tire stack; a standard 40-quart bag fills one stacked two-tire planter (~$8–10)
- Annuals or perennials for planting — trailing varieties like petunias and sweet potato vine spill over the sides beautifully; compact mounding types like marigolds fill the top tier
- Nitrile gloves — tire rubber leaves persistent residue on hands during scrubbing and painting
How to Make Them
- Scrub each tire thoroughly with dish soap, hot water, and a stiff brush, cleaning the entire outer sidewall and the top tread surface. Tires are treated with a rubber release agent during manufacturing that actively prevents paint adhesion — skipping or rushing this cleaning step is what causes paint to peel before the season ends.
- Rinse the tires completely and allow them to dry in the sun for at least thirty minutes before painting. Spray paint applied to damp rubber will bubble and lift within days regardless of how well you cleaned the surface.
- Position your tires on a drop cloth in a well-ventilated outdoor area, laying them flat with the sidewall you want painted facing upward. Painting tires horizontally gives you far more control than trying to paint them standing upright, where paint runs are almost inevitable.
- Spray the first coat of exterior paint in smooth, even passes held about twelve inches from the surface — keep the can moving at all times and overlap each pass by about a third. Multiple thin coats bond to rubber dramatically better than one heavy coat, which stays tacky and never fully cures.
- Allow the first coat to dry for thirty minutes, then apply a second coat using the same technique. Two full coats give you rich, even color and a surface durable enough to handle seasons of weather, watering, and incidental contact without chipping.
- Position your bottom tire in its final garden location before stacking — a filled tire planter is extremely heavy and nearly impossible to move without disrupting the arrangement. Choose a spot with appropriate sun exposure for your chosen plants before committing.
- Line the bottom tire's inner opening with landscape fabric or several overlapping sheets of newspaper to retain soil, then stack the second tire directly on top and fill the entire column with potting mix, firming it gently as you go to eliminate air pockets.
- Plant your chosen flowers into the top tier, placing trailing varieties toward the outer edges where they'll spill over the painted sidewall, and mounding or upright varieties toward the center. Water thoroughly until moisture drains from the base, and your planter is immediately ready to make an impression.
Garden designers who work with upcycled materials always choose paint colors by pulling from the existing palette of the house exterior rather than picking shades they simply like in isolation — a coral planter that clashes with brick red siding reads as accidental rather than intentional, while a color pulled directly from a front door, shutter, or trim detail makes the whole garden feel like a deliberate design decision. Hold paint swatches against your house exterior in both morning and afternoon light before committing, since exterior colors shift significantly across the day and what reads as a perfect match in the store can look discordant against your actual facade. Two colors that appear in your existing exterior palette, used across a collection of three or four tire planters in graduating sizes, creates a coordinated garden display that looks far more expensive than the materials involved.