Paint Concrete Pavers in Bold Metallics for $25
Rose gold, copper, chrome — your garden path is about to catch light in ways nobody sees coming
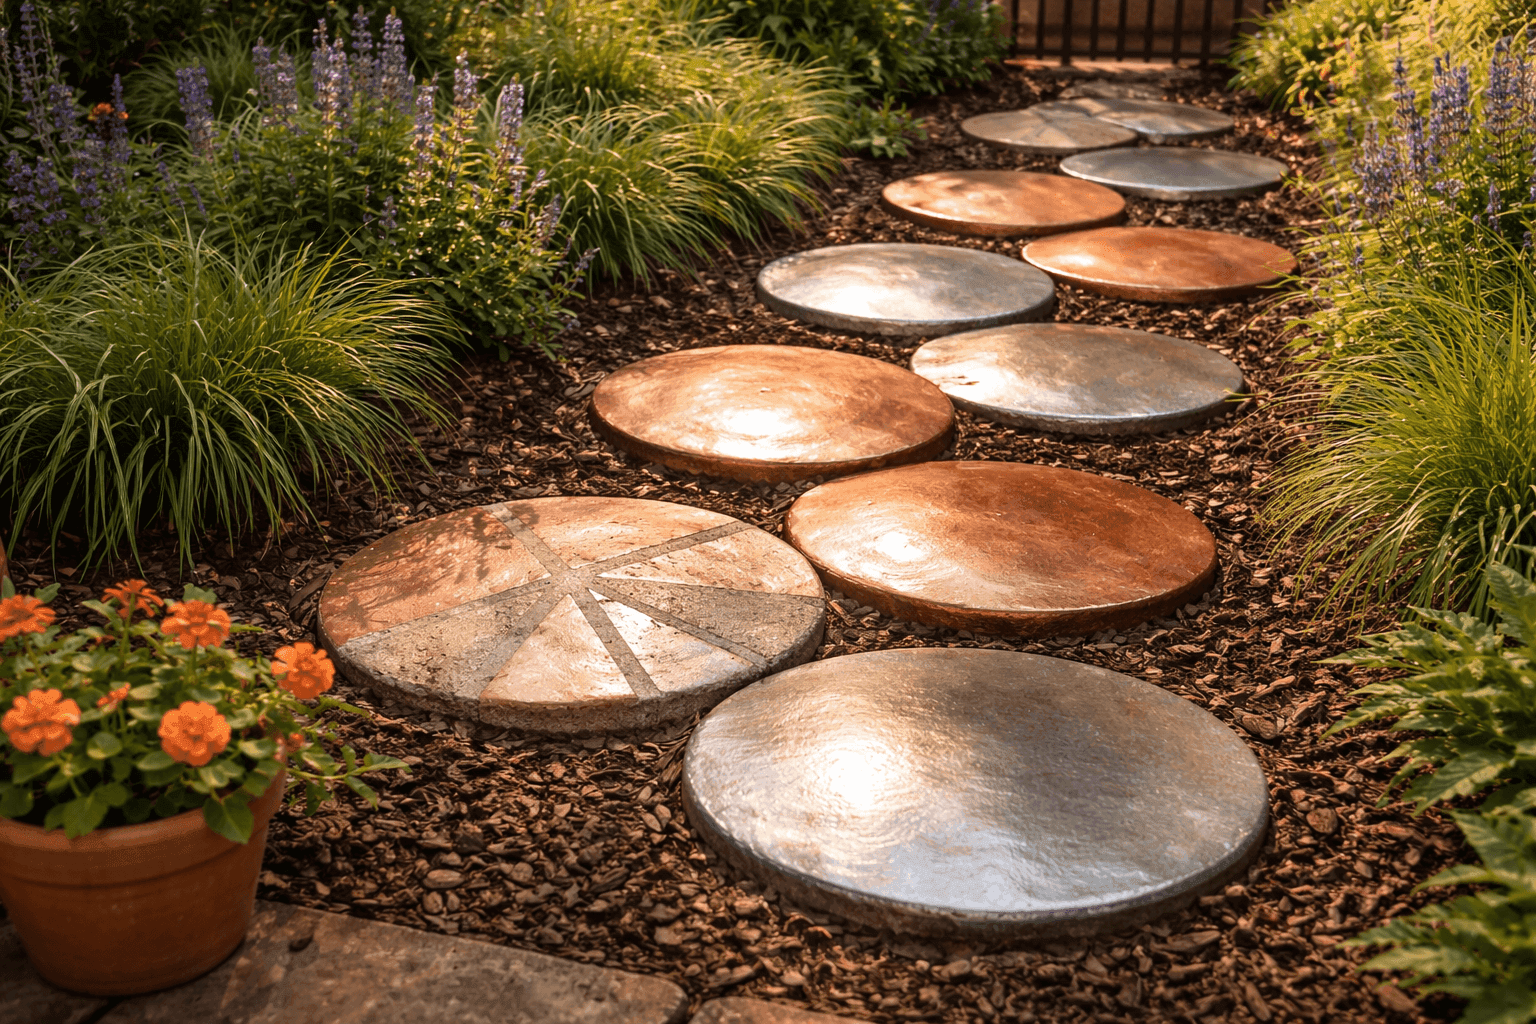
Garden paths are almost always an afterthought — functional, neutral, and completely forgettable by design. Metallic painted pavers are the deliberate rejection of that entire philosophy. Rose gold stepping stones catching afternoon light between ornamental grasses, copper hexagons gleaming against dark mulch, silver chrome pavers throwing light across a shady corner that has never done anything interesting before — this is garden design that makes people stop mid-conversation and look down at your feet. Plain concrete pavers from any home center cost a dollar or two each, metallic spray paint in the boldest finishes you can find runs about $8 a can, and the whole transformation takes an afternoon of painting and an overnight of curing before your garden path becomes the most unexpectedly glamorous thing in the neighborhood. This is not subtle. It was never meant to be subtle. It was meant to make people ask who did your garden.
What You Need
- Concrete pavers, square or hexagonal — 12×12" squares or 12" hex pavers from any home center give the most surface area for metallic impact; plain gray concrete takes metallic paint far better than textured or patterned surfaces (~$1–3 each)
- Metallic spray paint in 2–3 finishes — Rust-Oleum Metallic or Krylon Metallic in rose gold, copper, silver chrome, or gold; holographic chrome finishes are available at craft stores for maximum light-catching drama (~$7–9 per can)
- Concrete primer spray — one light coat before metallics dramatically improves adhesion on porous concrete surfaces and prevents the dull, absorbed look that happens when metallic paint soaks into unsealed concrete without a base (~$6–8)
- Painter's tape, 1" and ½" widths — for masking geometric patterns, stripes, or contrast sections where raw concrete shows through as a design element
- Exterior clear sealer, gloss finish — a gloss topcoat over cured metallic paint protects the finish through weather and foot traffic while amplifying the reflective quality of the metallic surface (~$8–10)
- Drop cloth or cardboard sheets — for protecting surrounding surfaces during spray painting
- Stiff bristle brush and water — for scrubbing pavers clean of any dirt, efflorescence, or surface debris before priming
- Fine-grit sanding sponge, 220-grit — for lightly scuffing between coats on particularly smooth paver surfaces
How to Make Them
- Clean every paver thoroughly with a stiff brush and water, scrubbing the full top surface and edges to remove dirt, algae, and any white efflorescence deposits. Efflorescence — the chalky white mineral residue that forms on concrete surfaces — actively prevents paint adhesion and must be scrubbed away completely before any primer touches the surface; metallic paint over efflorescence peels within weeks regardless of sealer applied afterward.
- Dry the cleaned pavers completely in the sun for at least four hours — concrete is highly porous and holds moisture deep in its structure long after the surface appears dry. Primer and paint applied over residual moisture in the concrete substrate bubble and lift as that moisture works its way out through the paint layers over the following days.
- Prime each paver with one even coat of concrete primer spray held twelve inches from the surface, covering the full top face and the visible edges in smooth overlapping passes. The primer seals the concrete pores so metallic paint sits on top of the surface and reflects light rather than absorbing into the concrete and producing a dull, flat finish that looks nothing like the metallic on the spray can lid.
- Plan your metallic arrangement across all pavers before opening a single paint can — lay the pavers out in their intended pathway sequence and decide which finish goes where, considering how the colors will read as a sequence from a standing height rather than how each individual paver looks in isolation. An alternating copper-rose gold-silver sequence reads as sophisticated; random color placement across a large pathway reads as accidental.
- Apply metallic spray paint in two to three thin, even coats over the primed surface, allowing full drying time between each coat — at least thirty minutes in warm dry weather. Metallic paints applied too thickly in a single coat lose their reflective quality as the metallic particles clump rather than lying flat and parallel to the surface where they catch and redirect light most effectively.
- Layer a second metallic for depth if desired — a base coat of copper with a light mist of rose gold applied at a steep angle from one side creates a dimensional finish that shifts color as light moves across it throughout the day. Apply the accent metallic sparingly from one direction only rather than covering the full surface, so the base color remains dominant and the layering reads as intentional shimmer rather than muddied color.
- Tape geometric patterns on any pavers designated for contrast designs — clean lines of 1-inch painter's tape create stripes, chevrons, or diamond sections where raw concrete or a contrasting metallic shows through. Press every tape edge firmly before painting and remove tape while the final coat is still slightly tacky rather than fully dry, which gives the cleanest possible edge without lifting the paint beneath.
- Seal all finished pavers with two coats of gloss exterior clear sealer once the metallic paint has cured for a full twenty-four hours — the sealer coat is what determines whether your metallic path looks this good in year two or only in the first season. Gloss sealer over metallic paint doesn't just protect the finish; it amplifies the reflective quality of the surface and makes the whole pathway catch light more dramatically than the unsealed paint alone.
Decorative concrete artists who work with metallic finishes professionally always orient their metallic paver installations so the pathway runs perpendicular to the primary afternoon sun angle rather than parallel to it — a pathway running east to west catches maximum direct light on its surface for the longest portion of the day, while a north-south pathway only catches raking light at the very beginning and end of the day when the sun is low. The difference in visual impact between a metallic surface in direct sun versus raking shadow is dramatic enough that professional installers will reposition a client's entire pathway plan by ninety degrees purely for light optimization. Walk your intended installation area at two in the afternoon before laying a single paver and note exactly where the light falls — that observation costs nothing and produces a metallic pathway that performs at its absolute spectacular best every single day.