Wipe Down Your Baseboards in 20 Minutes for Free
A microfiber cloth, a Magic Eraser, and twenty minutes — the detail that makes every room look more polished than anything you've cleaned this month
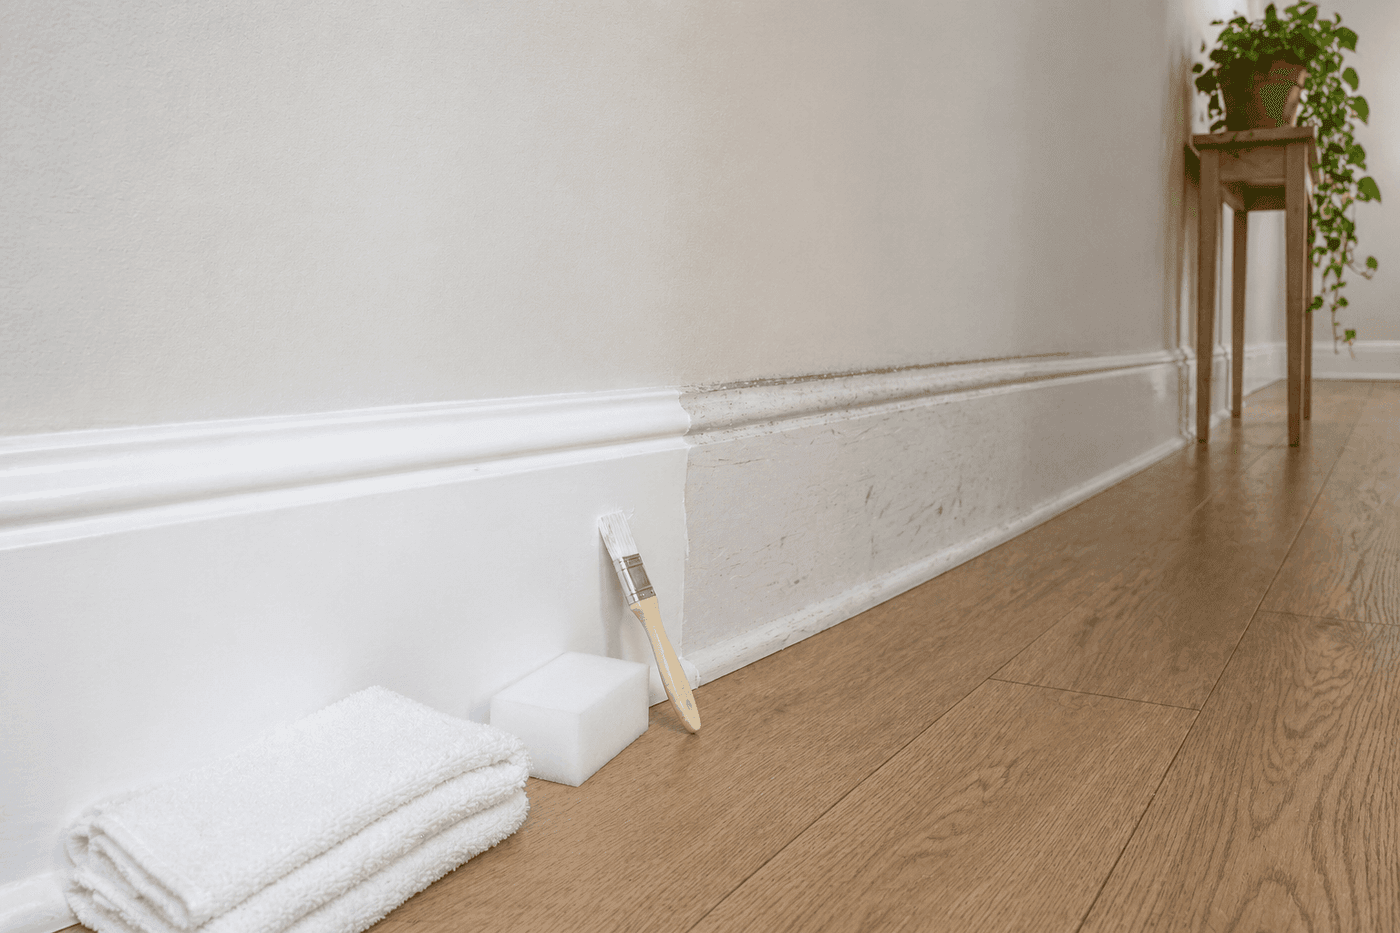
Baseboards are the one surface in a home that everyone sees and almost nobody consciously notices — until they're dirty, at which point they become the detail that makes an otherwise clean room feel vaguely neglected in a way that's hard to name but immediately felt. The accumulation happens gradually: dust settles along the top edge, shoe scuffs accumulate at the toe area, vacuum bumps leave gray marks at intervals, and the combination of all three produces a baseboard that reads as dingy even in a room where everything else is spotless. Twenty minutes of systematic wiping with a microfiber cloth and a Magic Eraser — working one room at a time, top edge before face, high-traffic areas first — resets all of it and produces the specific kind of whole-room polish that comes from attending to the detail that every visitor's eye travels across without registering, but that registers immediately when it's clean. This is the maintenance task that feels least urgent until it's done, at which point it feels completely obvious.
What You Need
- Microfiber cloth or duster — for the dry dust-removal pass that must precede any wet cleaning; wiping a dusty baseboard with a damp cloth turns loose dust into a muddy film that smears across the surface and requires significantly more effort to remove than the original dry dust
- Magic Eraser or melamine foam sponge — the most effective tool for removing the shoe scuffs, vacuum marks, and general grime that accumulate on painted baseboard surfaces; use it slightly damp rather than soaking wet, as excess water can soften paint and leave the melamine foam residue on the surface (~$4–6 for a pack that lasts through many cleaning sessions)
- Dish soap and warm water in a small bucket — for the damp wipe pass on moderately dirty sections; a drop of dish soap in warm water cuts through the grease and hand oils that accumulate on baseboards near doorways and in kitchens where hands and shoe tops make frequent contact
- Rubbing alcohol on a cloth — for stubborn marks that the Magic Eraser and dish soap don't fully lift; rubbing alcohol dissolves the adhesive residue from sticker labels, the crayon and marker marks of households with young children, and the sticky residue from cleaning product overspray that lands on baseboards during other cleaning tasks
- Small artist's brush and matching trim paint — for touching up the chips, scratches, and worn areas that cleaning reveals on painted baseboards; a 1-inch artist's brush loaded lightly with trim paint applied to a clean, dry chip fills it invisibly in a single application (~$2–3 for the brush; use leftover trim paint or a sample pot in the correct white if none is on hand)
- Knee pads or a folded towel — for comfortable working positioning during a room-by-room baseboard session; twenty minutes of crouching without knee padding is the reason most people don't maintain their baseboards as regularly as they intend to
How to Do It
- Start with a complete dry dust pass through every room before any wet cleaning begins — run a dry microfiber cloth or duster along the full length of every baseboard in the home, working the top ledge first where dust accumulates most densely and the face second. The dry pass first is not optional; wet cleaning applied to a dusty baseboard creates a gray muddy film at every stroke that requires multiple additional passes to fully remove and leaves the surface looking worse immediately after cleaning than it did before.
- Work room by room rather than attempting to clean all baseboards in the home simultaneously — completing one room fully before moving to the next gives you the immediate visual satisfaction of a finished space that motivates continuing through rooms that feel less urgent, and it prevents the half-cleaned state that results from getting distracted mid-task and never returning to the remaining rooms. High-traffic areas — entry, hallways, kitchen — show the most accumulated grime and benefit most from the cleaning, so start there rather than in the bedroom where the difference will be less dramatic.
- Wipe the full length of the baseboard face with a slightly damp cloth dipped in the dish soap solution, working in long horizontal strokes from one end of the wall to the other rather than scrubbing in circular motions that redistribute grime rather than removing it. Wring the cloth thoroughly before applying it to the baseboard — a dripping wet cloth leaves water marks that require a dry pass to remove and can raise the grain of wood baseboards or soften the top layer of latex paint if allowed to sit.
- Address scuffs and marks with the Magic Eraser after the soap pass — dampen the eraser slightly and apply it to each mark with light, even pressure rather than aggressive scrubbing. Magic Eraser works by micro-abrasion, and heavy pressure on painted surfaces removes the paint sheen along with the mark, leaving a dull patch that is more visible than the original scuff. Light pressure applied in two to three passes removes most marks without touching the paint surface beneath them.
- Apply rubbing alcohol on a cloth to any marks that remain after the Magic Eraser pass — crayon, permanent marker, adhesive residue, and grease-based marks that resist melamine foam abrasion typically dissolve readily under rubbing alcohol. Apply to a cloth rather than directly to the baseboard surface, and work in the same direction as the wood grain or paint texture rather than circular motions that can leave visible rubbing patterns on glossy trim paint.
- Dry each cleaned section with a clean dry cloth before moving to the next — leaving cleaned baseboards to air dry can leave water marks on high-gloss trim paint that are visible in raking light, and in the kitchen and bathroom where humidity is higher, moisture left on baseboards for extended periods promotes the mildew growth that makes baseboards in those rooms the most frequent repeat-cleaning offenders in any home.
- Inspect for chips, scratches, and worn spots once the cleaning is complete and the baseboards are fully dry — cleaning reveals damage that accumulated grime was concealing, and a baseboard that appeared merely dirty often shows more significant paint wear once the grime layer is removed. Touch up each chip with a small artist's brush loaded lightly with matching trim paint, feathering the edges of each application into the surrounding intact paint rather than applying it as a distinct patch that reads as a repair rather than a restoration.
- Maintain the result by adding a thirty-second baseboard wipe to the weekly cleaning rotation in high-traffic rooms — a dry microfiber pass along the top ledge and face of entry, hallway, and kitchen baseboards every week prevents the gradual accumulation that makes the full twenty-minute reset necessary, and it is the single habit that keeps baseboards looking clean without ever requiring the thorough all-rooms session more than once or twice a year.
Professional home stagers who prepare properties for sale always apply a thin coat of clear furniture wax to freshly cleaned and touched-up baseboards as a final step — the wax fills the micro-texture of the paint surface and creates a slight sheen that makes the baseboards read as freshly painted from any viewing distance, while simultaneously providing a slick surface that repels the dust and scuff accumulation that makes baseboards dirty in the first place. A single application of paste furniture wax buffed to a light sheen extends the interval between required baseboard cleaning from weeks to months, costs about $8 for a tin that treats every baseboard in a standard home many times over, and takes about as long to apply as the cleaning itself. Stagers who use this technique consistently find that properties maintain their show-ready baseboard condition through the full listing period without any additional attention.