Trash Can Deep Clean: Fresh in 30 Minutes Free
Baking soda, vinegar, dish soap, and a deck brush — and the trash cans that have been quietly ruining your driveway all summer are genuinely clean before lunch.
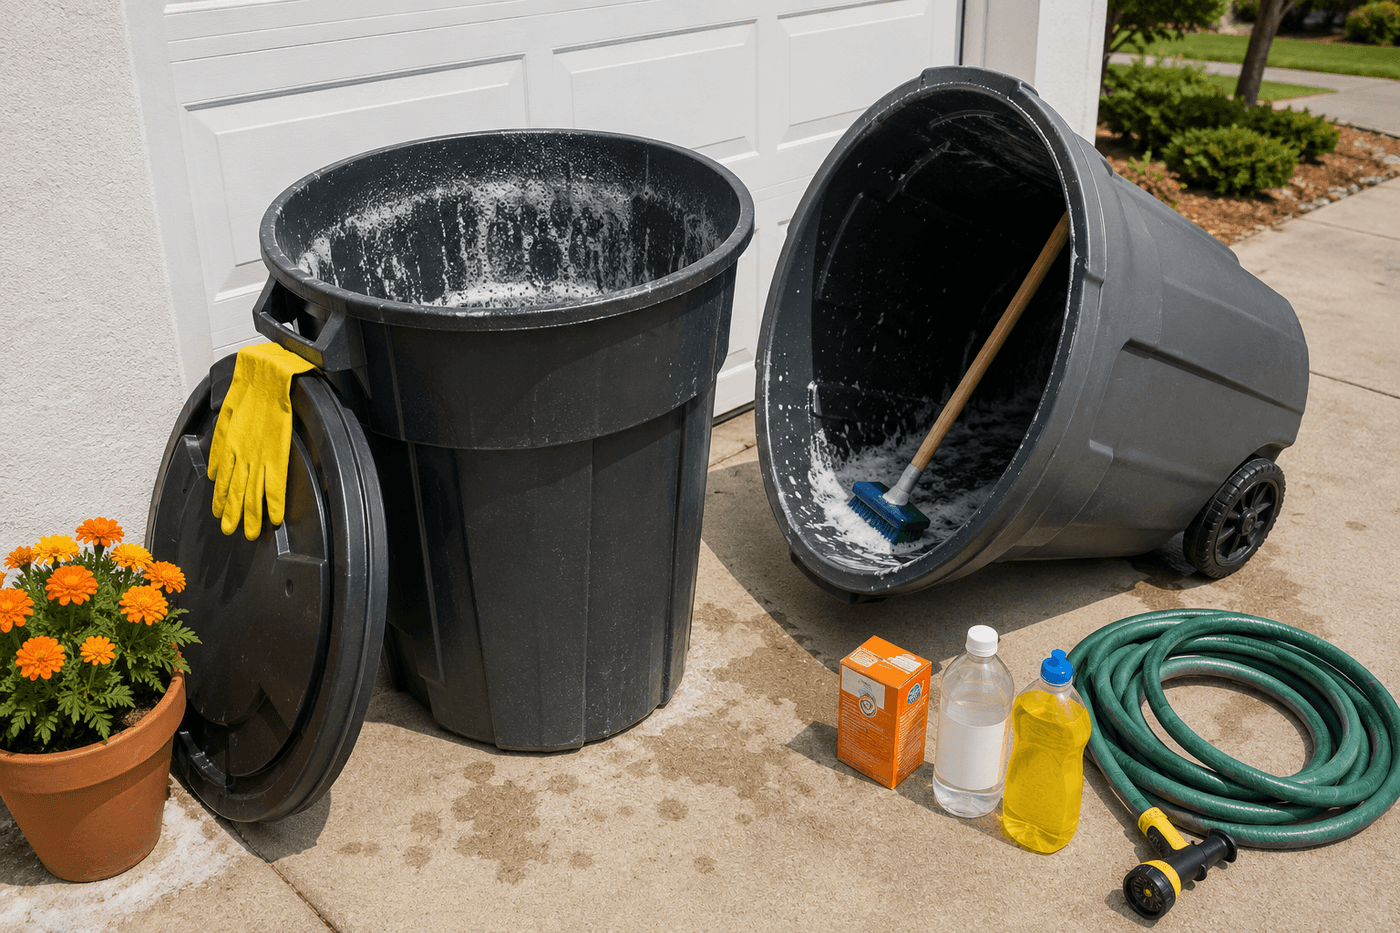
Outdoor trash cans are one of those household surfaces that get cleaned essentially never — which means that by the time the smell becomes noticeable enough that you cannot ignore it, the bacterial buildup inside has been accumulating through every hot day of the entire summer and the can has become genuinely unpleasant to be near. The fix is thirty minutes and supplies that are almost certainly already under your kitchen sink, and the result is the kind of dramatic improvement that is disproportionate to the effort in the most satisfying possible way. Baking soda and vinegar do the actual deodorizing work by neutralizing the bacterial compounds that produce trash odor at the source — not masking them with scent the way commercial sprays do, but actually eliminating them chemically so the smell does not return the moment the spray dissipates. Dish soap and a long-handled deck brush do the physical scrubbing, the garden hose does the rinsing, and a fresh layer of baking soda sprinkled in the bottom before the new liner goes in is the maintenance step that keeps the next cleaning session from being as necessary as this one. The monthly summer cadence is the practice that keeps trash cans at the level of occasional mild smell rather than the level of neighborhood problem — and once this becomes a habit, it takes less time and effort than the initial deep clean by a significant margin.
What You'll Need
- Baking soda — the odor-neutralizing agent that addresses bacterial smell compounds chemically rather than masking them; you will use it both during cleaning and as a preventive layer in the can bottom afterward; a standard box covers both cans with some left over
- White vinegar — poured generously over the baking soda to trigger the fizzing reaction that lifts residue from the can walls and bottom; also mildly antibacterial on its own; standard grocery store white vinegar works perfectly — cleaning vinegar with higher acidity is not necessary
- Dish soap — a generous splash added to the scrubbing water after the baking soda and vinegar treatment; the surfactant action cuts grease and organic residue that the baking soda and vinegar reaction loosens but does not fully remove
- Long-handled deck brush or scrub brush — the essential tool that allows you to scrub the full interior wall and bottom of a tall outdoor trash can without reaching inside the can; a standard scrub brush requires getting your arm into the can, which is the version of this task nobody wants to do
- Garden hose with spray nozzle — for the pre-rinse that loosens surface debris before the baking soda treatment, and the final full-blast rinse that clears all cleaning solution and loosened residue; maximum pressure on the nozzle setting produces the most effective rinse
- Disinfectant spray — Lysol, diluted bleach solution (1 tablespoon bleach per gallon of water), or white vinegar at full strength applied after the soap scrub and before the final rinse; this is the step that addresses bacterial contamination rather than just physical residue
- Rubber gloves — for the full cleaning session; trash can residue contains bacteria at concentrations that make bare-hand scrubbing a genuinely poor choice regardless of how quickly you plan to wash your hands afterward
- Old clothes or an apron — the vinegar-and-baking-soda fizz, dish soap, and hose rinse produce significant splatter; this is outdoor driveway work rather than indoor sink work, and dressing accordingly prevents the cleaning session from creating a second laundry problem
How to Do It
- Move both cans to the driveway or a paved outdoor area where the wash water can drain freely away from garden beds — the combination of baking soda, vinegar, dish soap, and disinfectant that will exit the cans during rinsing is not harmful to pavement but will damage lawn grass and garden plantings if the full rinse volume drains directly into planted areas. Doing this cleaning on collection day immediately after the cans come back from the curb is ideal timing — the cans are at their emptiest and you are already dealing with them.
- Pre-rinse the interior of each can with the garden hose on full pressure, directing the stream at the walls and bottom to dislodge loose debris and soften any dried residue before the baking soda treatment — this pre-rinse removes the material that would otherwise absorb the baking soda and vinegar treatment rather than allowing it to work on the actual residue and odor-causing bacteria on the can surfaces. Tip the can to drain completely before proceeding.
- Sprinkle a generous amount of baking soda across the bottom of the can and shake to distribute it up the lower walls — use enough to see a visible white coating across the bottom surface rather than a sparse dusting that makes contact with only a fraction of the residue. For particularly odorous cans, sprinkle baking soda on the lid interior and handle areas as well, which accumulate hand oils and splatter that contribute significantly to the overall smell.
- Pour white vinegar generously over the baking soda and allow the fizzing reaction to work for five full minutes without scrubbing — the fizzing is the mechanical and chemical action that lifts compacted residue and begins neutralizing odor compounds, and interrupting it by scrubbing before it completes reduces its effectiveness significantly. The fizzing will subside naturally as the reaction completes; this is the signal that the treatment has done its work and scrubbing will now be productive.
- Add a generous splash of dish soap and a cup of warm water to the can interior, then scrub all surfaces thoroughly with the long-handled deck brush — the walls from top to bottom, the bottom surface including corners, and the lid interior and handle. The dish soap surfactant is what actually removes the greasy, organic film that baking soda and vinegar loosen but cannot fully lift; scrubbing with soap after the baking soda treatment rather than instead of it takes advantage of both mechanisms in the correct sequence.
- Apply disinfectant spray to all scrubbed interior surfaces after the soap scrub — spray generously on the walls, bottom, and lid interior and allow it to dwell for the contact time specified on the product label before rinsing. A 1-tablespoon-per-gallon bleach solution applied with a sponge or poured in and swirled is an effective and inexpensive alternative to commercial disinfectant spray; the contact time for diluted bleach on non-porous plastic surfaces is typically 1–2 minutes before rinsing.
- Rinse the full interior with the garden hose on maximum pressure, directing the stream at the walls and bottom in a systematic top-to-bottom pattern and tipping the can progressively to allow rinse water to drain as you work — rinse until the water running out of the can is completely clear with no soap bubbles, which confirms all cleaning solution and loosened residue has been removed. Incomplete rinsing leaves a soap film that dries sticky, attracts new debris faster than a clean surface, and actually accelerates the next buildup cycle.
- Dry the cans in direct sunlight — tip them at a 45-degree angle against the garage wall or fence so the interior is exposed to sun and airflow simultaneously, which dries the interior completely within 30–45 minutes and allows UV light to do additional surface disinfection work that the cleaning steps alone cannot achieve. A can that goes back into service while still damp on the interior immediately begins developing the musty, mildew component of trash odor that compounds with the bacterial smell and is specifically the reason some trash cans smell worse after cleaning than before.
- Sprinkle a fresh layer of baking soda across the bottom of each fully dry can before replacing the liner — this preventive layer sits under the bag and absorbs any future leaks, condensation, or odor-producing moisture before it contacts the can surface and begins the bacterial growth cycle that produces the smell. This single step, repeated every time a new liner goes in, is what makes the monthly cleaning session genuinely shorter and easier than the initial deep clean by catching the problem at the prevention stage rather than the remediation stage.
Sanitation professionals and waste management consultants who advise on residential odor control consistently recommend one trash can maintenance product that most homeowners have never encountered but that commercial food service operations consider standard equipment: enzymatic odor eliminator concentrate rather than baking soda as the preventive bottom layer. Products like Nature's Miracle, BioKleen Bac-Out, or similar enzyme-based formulas contain live bacterial cultures that actively digest the organic compounds — food residue, grease, and protein breakdown products — that produce trash odor rather than simply absorbing or neutralizing the smell after it forms. Applied as a diluted spray to the clean can interior before the liner goes in, enzymatic cleaners establish a biological environment that out-competes odor-producing bacteria for the organic material that feeds them. Waste management professionals who specify these products for commercial dumpster maintenance report odor control intervals three to four times longer than baking soda-based prevention — which for a residential trash can translates to needing a deep clean every three to four months during summer rather than monthly, from a product application that takes thirty seconds and costs pennies per treatment from a concentrated bottle.