
Sew an Outdoor Floor Cushion Relaxation Corner for $55
Performance fabric, high-density foam, and three hours — the shady corner that becomes the most competed-for spot in your entire yard
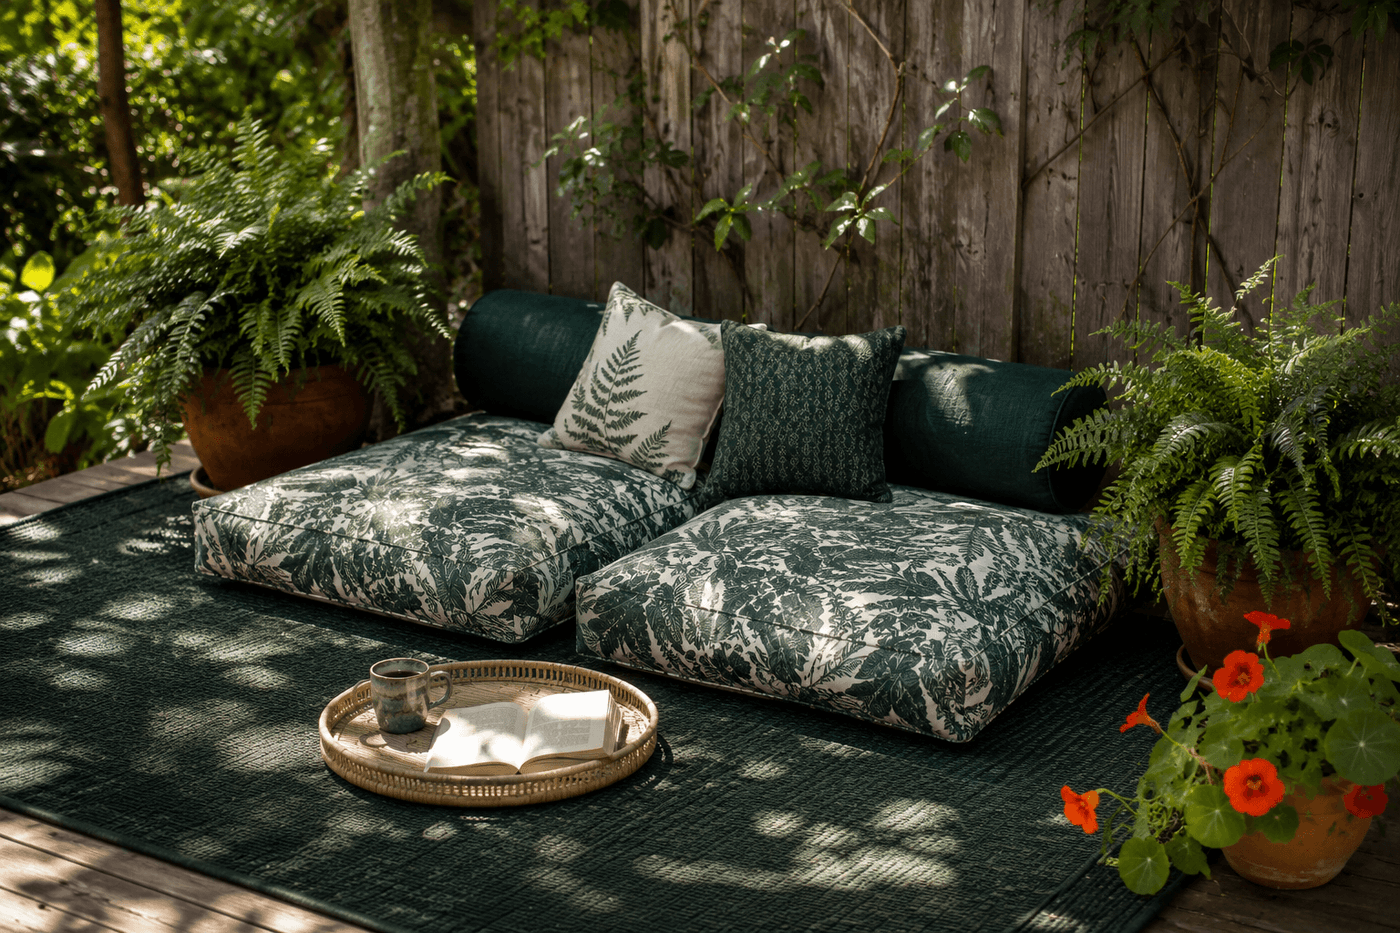
Every yard has a corner that isn't doing anything — too shady for a garden bed, too awkward for furniture, too overlooked to have ever received any real attention. Turning that corner into a floor cushion relaxation nook with sewn outdoor cushions is the project that transforms a space you walk past without registering into the place you protect fiercely in your morning schedule and find yourself thinking about during long workdays. Outdoor performance fabric handles rain, humidity, and UV exposure without fading or developing mildew; high-density foam wrapped in dacron batting produces a cushion with the supportive, plush feel of something from a boutique outdoor furniture shop; and the envelope-style cover construction means the whole thing slips off for washing in about thirty seconds. Three hours of sewing, $55 in materials, and a neglected corner becomes the most genuinely restorative spot on your entire property — the kind of place that changes your relationship with your own backyard in a way that no other single project quite manages.
What You Need
- Outdoor performance fabric, 2–3 yards — Sunbrella, Outdura, or any solution-dyed acrylic outdoor fabric rated for UV and moisture resistance; solution-dyed fabrics resist fading significantly longer than surface-printed fabrics because the color is woven into the fiber rather than applied on top (~$15–20 per yard at fabric stores or online, ~$30–40 total)
- High-density foam, 3–4" thickness — rated at 1.8 lb density or higher for floor cushion applications; lower-density foam compresses too quickly under seated body weight and loses its supportive quality within a single season of regular outdoor use (~$8–12 for a 24×24" sheet; most fabric stores cut foam to order)
- Dacron batting, 1–2 yards — for wrapping the foam before covering; a single layer of dacron adds a soft, rounded surface quality to the cushion that prevents the foam from feeling firm and institutional when sat on (~$4–6)
- Coordinating outdoor throw pillows, qty 2–3 — for layering against the bolster and adding color and texture variation; pre-made outdoor pillows in coordinating or complementary prints fill the space faster than sewing additional cushions from scratch (~$8–15 each, or use ones you already own)
- Weatherproof outdoor rug — for defining the relaxation zone and providing a clean, comfortable surface between the cushions and the ground; polypropylene outdoor rugs resist moisture and mildew and clean with a garden hose (~$20–30 for a 5×7, or use one you already have)
- Thread in coordinating color — outdoor thread rated for UV exposure lasts significantly longer than standard thread in direct sun applications; standard thread fades and weakens at seam lines within a season in full sun exposure (~$3–4)
- Zipper or hook-and-loop tape, 18–24" — for the envelope closure on each cushion cover; a zipper produces a cleaner closure line; hook-and-loop tape is faster to install and allows the cover to expand slightly if the foam is stuffed firmly (~$3–5)
How to Make & Set It Up
- Measure and cut your foam pieces before touching the fabric — two 24×24-inch squares for the floor cushions and one 24×10-inch rectangle for the bolster. Cut foam with a sharp serrated knife or electric carving knife using long, even strokes; scissors compress foam during cutting and produce uneven, beveled edges that don't sit square inside the cover. Accurate foam dimensions are the foundation of covers that look crisp and full rather than baggy or overstuffed.
- Wrap each foam piece in a single layer of dacron batting, pulling the batting taut over all faces and securing it on the back with a few hand stitches or a light application of spray adhesive. The dacron layer serves two functions: it softens the surface contact quality of the foam and it rounds the edges and corners of the foam block into the soft, slightly domed profile that makes a floor cushion look plush and inviting rather than like a foam block in a fabric case.
- Cut fabric for each cushion cover by adding one inch to each foam dimension for seam allowance — for a 24×24-inch cushion, cut two pieces of fabric at 25×25 inches. Cut on grain — parallel to the fabric selvage — so the finished cover doesn't stretch unevenly in one direction under body weight. For a print fabric, center the most visually interesting portion of the print on the cushion front face before cutting rather than cutting without regard to print placement.
- Install the zipper or hook-and-loop closure along one edge of each cushion cover before sewing the remaining sides — installing closure hardware on a flat piece of fabric is significantly easier than trying to install it in a nearly finished cover with limited access. For a zipper, baste the two fabric pieces together along the closure edge with right sides facing, press the seam open, center the zipper face-down over the pressed seam, and stitch along both sides of the zipper tape.
- Sew the remaining three sides of each cover with right sides together and a ½-inch seam allowance, backstitching firmly at both ends of each seam and at both ends of the closure to prevent the seam from pulling away from the closure under the stress of inserting and removing a firmly packed foam insert. Clip the seam allowance diagonally at all four corners before turning right-side out to produce crisp, square corners rather than the rounded, lumpy corners that result from unclipped seam bulk.
- Turn each cover right-side out through the closure, press all seam edges flat with an iron, and insert the dacron-wrapped foam insert through the opening. Work the foam into all four corners of the cover before closing the zipper — a foam insert that isn't fully seated in all four corners produces a cushion that looks lumpy and misshapen from any angle. The insert should fit with mild resistance rather than sliding in loosely, which is the fit that produces a plump, full cushion profile.
- Position the weatherproof rug in your chosen corner before arranging any cushions — the rug defines the boundary of the relaxation zone and needs to be placed and smoothed flat before anything sits on it. Orient the rug so its longest dimension runs along the back wall or fence of the corner, which creates the most usable sitting surface depth and gives the cushion arrangement a natural backing structure to lean against.
- Arrange the finished cushions on the rug with the bolster positioned against the back wall or fence as the lumbar support element, the two floor cushions in front of it for seated or reclining use, and the coordinating throw pillows layered against the bolster and on the floor cushions for texture and color variation. Finish the corner with a low bamboo tray or small side table at one edge for a coffee cup or book, and a small potted plant on each side of the arrangement to frame the space and signal that this corner is a destination rather than an afterthought.
Landscape designers who create dedicated outdoor relaxation zones for residential clients always add a layer of enclosure to the space — a bamboo screen panel, a trellis with climbing vines, or even a cluster of tall potted grasses positioned at the open sides of the corner — because the sense of being slightly enclosed rather than fully exposed is what transforms an outdoor seating area from a place to sit into a place to genuinely rest. The enclosure doesn't need to be complete or tall; even a partial visual boundary at one or two sides of the corner creates the psychological shift from "sitting outside" to "being in a space" that makes the difference between a relaxation corner you visit occasionally and one you return to every morning like a ritual. Three tall ornamental grasses in substantial pots positioned to define two sides of the corner costs about $30 and produces this enclosure effect more quickly and naturally than any built structure.














