Make Salt Dough Gift Ornaments in 2 Hours for $12
Slow, low oven drying is the one variable that separates ornaments that last for decades from ones that puff, crack, and crumble.

Every year somebody bakes salt dough ornaments at 350°F to rush them, and every year they come out puffed, blistered, and cracked down the middle. The difference between keepsakes that last for decades and ones that fail within a week comes down to drying temperature. Salt dough is just flour, salt, and water, so the goal is to evaporate moisture slowly rather than cook the dough. Steam trapped inside a hot oven expands and warps the surface, while a 200°F oven pulls water out gently and evenly. Follow that one rule and you'll finish about two dozen ornaments in 2 hours of mostly hands-off time for $12 total, with a clear sealer to protect them from humidity.
What You'll Need
- Dough Materials (~$7 total):
- 2 cups all-purpose flour (~$1)
- 1 cup fine table salt (~$1)
- 3/4 cup warm water (free)
- Acrylic craft paints in 4-5 holiday colors (~$4)
- Finishing Materials (~$5 total):
- Clear water-based acrylic sealer, matte or gloss (~$4)
- Natural jute twine or 1/8-inch satin ribbon, 3 yards (~$1)
- Tools (likely already owned):
- Rolling pin and large mixing bowl
- Cookie cutters, 2-3 inch holiday shapes
- Drinking straw for punching hanging holes
- Parchment-lined baking sheet
- Small paintbrushes, one fine-tipped and one flat
How to Do It
- Mix the flour and salt in a large bowl, then stir in the warm water gradually. The salt needs to dissolve fully, or you'll get gritty, brittle spots in the finished ornaments.
- Knead the dough for 5 minutes until smooth and slightly tacky, adding a teaspoon of flour if it sticks. Thorough kneading builds structure so the ornaments don't snap at the thin edges.
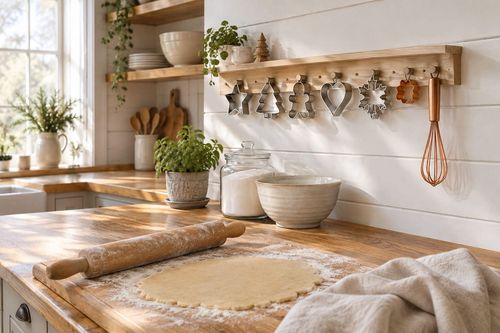
- Roll the dough out to a consistent 1/4-inch thickness on a floured surface. Uneven thickness dries at different rates and causes warping, so use two stacked rulers as guides if needed.
- Cut shapes with your cookie cutters and lift them onto the parchment-lined sheet with a spatula. Then punch a hanging hole about 1/2 inch from the top with a straw, since the hole can't be added after drying without cracking the piece.
- Bake at 200°F for 2 hours, flipping each ornament halfway through. The low heat evaporates moisture slowly so the dough hardens without puffing. Thicker pieces may need an extra 30 minutes.
- Cool the ornaments completely on a wire rack, then tap one: it should sound hard and dry all the way through. Any cool, soft spot means moisture remains, and it will mold later, so return it to the oven.
- Paint both sides with acrylics, letting the first coat dry before adding details with the fine brush. Painting the back also keeps humidity from creeping in unevenly and bowing the ornament.
- Seal every surface with two thin coats of clear acrylic sealer, drying fully between coats. Salt dough absorbs moisture from the air, so this protective layer is what lets your ornaments survive decades of storage. Thread twine through the holes and tie.
Pastry chefs working with sugar and dough rely on uniform thickness for even baking, and the same applies here. Set two 1/4-inch wooden dowels on either side of your dough and roll along them so the pin stays level. Every ornament then dries in the same time and stays flat.