Repair Wobbly Deck Railings with New Fasteners for $15
A socket set, stainless steel carriage bolts, and 90 minutes — the wobbly post you've been steering guests away from is rock solid before the next cookout
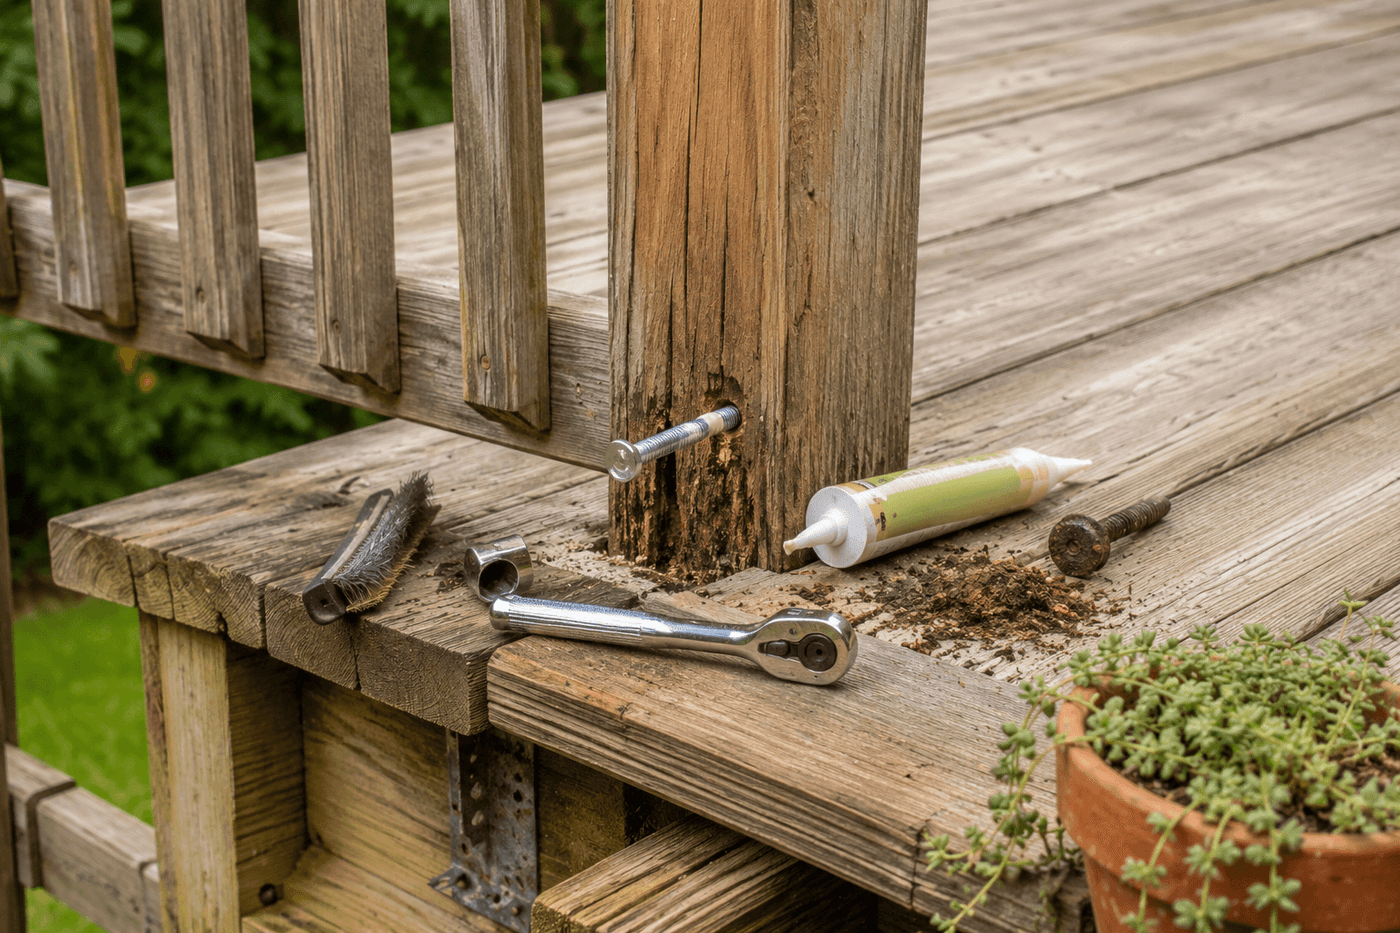
A wobbly deck railing post is not just an annoyance — it is a safety failure in progress, and every summer cookout where guests lean against it is a season closer to the moment it fails under load rather than under your hand while you're checking it. The fix is almost always the same regardless of which post is wobbling: corroded or stripped fasteners that have lost their mechanical grip on the deck frame over years of weather cycling, and the solution is removing the old hardware completely and replacing it with stainless steel carriage bolts that will never rust, corrode, or lose their grip through decades of outdoor exposure. A $15 investment in stainless hardware, a socket wrench, and ninety minutes of systematic work through every post on the railing run produces a railing that is genuinely solid in every direction — not just the post you noticed first, but every post, addressed while the tools and attention are already there. This is the deck maintenance task with the highest safety return per hour of any repair on this list.
What You Need
- Stainless steel carriage bolts, ½"×3½" or ½"×4" — sized to match your existing fastener diameter and post thickness; stainless steel grade 316 provides the best corrosion resistance for outdoor applications; buy two per post plus extras for any baluster tightening (~$1–2 per bolt, ~$10–15 total for a standard railing run)
- Stainless steel washers and nuts — sized to match your carriage bolts; a washer on the nut side distributes the clamping load across a larger wood surface area and prevents the nut from pulling through softened wood grain (~$0.50–1 per set)
- Socket wrench with appropriate socket size — for removing old bolts and tightening new ones; a socket wrench provides significantly more torque than a standard wrench for both removal of corroded fasteners and final tightening of new hardware
- Exterior wood adhesive — applied to the bolt shank before installation for additional holding power at the post-to-frame connection; construction adhesive rated for exterior use bonds wood fiber to metal and fills any slight void around the bolt hole that has developed through years of post movement (~$5–8 for a tube)
- Wire brush or drill with wire brush attachment — for cleaning rust debris and corrosion from old bolt holes before new hardware is installed; new fasteners driven into holes containing rust debris don't achieve full contact with clean wood fiber and produce weaker connections than fasteners driven into properly prepared holes
- Drill with appropriate bit — for drilling fresh holes if existing holes have stripped or enlarged beyond the fastener diameter; a hole that is even slightly larger than the bolt diameter produces a connection with lateral play that allows post movement to resume within the first season
- Pry bar or locking pliers — for extracting corroded bolts that won't turn with the socket wrench alone; a bolt that has corroded into the surrounding wood fiber requires lateral pressure to break the corrosion bond before rotational removal is possible
How to Fix It
- Test every post along the full railing run before removing any hardware — grip each post firmly at the top and push and pull in all directions, noting every post that shows any lateral movement at all rather than addressing only the most obviously wobbly post and leaving adjacent ones for next season. Posts that feel solid today but have corroded fasteners are one heavy lean away from showing the same wobble as the worst post, and addressing all of them in a single session while the tools are out is the maintenance habit that prevents the problem from recurring at a new post each summer.
- Examine the existing fasteners at each post before attempting removal — look for the orange rust staining around bolt heads that indicates significant corrosion, the pale gray oxidation of galvanized fasteners that have fully consumed their zinc coating, and any fastener heads that are already stripped or rounded from previous tightening attempts. Understanding the condition of each fastener before removing it tells you whether standard socket removal will work or whether a more aggressive extraction technique will be needed.
- Remove old fasteners using the socket wrench, applying steady counterclockwise torque rather than sudden force that can snap a corroded bolt at mid-shaft and leave the broken end embedded in the wood — a broken bolt stub is significantly more difficult to remove than an intact corroded bolt, and the ten seconds of patience required to feel the corrosion bond releasing before applying full removal torque prevents that outcome. If a bolt won't turn, spray penetrating oil on both the bolt head and the nut end and allow it to work for fifteen minutes before attempting removal again.
- Clean each bolt hole thoroughly with a wire brush after removing the old hardware — rotate the brush through the full depth of the hole several times and then blow or tap out the loosened rust debris before inspecting the hole diameter. A hole that the old bolt has wallowed out to a diameter larger than the new bolt requires either a larger-diameter replacement bolt or a wood epoxy filler packed into the hole and allowed to cure before the new bolt is driven, so the new fastener achieves full mechanical contact with solid material rather than centering loosely in an oversized hole.
- Apply a thin bead of exterior construction adhesive around the shank of each new stainless steel carriage bolt before driving it — run a continuous bead approximately one inch from the bolt head and allow it to distribute into the hole as the bolt is driven. The adhesive fills the microscopic gaps between the bolt shank and the surrounding wood fiber that allow micro-movement to begin, and that micro-movement is the mechanism by which a tight connection gradually loosens into a wobble over seasons of thermal expansion and contraction.
- Drive each new carriage bolt through the post and into the deck frame by tapping the bolt head with a hammer until the square shoulder below the head seats fully into the wood surface — the square shoulder is what prevents the carriage bolt from rotating when the nut is tightened, and a shoulder that hasn't fully seated allows the bolt to spin rather than tightening. Confirm the shoulder is fully seated before placing the washer and nut on the opposite end.
- Tighten the nut firmly with the socket wrench until the washer compresses slightly into the wood surface — firm enough that the post is completely rigid with no detectable movement in any direction, not so tight that the washer pulls through the wood grain or the bolt head crushes the post face. Over-tightening carriage bolts in older deck wood that has weathered and softened can split the post along the grain at the fastener location, which is a worse outcome than the original wobble and requires post replacement rather than fastener replacement to correct.
- Check all balusters along the railing run after completing the post fastener replacement — grip each baluster at its midpoint and push laterally; any that move require tightening at their top or bottom connection points. A post that was wobbling has transferred lateral stress to adjacent balusters through the top rail, and balusters that appear solid before a wobbly post is fixed sometimes reveal their own looseness once the post is no longer absorbing and masking the movement. Address every loose baluster while you're already working the railing so the completed repair is comprehensive rather than piecemeal.
Licensed deck inspectors who assess residential decks for structural safety always probe the wood around every railing post fastener location with a screwdriver or awl after the hardware is removed — pressing the tip firmly into the wood at the post base and the adjacent frame surface to check for the soft, spongy resistance that indicates wood rot has begun beneath the surface. A post with clean fastener holes and visually sound wood that accepts the awl tip with minimal resistance has internal rot that no fastener replacement will correct, and installing new hardware in rotted wood produces a connection that feels solid immediately and fails under load within one to two seasons. Spending thirty seconds probing each post location during the fastener replacement session is what identifies which posts need hardware replacement and which need the post itself replaced — and knowing the difference before the next cookout is genuinely the most important safety information available about any deck railing.