Repair Cracked Vinyl Siding with a Patch Kit for $15
A $15 patch kit and thirty minutes seals the crack that would spend all winter letting moisture into your wall — before it becomes a $500 sheathing repair
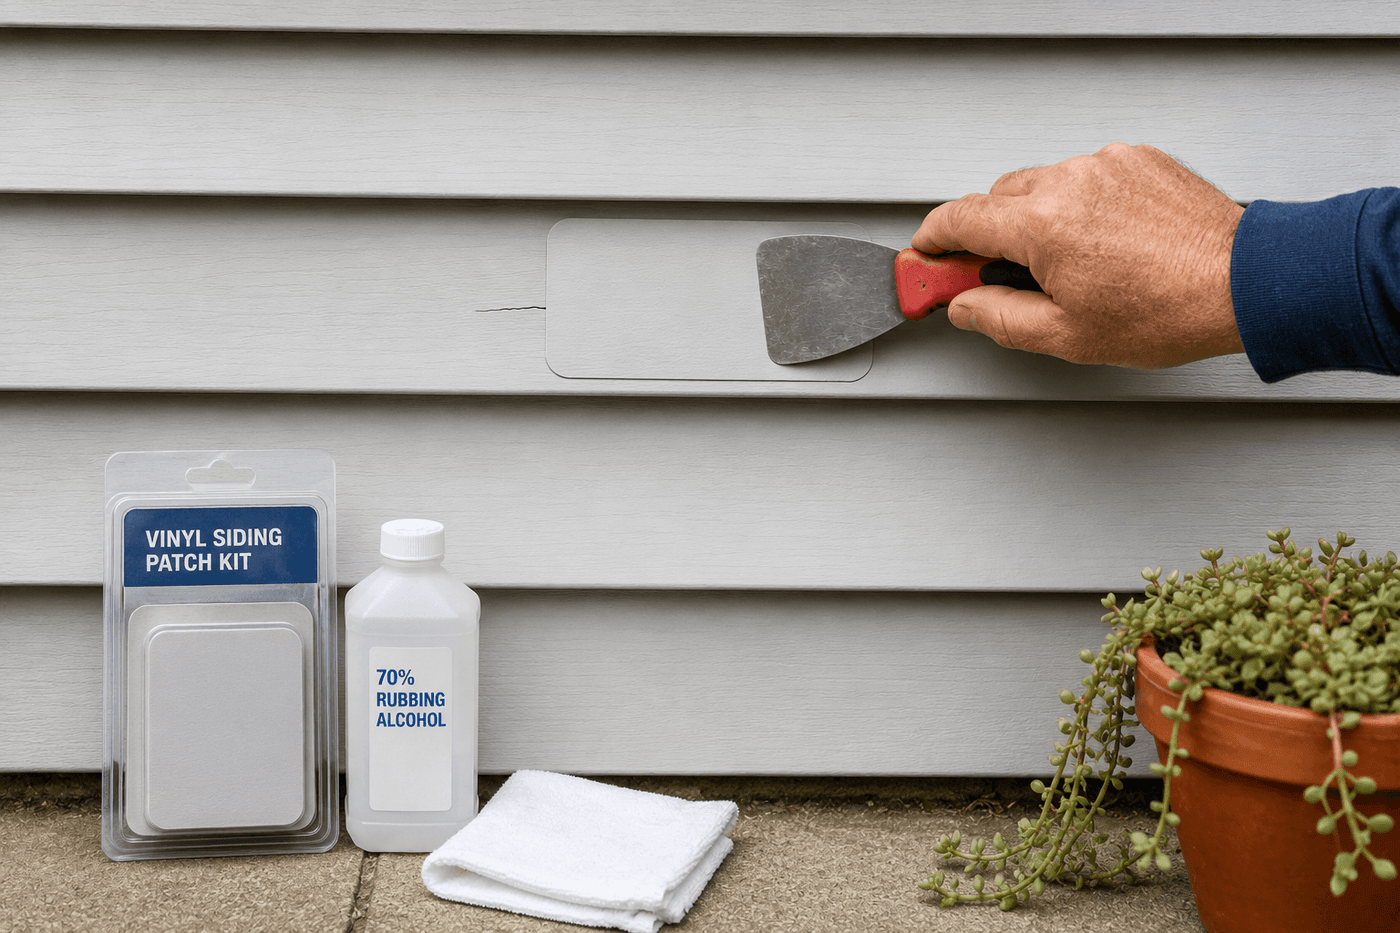
A crack in vinyl siding is not a cosmetic problem — it is an open invitation for water to travel behind the panel and into the wall assembly, where it saturates the house wrap, softens the sheathing, and begins the slow process of rot and mold development that transforms a fifteen-dollar repair into a repair that involves replacing structural components of your exterior wall. Vinyl siding patch kits address this with a self-adhesive vinyl patch that overlaps the crack on all sides, bonds to the siding surface, and creates a weatherproof seal that moisture cannot penetrate. The repair takes thirty minutes, requires no special tools beyond a putty knife and rubbing alcohol, and produces a result close enough in color to the surrounding siding that the repair is essentially invisible from a normal viewing distance. The only thing more satisfying than completing this repair is completing it before the first freeze rather than after, which is the timing that separates a thirty-minute maintenance task from a several-hundred-dollar remediation project.
What You Need
- Vinyl siding patch kit in matching color — available at hardware stores and home centers in a range of standard siding colors including white, beige, gray, and tan; the patch material is flexible vinyl with an aggressive self-adhesive backing designed to bond permanently to clean vinyl siding surfaces (~$12–15 for a kit that addresses multiple cracks)
- Rubbing alcohol and clean cloths — for cleaning the repair area thoroughly before patch application; the adhesive backing on vinyl patches requires a completely clean, dry, grease-free surface to achieve the permanent bond that keeps the patch flat and sealed through freeze-thaw cycling
- Scissors or craft knife — for cutting the patch to size; cut each patch at least one inch larger than the crack on all sides so the patch overlaps onto sound, undamaged siding rather than terminating at the crack edge where moisture could infiltrate the patch boundary
- Putty knife or credit card — for pressing out air bubbles and ensuring full adhesive contact between the patch and the siding surface after application; air pockets beneath a vinyl patch are the primary cause of patch edge lifting in the first season after application
- Heat gun or hair dryer — optional but highly recommended for application in temperatures below 60°F; vinyl patch adhesive activates most effectively at warm temperatures, and a thirty-second pass with a heat gun before pressing the patch down dramatically improves adhesion in cool weather conditions (~$12–15 for a basic heat gun if not already owned)
- Exterior silicone caulk in matching color — for filling the crack itself before applying the patch; on cracks wider than 1/16 inch, a thin bead of flexible silicone caulk pressed into the crack before the patch goes over it provides an additional moisture barrier at the crack depth that the surface patch alone cannot address (~$4–6 for a small tube)
How to Fix It
- Walk the full perimeter of your home before repairing any individual crack — this spring inspection pass identifies every crack, impact damage, and separation that needs addressing in a single session rather than discovering additional damage later. Pay particular attention to south-facing and west-facing walls where UV exposure and driving rain produce the most accelerated siding deterioration, and to areas around windows, doors, and utility penetrations where siding movement from thermal expansion concentrates stress at panel edges.
- Clean the repair area with rubbing alcohol on a clean cloth, wiping a generous area around the crack — at least three inches beyond the planned patch boundary in all directions. Vinyl siding accumulates a thin film of oxidation, airborne oils, and surface contamination that is invisible to the eye but completely prevents vinyl patch adhesive from bonding to the siding surface. A patch applied without this cleaning step may appear well-adhered for the first few weeks and then begin lifting at the edges as temperature cycling works the bond loose from the contamination layer beneath it.
- Assess the crack width before cutting the patch — a hairline crack requires only a surface patch to achieve a complete moisture seal, while a crack wider than 1/16 inch benefits from a thin bead of flexible exterior silicone caulk pressed into the crack depth before the patch is applied. Run the caulk bead along the full crack length, tool it smooth with a dampened finger, and allow it to skin over for fifteen minutes before applying the patch over the top.
- Cut the patch to size using scissors or a craft knife — the patch should extend at least one inch beyond the crack in every direction, and rounded corners on the patch rather than sharp 90-degree corners significantly reduce the likelihood of corner lifting over time. Sharp patch corners are the edge geometry most vulnerable to wind loading and thermal expansion stress; a simple ½-inch radius cut at each corner distributes the stress that would otherwise concentrate at the corner point and initiate peeling.
- Warm the repair area and the patch itself with a heat gun or hair dryer for thirty seconds before removing the adhesive backing — warm vinyl is more pliable and conforms better to any slight surface texture or contour of the existing siding, and warm adhesive develops its full tack immediately on contact rather than requiring pressure and time to activate as cold adhesive does. This warming step is the single preparation most consistently skipped in cool weather applications and the most consistently regretted when patches fail in the first winter.
- Peel the adhesive backing from the patch starting at one corner and position the patch over the crack, aligning it so the crack falls at the approximate center of the patch surface — a patch centered over the crack distributes the adhesive bond area equally on all sides of the repair point, while a patch positioned so the crack runs near one edge leaves insufficient adhesive overlap on that side to resist moisture infiltration at the narrow margin.
- Press the patch down firmly from the center outward using the putty knife or a credit card, working toward each edge in turn to push any air pockets out from beneath the patch rather than trapping them in the center. Apply firm, consistent pressure along the full patch surface for thirty seconds after the initial application — the adhesive bond that forms in the first thirty seconds of firm contact is significantly stronger than the bond that forms from light initial contact followed by normal handling pressure.
- Apply a final pass of heat gun warmth over the fully pressed patch for fifteen seconds and then apply firm hand pressure again while the adhesive is warm and fully activated — this final warm press is the step that seals the patch edges most completely and produces the flat, invisible repair that holds through the first freeze-thaw cycling season without any edge lifting. Run your fingernail around the full perimeter of the patch after it has cooled; any edge that produces a clicking sound rather than remaining flat against the siding surface needs additional pressing and warming before the repair is complete.
Exterior contractors who perform siding inspections and repairs always check the siding panels immediately above and below any crack for signs of moisture infiltration before closing the repair — pressing firmly on the wall surface around the crack and checking for any soft, spongy give in the siding that indicates the sheathing beneath has already absorbed moisture. A panel that feels solid resists firm pressure and the crack can be patched with confidence that the repair is addressing the full extent of the damage; a panel with any softness under firm pressure indicates moisture has already reached the sheathing, which requires the panel to be removed and the underlying damage assessed before the surface is patched. Patching over active moisture damage seals the problem in rather than sealing it out, which accelerates the sheathing deterioration that the repair was intended to prevent.