Refresh Paver Joints with Polymeric Sand for $40
Two bags of sand, a push broom, and three hours — the weed battle you've been losing every summer ends this weekend
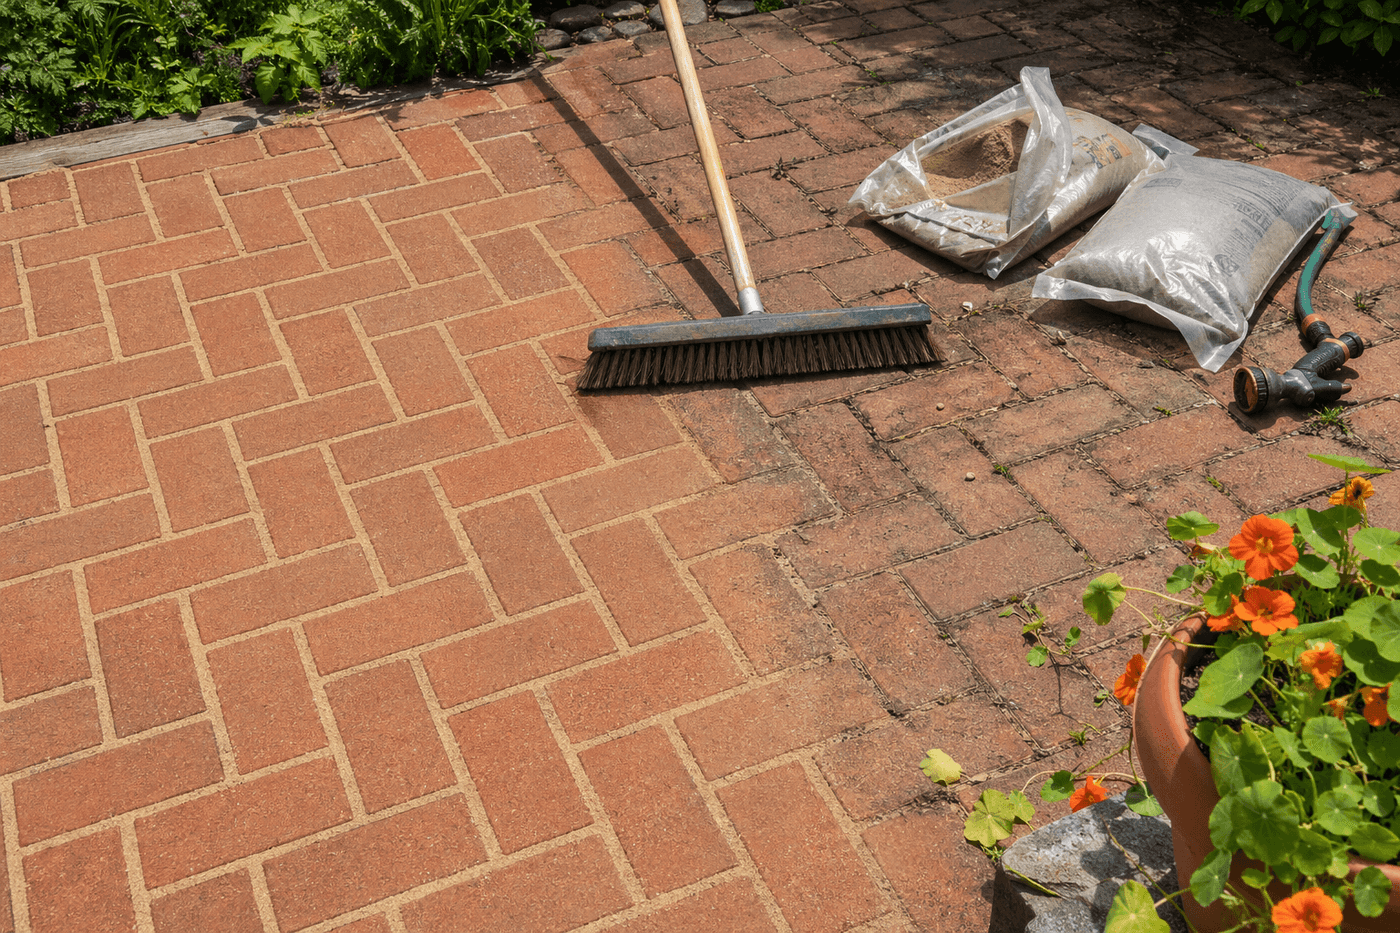
Pulling weeds from paver joints is one of those seasonal garden tasks that feels productive in the moment and completely futile within two weeks — the roots are never fully removed from the joint, the seeds blow back in from the surrounding area, and the deteriorated sand that has replaced the original joint material provides exactly the loose, hospitable growing medium that weed seeds need to establish. Polymeric sand solves the problem at the root cause rather than the symptom: it fills every joint completely and then activates with water to bind into a firm, cohesive mass that leaves weeds nowhere to establish roots and nowhere to push through from below. Two bags cover a standard patio, the application takes three hours, and the result lasts for multiple seasons without any retreatment — compared to the cumulative hours spent hand-weeding the same joints every two weeks, the three-hour investment pays for itself in reclaimed weekend time within the first season alone.
What You Need
- Polymeric sand, 40–50 lb bags, qty 2 — coverage varies by joint width and depth; standard ¼-inch joints on a 200 square foot patio typically require one to two bags. Choose a color that closely matches your existing joint sand — tan for natural stone and buff brick, gray for concrete pavers — as the activated sand color is permanent (~$18–22 per bag)
- Leaf blower or stiff-bristle hand tool — for clearing deteriorated sand, weed debris, and loose material from joints before filling; a leaf blower on low setting clears joints faster and more completely than manual tools for large patio areas (~$40–50 rental for a half-day, or use your own)
- Push broom with stiff synthetic bristles — for sweeping polymeric sand across the patio surface and working it into every joint; natural fiber brooms absorb moisture from the sand and can prematurely activate the binding agent before the sand is fully distributed
- Garden hose with a misting nozzle setting — for the activation watering that binds the polymeric sand into its firm final state; the misting setting wets the sand surface without washing it out of the joints, which a direct stream will do regardless of how gently it's applied
- Plate compactor or hand tamper — optional but recommended for joints deeper than ½ inch; compacting the sand before activation ensures it fills the full joint depth without voids that allow the surface layer to crack away from loose material below (~$40–60 rental for a half-day)
- Stiff-bristle hand brush or grout float — for working sand into tight corners, along the patio edge, and into any joint areas the push broom can't reach effectively
- Leaf blower for final cleanup — for removing excess sand from the paver surfaces before activation; polymeric sand left on paver faces during the misting step can cause a haze that bonds to the paver surface and is difficult to remove after curing
How to Do It
- Check the weather forecast before scheduling this project — polymeric sand requires a dry patio surface for application and a dry forecast for at least 24 hours after activation watering for the binding agent to cure properly. Sand applied to a damp patio prematurely activates before it can be fully distributed, and sand that is rained on before the 24-hour cure is complete washes out of the joints before the binding agent sets, requiring the entire application to be repeated.
- Clear the patio surface completely — remove all furniture, planters, and decorative items, then use a leaf blower on low setting to clear loose debris from the joint surfaces. Work systematically across the patio rather than randomly to ensure every joint section receives the clearing pass rather than discovering missed sections after the sand application has begun.
- Remove existing weed growth from every joint by pulling visible weeds and then using the leaf blower or a stiff brush to clear the deteriorated sand and root debris from each joint to a depth of at least one inch — the depth that polymeric sand needs to fill to create an effective weed barrier. A joint that still contains compacted old sand at depth will accept only a shallow layer of polymeric sand above it, which provides insufficient binding depth and fails within the first freeze-thaw cycle.
- Apply polymeric sand by pouring it in manageable sections across the patio surface — approximately 20 square feet at a time — rather than dumping the entire bag at once. Working in sections allows you to keep the sand from drifting into already-filled areas while the push broom works new sections, and prevents the sand from drying out on the paver surface during extended application on a warm or breezy day.
- Sweep the sand into the joints using the push broom in multiple directions — along the joint lines, across them diagonally, and back again — until every joint is visibly filled to just below the paver surface level. Polymeric sand should fill joints to within ⅛ inch of the paver top surface; joints filled to the very top leave no room for the slight expansion that occurs during activation and can push sand onto the paver faces during the misting step.
- Compact the filled joints by running a plate compactor over the patio surface or tamping firmly with a hand tamper if joints are deeper than ½ inch — compaction settles the sand granules into full contact with the joint sides and base, eliminating the voids that cause the surface sand layer to crack and separate from the mass below after the first freeze-thaw cycle. Add a second pass of sand after compaction to refill any joints that settled below the ⅛-inch target depth.
- Remove all excess sand from the paver surfaces using the leaf blower on low setting before any water contacts the patio — this is the most consequential step in the entire application and the one most commonly rushed. Polymeric sand residue left on paver faces during the misting step bonds to the surface as it activates, creating a sandy haze that is extremely difficult to remove after the binder has cured. Take an extra five minutes to confirm every paver face is completely clear before picking up the hose.
- Activate the sand by misting the entire patio surface with the garden hose on the gentlest possible setting, working in slow, overlapping passes until the surface is thoroughly wet but no pooling water is visible in the joints or on the paver faces. Allow the misted surface to absorb for two to three minutes, then apply a second gentle misting pass to ensure the full depth of sand in each joint has been wetted. Keep all foot traffic off the patio for a minimum of 24 hours and avoid rain exposure for the same period to allow the binding agent to cure to its full hardness.
Hardscape contractors who install and maintain paver patios professionally always apply a penetrating paver sealer over the entire patio surface within seven days of polymeric sand installation — the sealer locks the activated sand surface further and simultaneously protects the paver faces from the UV fading, oil staining, and efflorescence that gradually dulls the color and texture of even high-quality pavers over multiple seasons. A quality penetrating paver sealer applied every two to three years maintains the patio's original appearance and extends the interval between polymeric sand retreatment from the typical two to three year range to four to five years or beyond. The sealer application takes about the same three hours as the sand application and costs about the same $40, making it the natural same-weekend follow-up that doubles the lifespan of both treatments.