Rainbow Mailbox: Bold Stripes, Big Statement
Your mailbox sits at the edge of your property announcing your house to the entire street — it might as well say something worth hearing.
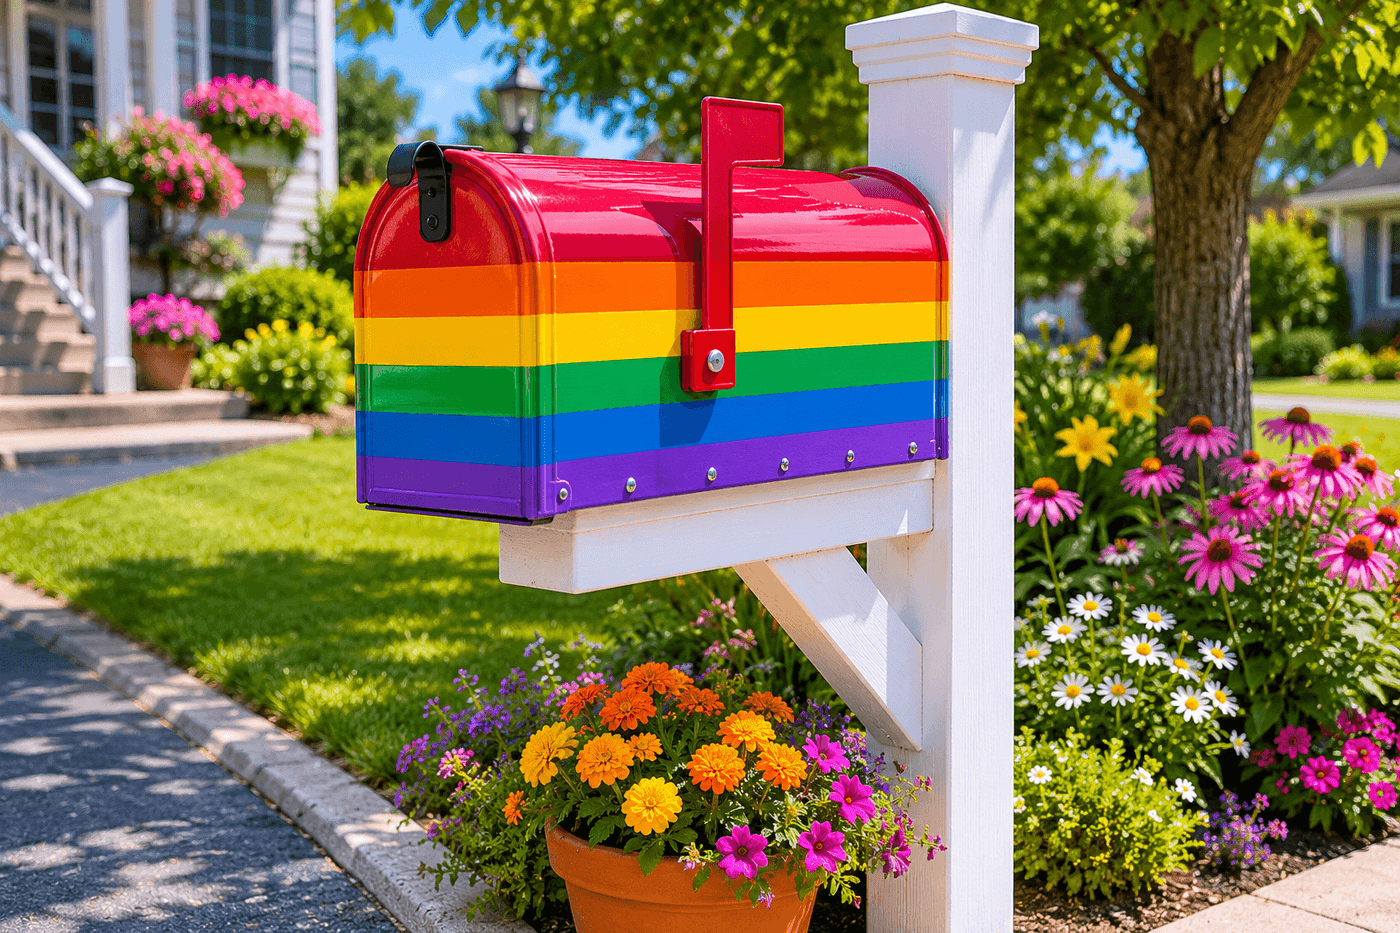
The standard black or beige mailbox is one of those default choices that nobody actually makes — it just arrives that way and stays that way for fifteen years because changing it requires deciding to, which requires believing your mailbox is worth caring about. It absolutely is. Your mailbox is the first thing anyone sees when they approach your house, it sits at street level where every passerby clocks it, and painting it in bold rainbow stripes takes about two hours and $20–25 in exterior paint — which is approximately the lowest possible cost-to-impact ratio of any home exterior update you will ever make. The stripe technique is forgiving, the painter's tape does all the precision work for you, and the finished result is the kind of thing that makes your mail carrier smile and makes your house instantly, unmistakably yours on a street full of houses that all look more or less the same. No artistic skill required. Unapologetic personality very much encouraged.
What You'll Need
- Exterior spray paint or outdoor acrylic craft paint in 6 colors — red, orange, yellow, green, blue, and violet for a true rainbow; Rust-Oleum 2X spray paint bonds to metal beautifully and covers in one coat (~$5–6 per can, or ~$3–4 per bottle of outdoor acrylic)
- Primer spray paint — essential for bare metal or glossy existing paint; skipping primer is the single most common reason mailbox paint peels within one season (~$5–6)
- Painter's tape, 1-inch width — for creating clean, precise stripe edges; FrogTape produces sharper lines than standard blue tape on curved surfaces (~$5–7)
- Fine-grit sandpaper, 220-grit — for scuffing the existing mailbox surface so primer and paint adhere properly
- Tack cloth or damp rag — for wiping sanding dust before priming
- Clear exterior sealer spray — for protecting the finished stripes against UV fading, rain, and temperature swings (~$6–8); without sealer a rainbow mailbox fades noticeably within one summer
- Ruler and pencil or chalk — for marking even stripe widths before taping
- Drop cloth or cardboard — for protecting the post and surrounding area during spray painting
- Screwdriver — for removing the mailbox from its post before painting, which produces dramatically cleaner results than painting in place
How to Do It
- Remove the mailbox from its post entirely before doing anything else — painting a mailbox in place means fighting gravity, awkward angles, and the post itself getting painted, and the extra two minutes of removal produces results so much cleaner that it is never worth skipping. Set the removed mailbox on a drop cloth at a comfortable working height.
- Sand the entire mailbox surface lightly with 220-grit sandpaper to scuff the existing finish and give primer something to grip — you are not trying to remove the existing paint, just dull the surface sheen enough that new paint bonds rather than sitting on top and eventually peeling. Wipe thoroughly with a tack cloth after sanding to remove all dust.
- Prime the entire mailbox with two light coats of primer spray, holding the can 10–12 inches from the surface and using smooth, overlapping passes rather than slow heavy coats that run and drip. Let the first coat dry fully before the second — primer that isn't dry between coats traps solvents underneath and causes the finish paint to bubble. Let the final primer coat cure at least 30 minutes before taping.
- Mark your stripe positions by measuring the paintable length of the mailbox body and dividing evenly into six equal sections — use a ruler and light pencil or chalk marks at the top and bottom edges of the mailbox to indicate where each stripe begins and ends. Equal stripe widths read as intentional and graphic; uneven stripes look accidental even when the colors are bold.
- Tape the stripe boundaries using painter's tape aligned precisely to your marked positions, pressing the tape edge firmly along the full length with your fingernail or a credit card to seal it against paint bleed. For curved mailbox surfaces, apply tape in short overlapping sections rather than one long pull, which prevents the tape from bridging the curve and allowing paint to seep underneath.
- Paint each stripe color in light, even coats — two thin coats per stripe produce better coverage and sharper edges than one heavy coat, which is prone to running at the tape line and bleeding underneath. Work from one end of the mailbox to the other in rainbow order so you always know which stripe comes next, and allow each color to dry to the touch before moving the tape to the adjacent stripe position.
- Remove tape while each stripe's paint is still slightly tacky rather than fully dry — pulling tape from fully cured paint risks lifting the color at the edge, while pulling from tacky paint releases cleanly and leaves the sharpest possible stripe boundary. Pull at a 45-degree angle back over itself rather than straight up, which is the technique that prevents the paint edge from tearing.
- Seal the completed mailbox with two coats of clear exterior sealer spray once all stripe colors are fully dry — at least two hours after the final paint coat, or ideally the following morning. UV-resistant exterior sealer is what stands between your bold rainbow and a faded, chalky version of it by August; this step is not optional if you want the stripes to still look vivid a year from now. Remount the mailbox once the sealer has cured fully.
Exterior painters and sign artists who work with bold color on outdoor metal surfaces use one stripe-sealing technique that prevents the most common failure point of any multi-color painted project — color bleed at the tape line: seal each tape edge with a thin coat of the base primer color before applying the stripe color. Once your tape is positioned, brush or spray a very thin coat of white or light gray primer along the tape edge and let it dry for five minutes before applying the stripe color on top. Any bleed that occurs at the tape line bleeds primer rather than the stripe color into the adjacent section — and primer in a white or neutral tone is invisible against the primed mailbox base. Sign painters call this "locking the edge," and it is the technique responsible for the razor-sharp color boundaries on professional painted signage that seem impossible to achieve with tape alone.