Polish Chrome Fixtures Throughout Your Home for Free
White vinegar, microfiber cloths, and a drop of baby oil — the fixtures you stopped seeing come back to a mirror shine in about an hour for nothing
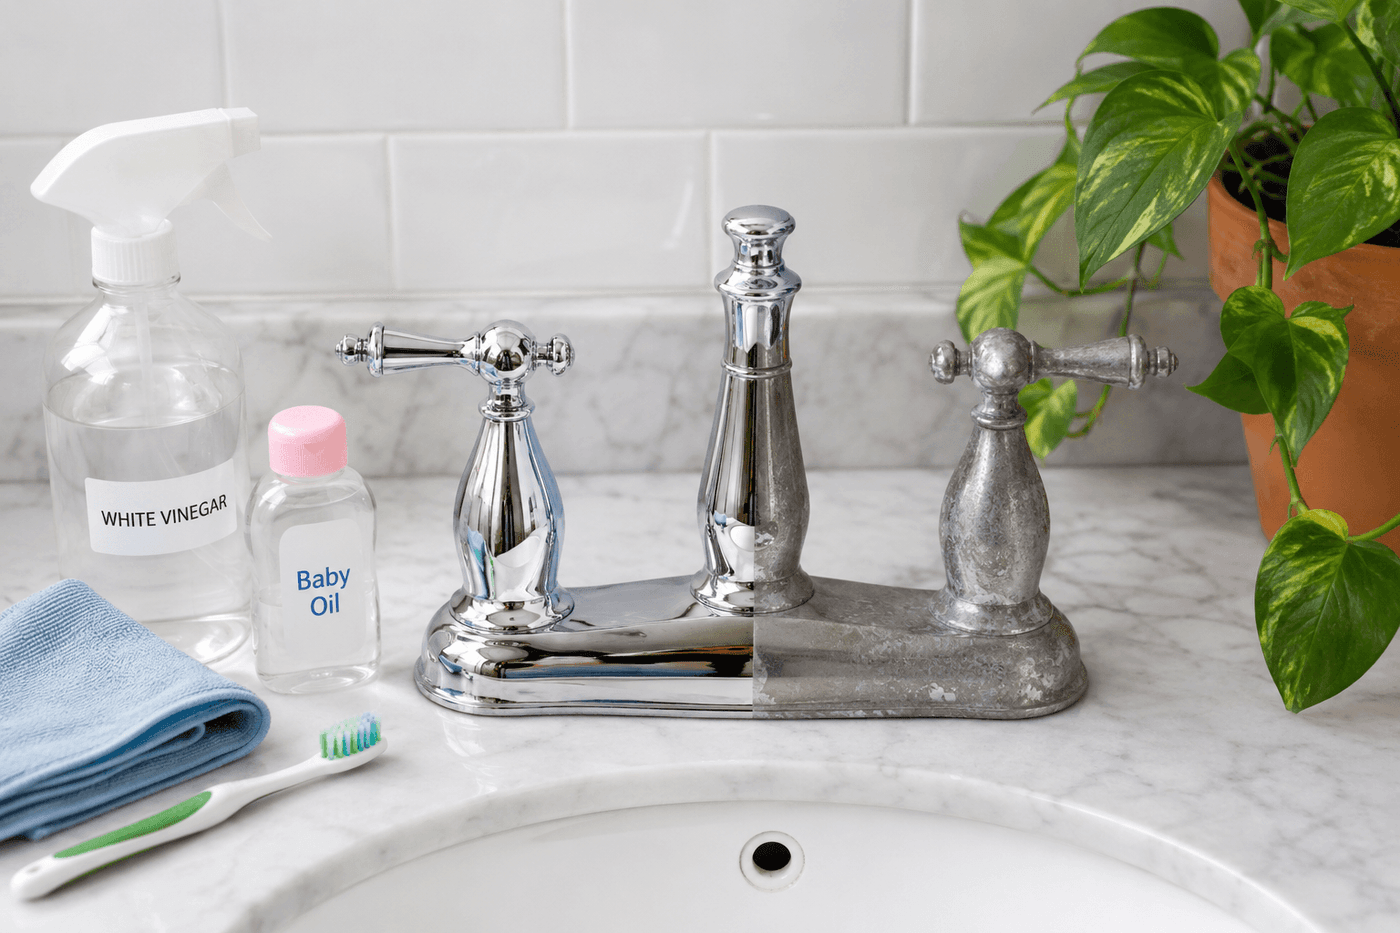
Chrome fixtures have a specific failure mode that makes them particularly insidious to neglect: the dullness accumulates so gradually — one water spot at a time, one layer of mineral film at a time — that the eye adjusts to the diminished appearance and stops registering it as a problem. The fixtures you interact with multiple times every single day become invisible in their current state, and it takes a fresh set of eyes, or a photograph, or an hour of actually polishing them to reveal how dramatically their appearance has deteriorated from what it was when they were new. White vinegar dissolves mineral deposits and water spots in two to three minutes of contact without touching the chrome plating beneath; microfiber cloth buffs the revealed chrome to a mirror finish; and a single drop of baby oil applied last repels water from the freshly cleaned surface for weeks. The cost is zero if you already keep vinegar in the kitchen and microfiber cloths in the cleaning cabinet — and the effect on how the entire home feels is disproportionate to the one hour of attention it required.
What You Need
- White distilled vinegar in a spray bottle — the acetic acid dissolves the calcium and magnesium mineral deposits that form water spots and dull film on chrome surfaces; do not substitute apple cider vinegar, which leaves a faint residue and slightly yellow tint on polished chrome surfaces (~$3 for a large bottle if not already on hand)
- Microfiber cloths, qty 3–4 — one for applying and spreading the vinegar during the dissolution phase, one dry cloth for the initial buff, and a fresh dry cloth for the streak-elimination final pass; microfiber's ultra-fine fiber structure polishes chrome to a mirror finish without leaving lint or scratching the plating the way paper towels and standard cloths do (~$6–10 for a pack if not already owned)
- Baby oil or mineral oil — the invisible water-repelling barrier applied after polishing; a single drop per fixture, buffed completely into the chrome surface until no oiliness is detectable, leaves a hydrophobic layer that causes water to bead and run off rather than forming the flat pools that evaporate into water spots (~$3–4 for a bottle that provides enough oil for years of monthly fixture maintenance)
- Old toothbrush — for working vinegar into the crevices around faucet bases, handle connections, and drain covers where mineral deposits accumulate most densely and where no cloth can reach effectively; the toothbrush bristles access the texture and geometry of faucet detail work that a cloth applied to the exterior surfaces misses entirely
- Cotton swabs — for the tightest crevices around aerator threads, handle set screws, and any decorative texture detail where the toothbrush can't fit and where deposits visually interrupt the polished chrome finish
How to Do It
- Work through every chrome fixture in the home in a systematic room-by-room sequence rather than jumping between fixtures — completing each fixture fully before moving to the next allows the vinegar application time to work while you're buffing the previous fixture, and the systematic approach ensures nothing is overlooked in the single session that addresses the whole house at once. Start with the kitchen faucet where mineral buildup tends to be heaviest from cooking water and vegetable rinsing, then move through each bathroom fixture in sequence.
- Spray white vinegar generously across all chrome surfaces of each fixture — the faucet body, both handles, the spout, the drain cover, and any decorative escutcheon plates — holding the spray bottle four to six inches from the surface to deliver a fine, even mist rather than a heavy stream that runs immediately off vertical surfaces before the acid has time to work. On vertical faucet bodies and handles, spray a cloth with vinegar and press it against the surface for two to three minutes rather than trying to keep spray applied to a vertical surface.
- Work the toothbrush around all crevices and detail areas while the vinegar is still wet on the fixture surfaces — the base where the faucet meets the sink deck, the crease between handle and body, the threads around aerators, and any decorative ribbing or texture on the faucet body. These areas accumulate the densest mineral deposits because standing water collects there after every use and evaporates in place, and a toothbrush working wet vinegar into those crevices removes buildup that no amount of cloth buffing on the exterior surface addresses.
- Allow the vinegar to sit on the fixture surface for a full two to three minutes after application and crevice work — this contact time is what differentiates a vinegar cleaning that actually dissolves mineral deposits from one that merely wets the surface and wipes off the same buildup that a damp cloth would remove. Fixtures with heavy accumulated buildup from months or years of water spots may benefit from a second vinegar application and soak period after the first has been wiped away.
- Buff the fixture surface with a dry microfiber cloth using firm circular motions, working section by section around the full fixture rather than wiping once across the surface and moving on. The buffing phase is where the dissolved mineral film is physically removed from the chrome surface and where the polishing action of the microfiber produces the mirror finish — light, casual wiping removes the dissolved deposits but doesn't produce the surface polish that makes chrome genuinely reflective rather than merely cleaner.
- Inspect the buffed surface in raking light — holding a flashlight or phone torch at a low angle across the fixture face — to identify any remaining water spot halos, cloudy patches, or areas where the chrome still appears dull rather than reflective. Raking light reveals surface imperfections that are invisible in direct overhead lighting, and addressing them with a second targeted vinegar application while you still have the supplies at hand prevents discovering them later when the setup has been put away.
- Eliminate any streaks with a fresh, completely dry microfiber cloth buffed over the full fixture surface in final pass — the streak-elimination cloth should be completely unwetted, unsprayed, and freshly unfolded so it carries zero moisture content that would redeposit on the polished surface. Streaks on chrome are caused by moisture drying on the surface rather than being fully removed during the buff phase, and a bone-dry final cloth applied with light pressure resolves them completely.
- Apply the baby oil barrier as the final step on each fully polished, completely dry fixture — place a single small drop of baby oil on a clean microfiber cloth and buff it into the chrome surface using the same circular motion as the polish pass, working it into the surface until no visible oiliness or sheen remains and the cloth comes away clean. The oil barrier is invisible on the finished surface but dramatically extends the interval between required polishings by preventing the flat water pooling that produces new mineral deposits within days of cleaning on untreated chrome.
Professional home stagers who prepare bathrooms for listing photography always remove and soak faucet aerators separately during their fixture polishing sessions — the aerator is the threaded screen insert at the end of the faucet spout, and it accumulates internal mineral deposits that restrict water flow and cause the sputtering, uneven stream that makes a faucet feel and perform like an old fixture regardless of how polished its exterior appears. Unscrew the aerator counterclockwise, drop it in a small bowl of undiluted white vinegar for thirty minutes, then scrub with the toothbrush and rinse before reinstalling. A faucet with a clean aerator that delivers a smooth, full stream feels new in a way that polished chrome alone cannot achieve — and the combination of mirror-polished exterior and smooth water flow is what makes a bathroom feel genuinely renovated rather than merely cleaned.