Paint a Graffiti-Style Garage Door Panel for $28
One panel, a dark base coat, and a few cans of vivid spray paint — the street art statement that announces creative people live here
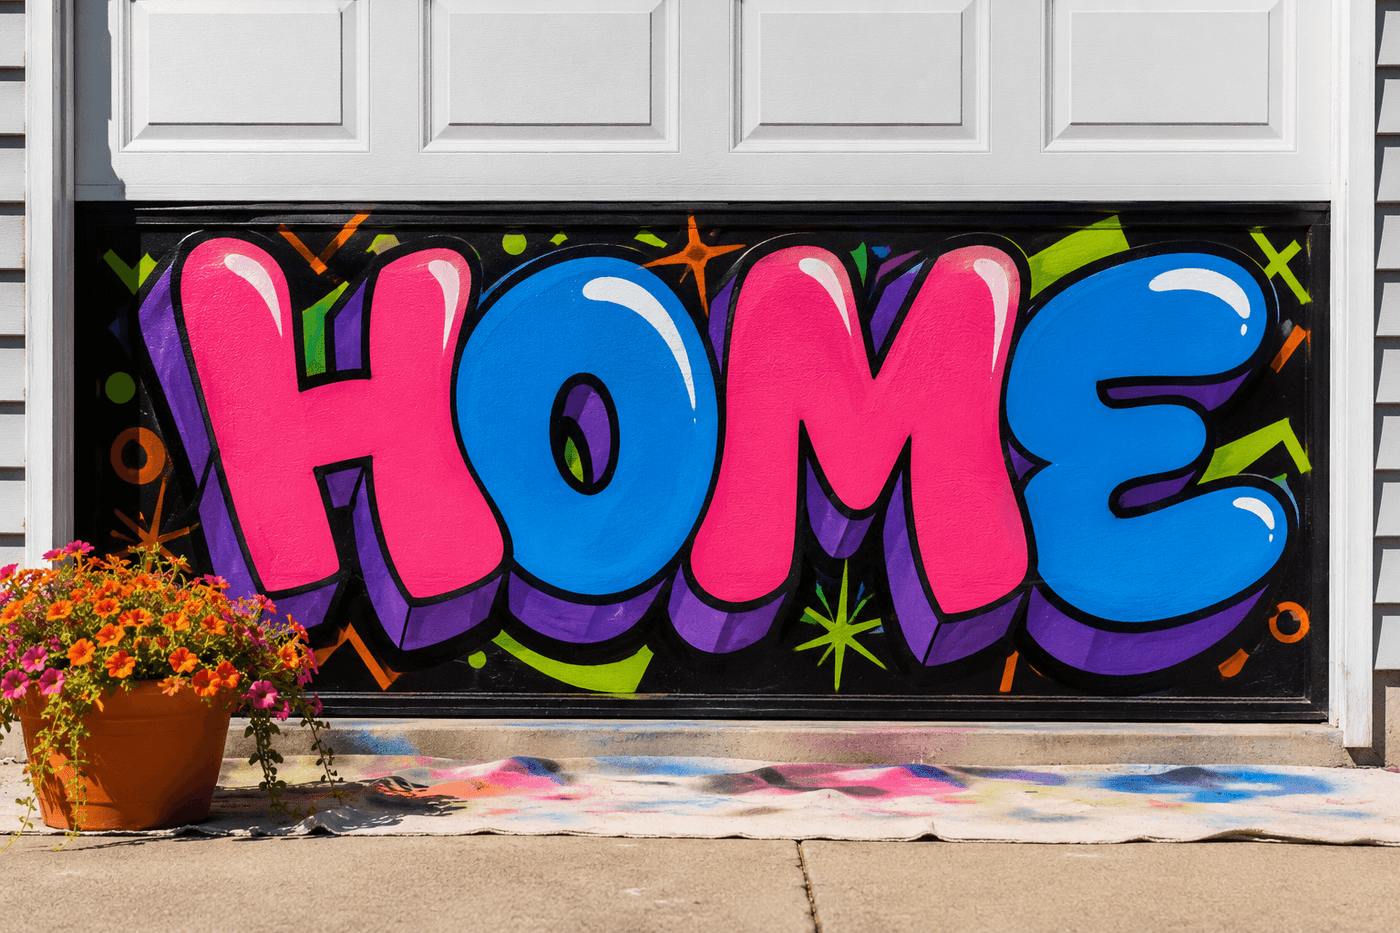
Most garage doors are neutral, forgettable surfaces that contribute nothing to a home's personality except the absence of it — and one painted panel changes that calculus entirely. The graffiti-style approach works on a garage panel in a specific way that it works nowhere else: the scale is right, the surface is flat and primed for paint adhesion, and the contrast between urban street art aesthetics and residential architecture is exactly the kind of unexpected visual collision that makes a house genuinely memorable from the street. Oversized bubble letters in neon pink and electric blue with black outlines and white highlights — your house number, your name, a single bold word — on a dark charcoal base transforms a 2×7-foot garage door panel from a flat beige surface into the most talked-about feature on your block. This project is not for everyone. It is precisely for the people who know immediately that it is for them, and who are done living in a house that looks like every other house on the street.
What You Need
- Exterior spray paint in 4–5 vivid colors — Rust-Oleum 2X Coverage in neon pink, electric blue, lime green, and hot orange for the letter fills; the 2X formula provides full opacity in fewer coats on previously painted garage door surfaces (~$5–7 per can, ~$20–28 total for a full color palette)
- Black exterior spray paint, 2 cans — for the dark base coat on the chosen panel and for the outlines that define the letter forms and give the finished design its graphic crispness; black is the color that does the most work in graffiti-style lettering and requires more coverage than the accent colors
- White exterior spray paint, 1 can — specifically for highlights; a single white highlight stroke on each letter creates the dimensional, three-dimensional quality that distinguishes graffiti lettering from flat painted text and makes the letters appear to pop forward from the surface
- Painter's tape, 2" width — for masking the panel borders precisely so the art stays contained within the chosen panel and produces a clean, deliberate boundary rather than bleeding onto adjacent panels or the garage door frame
- Chalk or removable marking pencil — for sketching the letter layout on the panel before any spray paint is applied; working out letter size, spacing, and arrangement in chalk that can be wiped away prevents the spray paint commitment from happening before the composition is confirmed
- Exterior clear coat sealer, gloss finish — two coats over the fully dried finished panel lock the spray paint against UV fading, moisture, and the physical contact that garage doors experience during regular operation (~$7–9)
- Drop cloth — for protecting the driveway surface below the panel during painting; overspray from multiple spray paint colors applied at a distance creates a significant radius of fine mist that settles on everything below
How to Paint It
- Choose your panel before preparing anything — on a multi-panel garage door, the bottom panel is most visible from the street and most accessible for painting; the second panel from the bottom reads at eye level for someone standing at the end of the driveway and may have more visual impact depending on your specific garage door proportion. Tape a large piece of paper cut to panel size to your candidate panel and stand at the street to assess which position gives you the viewing angle and visual impact you're after before committing any paint.
- Clean the chosen panel thoroughly with an all-purpose cleaner and a microfiber cloth, then wipe with rubbing alcohol to remove any wax, silicone residue, or surface contamination that would prevent spray paint from bonding. Garage door panels accumulate car exhaust residue, brake dust, and road film that are invisible to the eye but actively prevent paint adhesion — a panel that looks clean but hasn't been wiped with alcohol will show paint adhesion failure at the edges of letter forms within the first season.
- Mask the panel borders with painter's tape applied precisely along the panel edge seams, pressing the tape edge firmly against the surface with a credit card to prevent overspray from bleeding under the tape edge onto adjacent panels. Cover the adjacent panels and the surrounding garage door frame with additional tape and paper if you're working with multiple spray colors, as overspray from bright colors travels significantly farther than most people expect when working outdoors in even a light breeze.
- Apply the black base coat in two even passes across the full panel surface, holding the can twelve inches away and working in smooth overlapping horizontal strokes. Allow full drying time — at least thirty minutes — before sketching the letter composition in chalk on the dried black surface. The black base is what gives the finished piece its depth and makes the vivid letter colors appear saturated and luminous rather than flat; a colored base coat mutes the letter colors and loses the high-contrast visual impact that makes graffiti-style lettering work at street distance.
- Sketch the full letter composition in chalk before applying any color — draw the outer silhouette of each letter at the size you want in the final piece, standing back to assess letter proportions and spacing from a distance of ten feet before committing. Letters that look correctly sized when you're standing at the panel appear much smaller from the street than you expect; work up from what feels too large rather than down from what looks proportional at arm's reach.
- Fill the letter interiors with your chosen vivid colors, applying each color in two thin coats rather than one heavy application that runs and pools at the letter base. Work from the center of each letter outward to keep color contained within the chalk outline, and allow each color to dry before applying adjacent colors that would bleed together if applied wet-on-wet. The color fill is where the personality of the piece develops — use your boldest color for the largest letter, and vary the color assignment so no two adjacent letters share the same fill color.
- Outline each letter with black spray paint applied carefully along the letter edges in smooth, confident strokes — the black outline is the technical element that most dramatically elevates the quality of the finished piece, because it sharpens every letter edge, corrects any slight color overrun from the fill phase, and produces the graphic crispness that distinguishes intentional graffiti-style lettering from painted letters that look unfinished. Apply the outline before the white highlights so the black defines the letter form completely before the highlight adds the final dimension.
- Add white highlights with a single decisive stroke on the upper-left face of each letter — a short diagonal white stroke in the upper-left corner of each letter, applied consistently across all letters in the same relative position, creates the illusion that light is striking the letter surface from the upper left and produces the three-dimensional pop that makes the letters appear to float forward from the dark background. Remove all tape while the final sealer is still slightly tacky for the cleanest possible panel boundary edge, and apply two coats of gloss exterior sealer over the completely dry finished piece.
Muralists who work on residential exterior surfaces always study the finished composition from multiple distances before applying the outline layer — ten feet, twenty feet, and from the street — because letter spacing and proportion that reads as correct at arm's reach often reveals significant inconsistencies at street viewing distance that the outline layer will permanently lock in. They also always apply drop shadows before white highlights, not after; a drop shadow is a second, slightly offset version of each letter painted in a darker tone immediately behind and below the primary letter form, and it adds the kind of depth that makes a street-distance composition read as genuinely dimensional rather than flat. A black or deep purple drop shadow applied two inches down and to the right of each letter before the white highlight is added is the professional technique that most clearly distinguishes finished mural lettering from enthusiastic amateur work, and it adds about fifteen minutes to the project for a result that looks several hours more skilled.