
Oven Fruit Chips: 15 Minutes Prep, 4 Hours Magic
Slice thin, arrange without overlapping, dust with spice, set the oven to 200 degrees, and walk away — the most intensely flavored snack you have ever eaten makes itself.
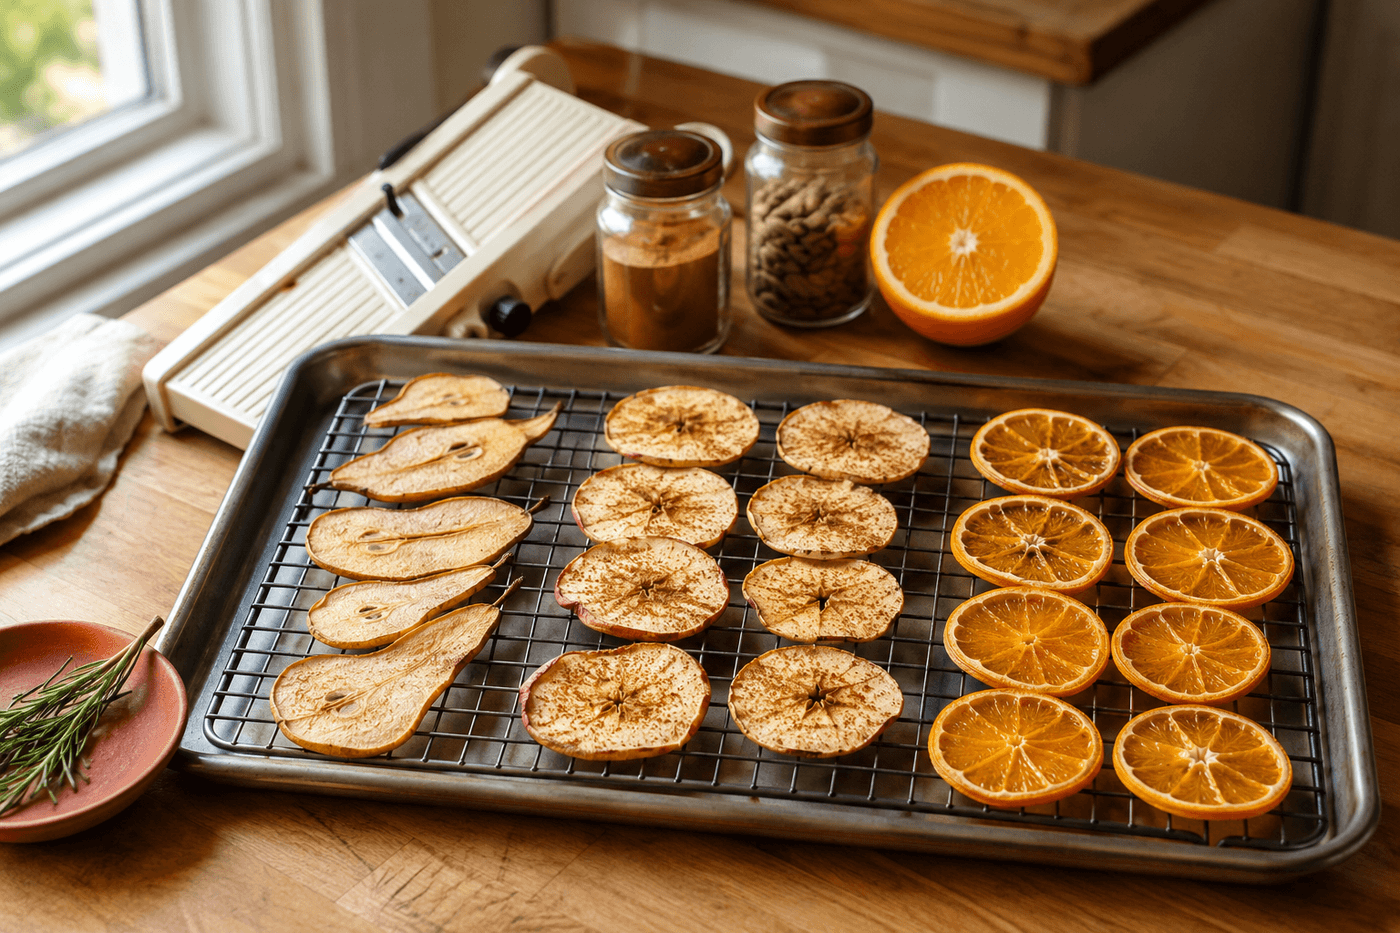
The oven dehydrated fruit chip occupies a specific category of food project where the result is so dramatically superior to the commercial version — more intense flavor, better texture, no additives, made from fruit that would otherwise have gone soft in the bowl — that making your own becomes the obvious choice within about thirty seconds of tasting the first batch. Fifteen minutes of slicing and arranging is the complete active investment; the oven does four hours of slow, low-heat work entirely on its own and produces chips with a flavor concentration that makes a fresh apple taste comparatively bland by comparison. The mechanism is simple and remarkable: water is removed without cooking, which means the natural sugars, the fruit character, and all the aromatic complexity concentrate into each chip rather than being diluted by moisture. Apple chips dusted with cinnamon, pear chips with cardamom, and thin orange slices that work as both a snack and a sparkling water garnish are the three combinations that produce the most consistently enthusiastic responses — and every batch costs about $4 in fruit that might otherwise have been quietly composted and takes less active time than most snacks that require actual cooking. The oven does the work. You take the credit.
What You'll Need
- Fruit — choose one or combine:
- Apples — Fuji, Honeycrisp, and Granny Smith all dehydrate beautifully; sweeter varieties produce sweeter chips; tart varieties produce a more complex, tangy chip that many people prefer for snacking; core and slice crosswise into rounds for the most visually appealing chip shape
- Pears — Bosc and Anjou dehydrate with the best texture; the floral, honey character of pear concentrates into an extraordinarily complex chip flavor; slice lengthwise through the core for a teardrop shape or crosswise for rounds
- Oranges and citrus — navel oranges, blood oranges, lemons, and limes all dehydrate successfully; the pith becomes pleasantly chewy and the flavor is intensely aromatic; slice crosswise into ⅛-inch rounds and use as snacks, garnishes, cocktail accessories, and sparkling water additions (~$1–2 per pound, 2–3 pounds fills one baking sheet)
- Mandoline slicer — the single most important tool for consistent results; uniform slice thickness is what produces chips that finish at the same time without some burning while others are still leathery; ⅛-inch thickness is the target for crisp chips; a sharp chef's knife works for citrus rounds but mandoline is strongly recommended for apples and pears
- Parchment paper — for lining the baking sheet; fruit chips stick to unlined pans and tear when removed; parchment releases cleanly and makes cleanup effortless
- Wire cooling rack set inside a baking sheet — optional but significantly improves results; elevating the fruit slices on a rack allows hot air to circulate under each slice simultaneously with the air above, which reduces dehydration time by 20–30 minutes and produces more evenly dried chips than a flat baking sheet alone
- Spices — choose per fruit:
- Apple: cinnamon, or cinnamon plus a pinch of nutmeg
- Pear: cardamom, or cardamom plus a pinch of ginger
- Citrus: no spice needed; the flavor is complete; a very light dusting of flaky salt on orange rounds is extraordinary
- Optional for all: a very light drizzle of honey before baking produces caramelized edges that add another layer of flavor complexity
- Lemon juice and water, 1:4 ratio — for a brief dip of apple and pear slices before arranging on the baking sheet; the acid prevents browning during the long oven time and preserves the visual appeal of the finished chip; citrus slices do not need treatment
- Airtight container — for storing finished chips; fruit chips absorb ambient humidity and lose their crisp texture within hours if left uncovered; stored in an airtight container at room temperature, properly dehydrated chips keep for one to two weeks
How to Make Them
- Preheat the oven to its lowest available setting — 200°F is ideal; 225°F works if the oven does not go lower; temperatures above 250°F begin to cook the fruit rather than dehydrate it, which produces a cooked, jammy texture rather than a crisp chip and causes the natural sugars to caramelize and burn on thinner slices before the interior moisture is fully removed. If the oven's lowest setting is 250°F, prop the oven door open slightly with a wooden spoon to reduce the effective temperature during the first two hours.
- Prepare a lemon water dip by combining one part fresh lemon juice with four parts cold water in a wide bowl — large enough to submerge the sliced fruit flat rather than stacking pieces in a small container. The acid dip takes ten seconds per slice and is worth the minor extra step for apple and pear chips that will be displayed or gifted; chips eaten the same day they are made can skip the dip without significant visual impact since the browning develops slowly during the dehydration process.
- Slice the fruit on the mandoline to ⅛-inch thickness — consistent with the uniform thickness that produces chips that finish simultaneously. Core removal from apples is optional; the thin core slice in the center of a round apple chip is visually beautiful and edible. For pears sliced lengthwise, the core and seeds can be removed with a small melon baller after slicing without affecting the chip shape significantly. Work quickly and transfer slices directly to the lemon water dip as each is cut to minimize pre-dip browning.
- Arrange the fruit slices in a single layer on the parchment-lined baking sheet or rack — no overlapping, no touching at the edges, which would cause the contact points to steam rather than dehydrate and produce soft spots in the finished chip. A standard half-sheet pan holds approximately 30–40 apple or pear rounds depending on fruit size; a full orange sliced at ⅛ inch produces 15–20 rounds that fill a half-sheet pan with moderate spacing.
- Dust the arranged slices lightly with the chosen spice — hold the spice over each slice at 12 inches height and tap the measuring spoon gently to produce an even, light distribution rather than clumps; a light dusting that allows the fruit color to show through reads as more refined and seasons more evenly than a heavy coat that obscures the fruit and tastes primarily of spice.
- Bake at 200–225°F for three to four hours without opening the oven during the first two hours — opening the oven releases the accumulated humidity of the evaporating moisture and significantly extends the dehydration time by returning moisture to the oven environment. Begin checking at the three-hour mark by removing one chip and allowing it to cool for two minutes before assessing texture; a properly dehydrated chip that appears slightly pliable when hot will crisp completely as it cools, while a chip that appears crisp when hot and pliable when cool needs additional time.
- Flip the chips at the two-hour mark using a thin spatula — the underside in contact with the parchment or rack dehydrates more slowly than the exposed top surface; flipping at the midpoint produces chips that are uniformly dry on both sides rather than ones that are crisp on top and slightly leathery on the bottom. Work quickly during the flip to minimize the time the oven door is open.
- Cool the finished chips on the rack or baking sheet completely before storing — chips that are stored while still warm trap residual steam in the airtight container, which softens the chips within hours. Allow at least 20 minutes of cooling at room temperature before the first taste assessment and a full 30 minutes before transferring to a storage container; the full cool is also when the final crisp texture develops from what will appear as slight pliability immediately out of the oven.
Pastry chefs and food stylists who produce dehydrated fruit for restaurant garnishes, charcuterie boards, and high-end food photography use one technique that elevates oven-dehydrated fruit chips from a home snack to something that reads as genuinely artisanal: brush each fruit slice with a very thin coat of simple syrup — equal parts sugar dissolved in equal parts water — immediately before arranging on the baking sheet, and add a single small sprig of fresh thyme, rosemary, or a few dried lavender buds pressed lightly onto the surface before dehydrating. The simple syrup creates a translucent glaze during dehydration that makes the finished chip appear luminous and jewel-like rather than matte, and the fresh herb pressed into the surface becomes an embedded aromatic element that infuses the chip with a savory-sweet complexity that plain fruit alone cannot achieve. Food stylists who use this technique describe the finished chips as looking like stained glass — the translucent color of the fruit intensified by the syrup glaze against the dried herb pressed into the surface — and the technique adds approximately five minutes of additional prep time while producing a result that makes the chips look and taste like they came from an expensive specialty food shop rather than a 200-degree home oven.














