
Outdoor Serving Tray: Build It for $12
Ninety minutes, a few boards, and you've got a serving tray that outlasts anything from the big box store.
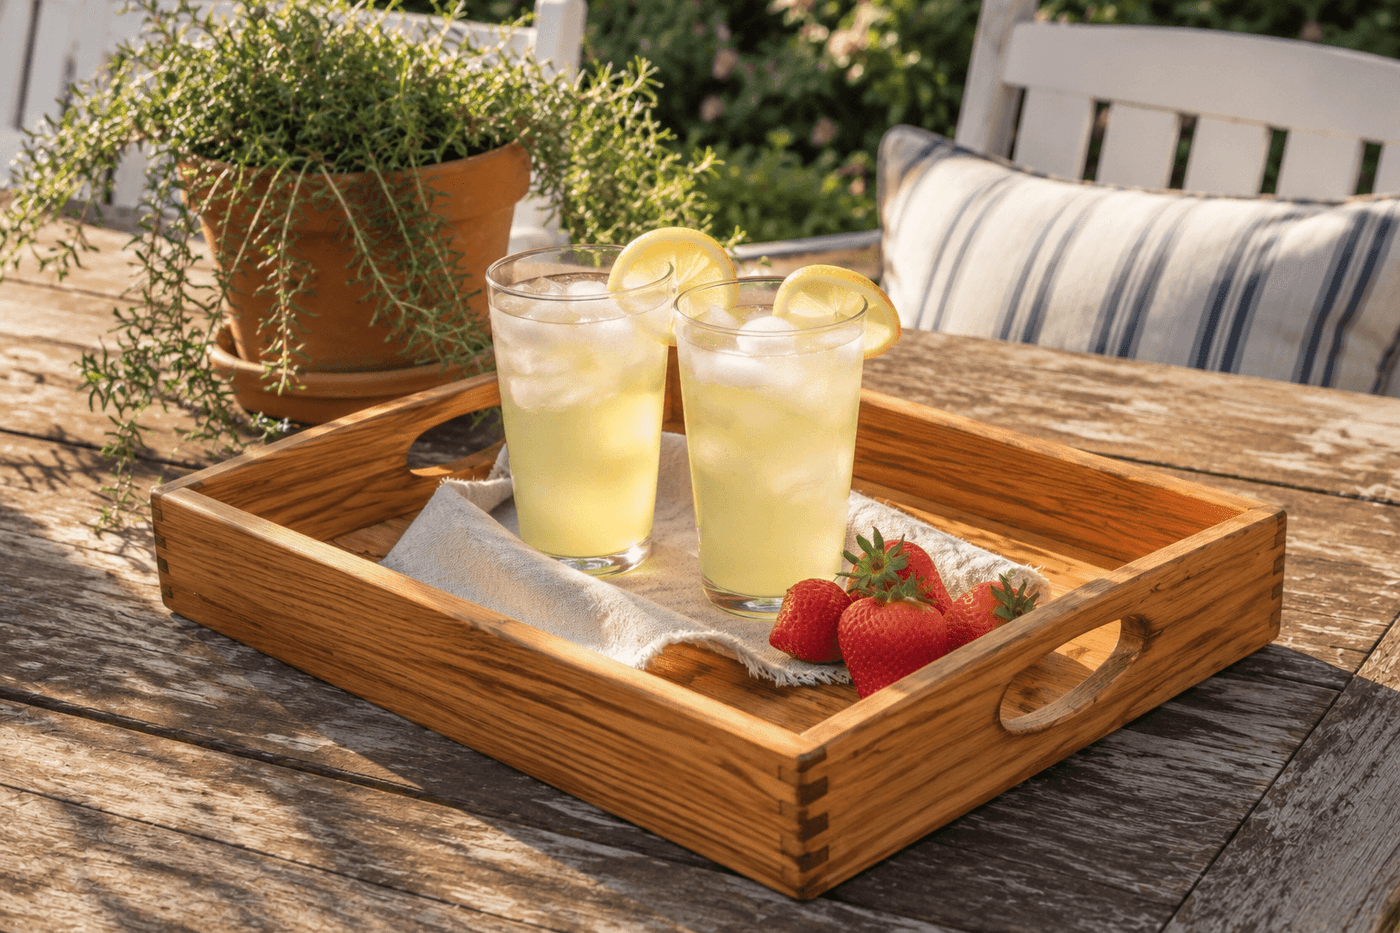
There's a particular kind of satisfaction in carrying drinks out to the patio on something you built yourself — especially when guests pick it up, turn it over, and ask where you got it. This serving tray is a 90-minute build from three types of dimensional lumber that costs about $12 total, and the result is genuinely more solid and better-looking than anything in that price range at a home goods store. The taller end pieces double as handles with cut-out hand-holds, the raised side rails keep glasses from sliding during the walk from kitchen to patio, and the whole thing finishes beautifully with mineral oil, outdoor stain, or paint depending on your aesthetic. It's also one of those projects that scales perfectly into gift-giving — a few extra boards and an afternoon gets you three or four trays that are genuinely impressive presents. First-time woodworkers, this one's for you: if you can make straight cuts and drive a screw, you can build this.
What You'll Need
- 1x12 common board, 2 feet — tray base; pine works well and is budget-friendly (~$4–5)
- 1x2 common board, 4 feet — side rails running along the long edges (~$2)
- 1x4 common board, 2 feet — end pieces that become your handles (~$2–3)
- Wood glue — Titebond II or similar water-resistant formula for outdoor use
- 1¼" wood screws or finishing nails — driven from underneath for a clean top surface
- Jigsaw — for cutting the hand-hold openings in end pieces
- Drill and bits — for pilot holes and optional rope handle holes
- Sandpaper — 80-grit to shape, 120-grit to smooth, 220-grit for final finish
- Finish — choose one:
- Food-safe mineral oil — natural, easy, beautiful on bare wood
- Outdoor stain + sealer — for weathered or tinted looks
- Exterior paint — for bold color that coordinates with patio furniture
- Natural rope, ½" diameter — optional decorative handles (~$3 for a few feet)
How to Build It
- Cut your tray base from the 1x12 board at 18–24" long depending on your preferred size — 20" is a versatile middle ground that fits most patio tables without feeling unwieldy. Cut the 1x2 side rails to match the base length exactly, and cut two 1x4 end pieces to match the full width of the base including the side rails (typically 11¼" for a standard 1x12).
- Trace your hand-hold openings on both end pieces before any assembly — an oval roughly 4" wide by 1½" tall, centered horizontally and positioned in the upper half of the board. Use a glass or jar lid to trace smooth rounded ends, which are far more comfortable to grip than sharp corners and easier to cut cleanly with a jigsaw.
- Drill a starter hole inside each traced oval using a ½" bit, then cut out the hand-hold shape with your jigsaw following the traced line. Cut slowly and let the blade do the work — forcing the jigsaw through pine causes tear-out that requires significant extra sanding to fix.
- Sand the hand-hold openings thoroughly before assembly, when the end pieces are still flat and easy to maneuver — start with 80-grit to shape any rough edges, progress to 120-grit, and finish with 220-grit until the opening feels completely smooth to the touch. This is the step that determines comfort every time the tray is carried, so don't rush it.
- Assemble by applying wood glue to the bottom edges of the side rails and end pieces, positioning them flush around the tray base perimeter, and clamping or holding in place while you drive screws up through the base from underneath. Driving fasteners from below keeps the tray surface clean and splinter-free — countersink your pilot holes so screw heads sit flush with the bottom.
- Check that all four corners are square by measuring diagonally corner to corner in both directions — if the measurements match, you're square; if not, apply gentle pressure to the long diagonal while the glue is still wet to bring it into alignment. A square tray sits flat; a racked tray wobbles on every table.
- Sand the entire assembled tray progressing through 80-, 120-, and 220-grit, paying extra attention to outside corners and the transition between base and rails where glue squeeze-out needs to be feathered smooth. Wipe with a tack cloth between grits to remove dust that would otherwise scratch the next pass.
- Finish with two coats of your chosen finish, letting each coat dry fully before the next. For mineral oil, apply liberally with a rag, let soak 20 minutes, and wipe away excess — repeat after 24 hours for a rich, water-resistant surface. If adding rope handles, drill ½" holes through both end pieces below the cut-out openings, thread rope through, and knot securely on the inside.
Furniture makers and woodworking instructors who teach beginner joinery consistently recommend one upgrade that separates a good-looking tray from an heirloom-quality one: routing a shallow chamfer or roundover on every exposed edge before final sanding, using a router with a ⅛" roundover bit or even 80-grit paper wrapped around a dowel for a hand-shaped alternative. Sharp 90-degree corners on a serving tray catch on tablecloths, show dings and dents immediately, and feel unfinished in the hand — softened edges, by contrast, give the piece a crafted, intentional quality that reads as professional. Apply this technique to the top face of the tray rim, the outside of the end pieces, and especially the inside edge of the hand-hold openings, and the finished piece will feel noticeably more refined than the lumber it started as.














