Organize Your Garage Floor to Ceiling for $75
One Saturday, a wall track system, and the four-pile method — the garage that hasn't fit a car in a year fits two by four o'clock
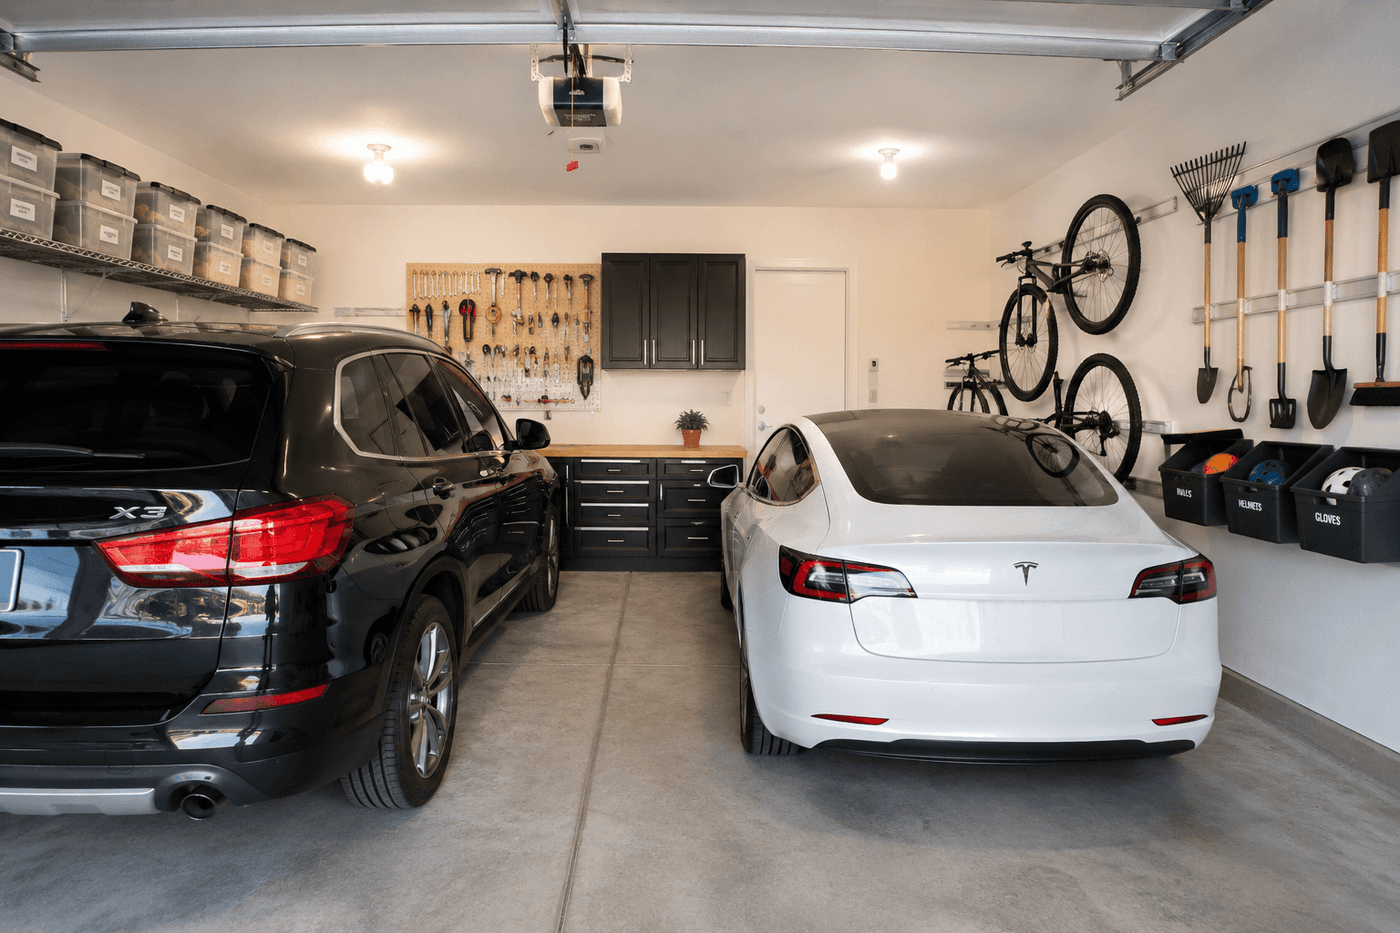
A garage that cannot fit a car is not a garage — it is an anxiety storage facility with a large door, and the slow process by which it becomes one is so gradual that most households don't notice it happening until it has fully happened and the daily experience of opening that door generates the specific low-grade dread of a problem too large to tackle on a Tuesday evening. The solution is a single committed Saturday with a clear process, a four-pile sorting system that makes every decision binary rather than agonizing, and about $75 in wall-mounted track hardware that transforms vertical wall space from dead storage into the most efficient square footage in the garage. The transformation is not incremental — it is complete, and it happens in a single day if the process is followed rather than improvised. By the time the car goes back in and the door closes, the garage that generated daily anxiety becomes the garage that generates daily satisfaction every time it is opened.
What You Need
- Wall-mounted track system with adjustable hooks — a slotted wall track system like Rubbermaid FastTrack or a similar adjustable rail system; the adjustable hook format allows the storage configuration to change as garage contents evolve without requiring new hardware installation (~$35–45 for a starter kit with rails and assorted hooks)
- Heavy-duty storage bins, qty 4–6 — for grouping similar items within each zone; clear bins allow contents to be identified without opening and large labels on the front prevent the bin from becoming a catch-all within the first month (~$15–20 for a set)
- Bike hooks, qty as needed — ceiling-mount or wall-mount single bike hooks that lift bikes completely off the floor; floor space occupied by bikes is some of the most valuable real estate in a garage and the single most impactful thing to reclaim (~$5–8 for a two-pack)
- Concrete floor cleaner or degreaser — for cleaning the floor once it is completely empty; a clean, degreased floor makes the zone markings clearer and the overall garage feel intentional rather than simply sorted (~$6–8 for a bottle)
- Label maker or adhesive labels and marker — for labeling every bin, hook zone, and storage area before anything goes back in; labels are the maintenance mechanism that keeps a one-day organization project organized for years rather than weeks
- Four sorting zones on the driveway — designated areas marked with tape, signs, or simply spread apart spatially for keep, donate, trash, and relocate piles; the physical separation of these zones during the sort phase prevents items from migrating between categories and extends the sort session into an indecision spiral
How to Do It
- Set up four clearly separated zones on the driveway before removing a single item from the garage — keep, donate, trash, and relocate inside the house. The four-pile system works because it makes every decision binary at the category level: first, does this item stay in the garage or not, and if not, which exit does it take. An item that requires extended deliberation about whether it belongs in donate versus trash is making a much easier decision than it appears; when in doubt, trash wins over donate for items with genuine uncertainty, because a donated item of dubious quality wastes the receiving organization's time and resources.
- Empty the garage completely before sorting or planning any storage — every single item out onto the driveway before a single organizational decision is made. The complete-empty approach feels inefficient compared to sorting as you go, but it accomplishes two things that sorting-in-place cannot: it forces a genuine decision about every item rather than allowing items to stay in place by default, and it reveals the actual floor area and wall space of the garage that has been invisible under the accumulated contents for potentially years.
- Sort ruthlessly and quickly — the pace of sorting matters as much as the decisions themselves. Items that require more than ten seconds of consideration are almost always candidates for the donate or trash pile that are being over-thought; genuine keep items are recognized immediately and placed without deliberation. Work through the driveway piles systematically rather than randomly, completing one category of items fully before moving to the next — all sports equipment together, all lawn and garden tools together, all automotive supplies together — which surfaces duplicates and confirms true quantities before any storage decisions are made.
- Clean the empty garage thoroughly before any storage system is installed — sweep the floor completely, treat oil stains with concrete degreaser, wipe down shelves and wall surfaces, and note any damage, pest evidence, or moisture issues that the cleared space reveals. Installing storage over a dirty, damaged floor creates a maintenance problem that the organization project was supposed to solve; an hour of cleaning the empty space sets the foundation for a system that stays clean and organized rather than one that looks organized the day it is installed and accumulates the familiar chaos within the following months.
- Map the storage zones on the empty floor before installing any hardware — use chalk or painter's tape on the floor to mark the car footprint first, then designate remaining zones for lawn equipment, sports gear, workshop supplies, and seasonal storage. The car zone is inviolable and must be established as the primary floor constraint before any other zone is considered; every other storage decision in the garage is downstream of the car footprint, and a zone map that doesn't protect the car space first produces a garage that fits everything except the vehicle it was designed to shelter.
- Install the wall track system on the wall or walls that don't interfere with car doors — typically the side walls and the back wall of the garage rather than the walls beside the driver and passenger doors. Drive track mounting screws into wall studs rather than drywall anchors for any hook that will carry significant weight; bikes, long-handled tools, and heavy equipment bags all carry loads that drywall anchors cannot sustain through years of loading and unloading. Use a stud finder before marking any mounting holes and confirm stud location by driving a finish nail at the marked position before committing the track screws.
- Return items to the garage in zone order from largest to smallest — lawn mower and large equipment first since they define the floor footprint of the lawn zone, then shelving units and bins in their designated areas, then wall-hung items on the track system, and finally small items into labeled bins. Returning items in this sequence prevents the need to move large equipment around smaller items that were placed first, which is the reorganization mid-session that extends a six-hour project into an eight-hour one and depletes the motivation needed to finish the labeling and final detail work.
- Label everything before closing the garage door on the finished project — every bin, every hook zone, every shelf section, and every floor zone boundary. Labels are not a finishing touch; they are the maintenance system that allows every member of the household to return items to the correct location without guidance and that prevents the gradual zone erosion that returns a well-organized garage to its previous state within six months. A garage where every storage location is labeled maintains its organization through the natural entropy of daily use; an unlabeled garage drifts back toward its previous state regardless of how well-intentioned the people using it are.
Professional garage organizers who transform storage spaces for clients always photograph the finished garage from the door opening perspective — the view you see every single time you open the garage — before the client uses it for the first time. The photograph serves two functions: it documents the organized state as a reference for what the garage should look like when everything is in its place, and it creates a visual standard that motivates returning items to their correct locations because the goal state is clearly defined and literally pictured. Posting this photograph inside the garage door or saving it as a phone wallpaper gives every household member a reference point that requires no memory of where things go — the photo shows exactly where things go, which is the single most effective tool for maintaining a garage organization project through the first six months when new habits are still forming.