Install a Door Latch Guard in 30 Minutes for $20
The difference between a door that holds and one that splinters is the screw length: 3-inch screws reach the wall stud, not just the thin door jamb.

Holiday season means packages on porches, guests coming and going, and more travel, so your entry door should be ready. Most doors fail at the strike plate, because the factory screws are only about 3/4 inch long and bite into soft jamb wood that splits under force. The single variable that separates a door that holds from one that gives way is screw length: 3-inch screws pass through the jamb and anchor into the wall stud behind it, spreading force into the framing instead of thin trim. Add a reinforced strike plate and a latch guard and you have a real upgrade, not a cosmetic one. This beginner project takes about 30 minutes and costs around $20 total, and a drill and screwdriver are all the skill you need.
What You'll Need
- Materials (~$20 total):
- Heavy-duty reinforced steel strike plate, 4-inch long, ~$8
- Door latch guard plate (steel, fits standard 2-1/8 inch bore), ~$8
- Four 3-inch #9 wood screws, ~$3
- Wood glue or wood filler (small tube), ~$1
- Tools (likely on hand):
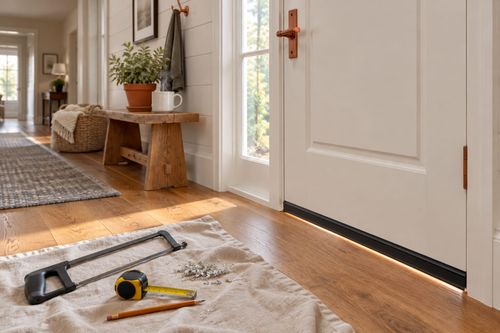
- Cordless drill with 1/8-inch bit and Phillips driver bit
- Phillips screwdriver
- 1/2-inch wood chisel (only if the new plate needs a deeper mortise)
- Pencil and safety glasses
How to Do It
- Open the door and unscrew the existing strike plate from the jamb. Keep it handy to trace and compare against the new plate so you know the mortise will match.
- Inspect the old screw holes and the jamb wood. If they are stripped or cracked, dip a few toothpicks in wood glue, push them in, and let them set so the new screws have fresh wood to grip.
- Test the fit of the new reinforced strike plate in the existing recess. If it sits proud, mark the edge with a pencil and pare the recess slightly with the chisel so the plate sits flush and the latch doesn't snag.
- Drill pilot holes with the 1/8-inch bit through the jamb for each long screw, going about 2.5 inches deep. Pilot holes prevent splitting, which is the exact failure you are trying to prevent.
- Fasten the strike plate with the 3-inch screws, driving them through the jamb and into the wall stud. Snug them firmly but stop before they strip, and you should feel the screws bite solid wood.
- Mount the latch guard over the door edge at the latch height. It shields the gap between door and jamb where a pry tool would slip in. Mark holes, drill small pilots, and fasten with the supplied screws.
- Check by closing and latching the door several times. It should click smoothly without rattling. If it binds, loosen the screws a quarter turn and adjust the plate position.
- Finish by touching up any exposed wood with wood filler or paint, then repeat on any other exterior doors. Matching hardware keeps the look clean while strengthening each entry point.
Locksmiths and security installers always check the stud, not just the jamb: tap along the wall beside the door frame, and when the sound turns from hollow to solid you've found the stud. Aim your long screws at that spot, and if you can, replace the hinge-side top screw with a 3-inch one too so the whole door is tied into the framing.