Fix Misaligned Bifold Doors in 15 Minutes for Free
A screwdriver, silicone spray, and fifteen minutes — the closet door that pops out of its track and hangs crooked every morning is fixed before the weekend is over
A bifold closet door that pops out of its track, hangs at a visible angle, or requires a specific ritual of lifting and shoving to close belongs in a specific category of household irritation — the kind that is mildly infuriating multiple times a day, that everyone in the house has developed workarounds for, and that turns out to take fifteen minutes to fix permanently once you understand what the three adjustment points actually do. The pivot pin at the top corner raises or lowers the door; the screw on the top bracket moves it in or out from the frame; the bottom pivot pin seats in its floor bracket and keeps the door plumb; and the roller at the opposite top corner rides in the track and needs to be fully seated and lubricated to roll freely. Adjust all three points in sequence, add a shot of silicone spray to the track, and the door that has been fighting you every morning closes with a single smooth motion that feels genuinely satisfying after months of the alternative. This is fifteen minutes of attention that pays back every single day.
What You Need
- Phillips screwdriver — for turning the adjustment screws on the top pivot bracket; most bifold door hardware uses Phillips head adjustment screws, though some older installations use flathead
- Flathead screwdriver — for prying the bottom pivot pin back into its floor bracket if it has popped out, and for accessing any adjustment mechanisms on older bifold hardware that uses slotted rather than Phillips screws
- Silicone spray lubricant — for the track channel and the roller; silicone spray is the correct lubricant for bifold door hardware because it doesn't attract dust and debris the way petroleum-based lubricants do, and it won't stain the door or surrounding trim if it contacts painted surfaces (~$5–7 for a can)
- Flashlight or phone torch — for examining the top track channel clearly to confirm roller seating and identify any debris or damage inside the track that may be causing roller binding
- Replacement roller, if needed — bifold door rollers are inexpensive plastic or nylon wheels available at any hardware store; bring the old roller for exact size matching, as roller diameters vary between door hardware manufacturers (~$3–5 for a pair)
- Needle-nose pliers — for gripping and repositioning a bottom pivot pin that has popped completely free of its floor bracket and needs to be pressed back into the bracket socket while the door is held in position
How to Fix It
- Examine the door's current alignment by closing it completely and standing back to assess — note whether the door hangs lower on one side than the other, whether it protrudes from the frame face rather than sitting flush with it, whether it contacts the floor or drags on carpet, and whether the gap between the door edge and the frame is consistent top to bottom. Each of these alignment problems corresponds to a specific adjustment point, and identifying which problems exist before touching any hardware prevents the confusion of adjusting the wrong point and making the door worse rather than better.
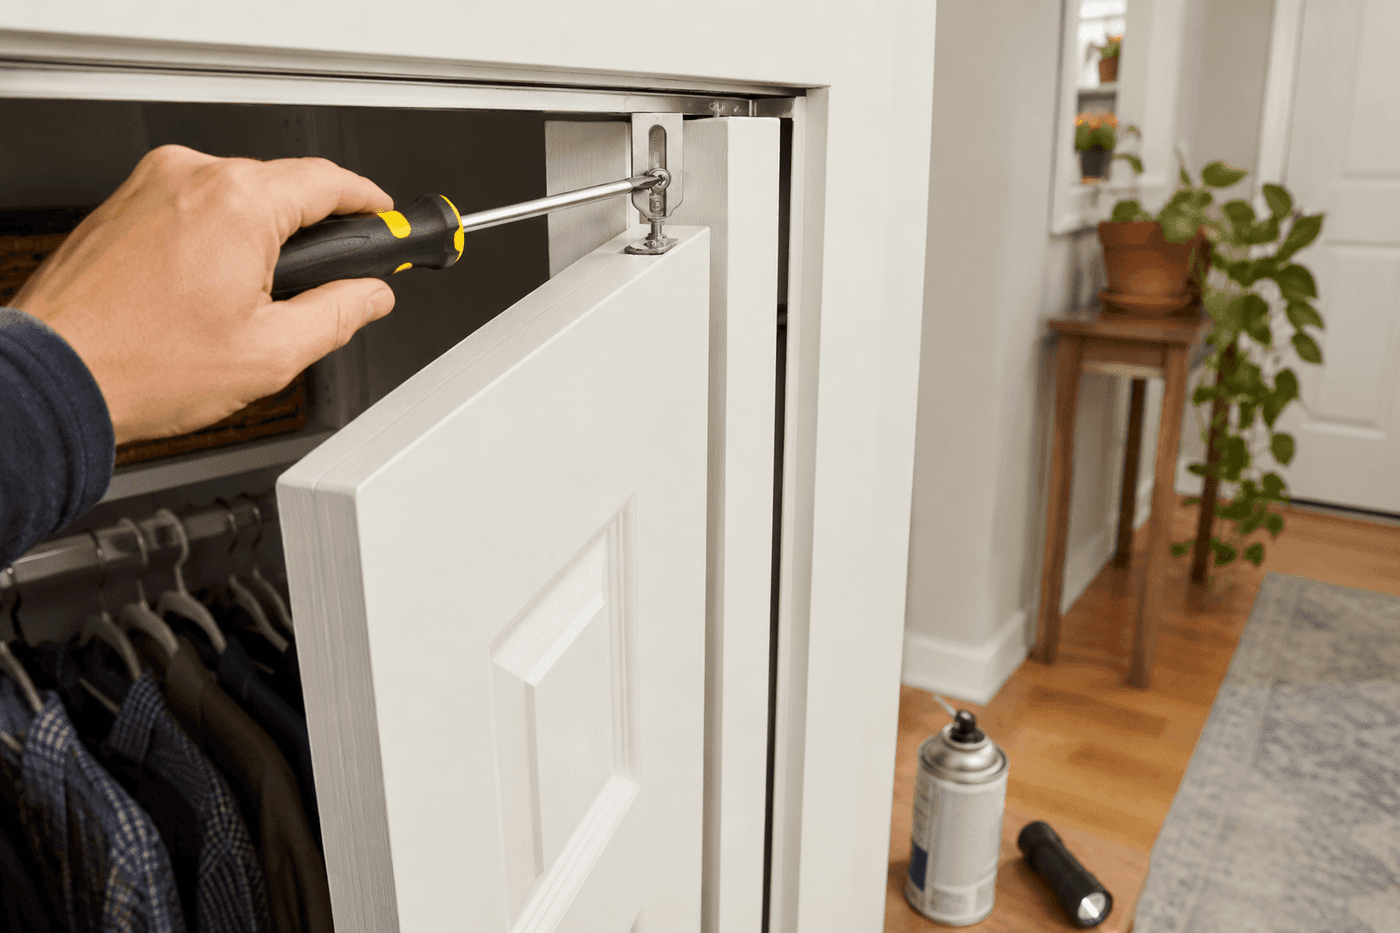
- Locate the top pivot bracket — the hardware mounted at the top corner of the door opening where the fixed pivot pin of the door's leading panel sits. Most bifold top pivot brackets have two adjustment mechanisms: a vertical screw that raises or lowers the door by moving the pivot point up or down, and a horizontal screw or slot that moves the door in or out from the frame face. The vertical adjustment corrects a door that hangs crooked or drags on the floor; the horizontal adjustment corrects a door that sticks out from the frame or sits recessed behind it.
- Adjust the vertical alignment first by turning the vertical adjustment screw in quarter-turn increments — clockwise typically raises that corner of the door, counterclockwise lowers it. Make one quarter-turn adjustment, close the door and observe the gap at the floor and the hang angle, then make additional quarter-turn adjustments as needed. Working in small increments prevents overshooting the correct position and having to reverse direction multiple times to find the right setting.
- Adjust the horizontal positioning once the door hangs level — turn the horizontal adjustment screw or slide the bracket in its mounting slot until the door face sits flush with the surrounding frame rather than protruding forward or receding behind it. A door that sits flush with the frame closes cleanly and presents a neat appearance from both inside and outside the closet; a door that protrudes catches on things and looks misinstalled regardless of how well the rest of the hardware is adjusted.
- Check the bottom pivot pin by opening the door fully and looking at the floor bracket at the bottom leading corner — the pivot pin extending from the bottom of the door should be fully seated in the floor bracket socket with no wobble or visible gap between the pin and socket. A pin that has partially worked free of its socket causes the door to lean forward at the bottom and drag on the floor regardless of how the top pivot is adjusted; press the door firmly back into the socket until the pin seats completely.
- Examine the roller at the top of the door's trailing panel — the small wheel that rides in the track channel and allows the door to fold and unfold. Open the door and look at the roller from below with a flashlight; it should sit fully within the track channel with the wheel contacting the track surface and rolling freely when pushed. A roller that has jumped out of the track channel causes the door to bind or fall forward when operated; reseat it by lifting the door slightly and pressing the roller back into the channel from below.
- Replace the roller if it shows visible cracking, flat spots from wear, or a broken axle pin — a damaged roller cannot be repaired and will continue to cause track-jumping regardless of lubrication. Remove the old roller by pressing its retaining clip with a flathead screwdriver and sliding it off the pin, take it to a hardware store for an exact size match, and press the new roller onto the pin until the retaining clip seats audibly. A new roller that is even slightly the wrong diameter for the track channel will either fall out of the track or bind against the channel walls during operation.
- Lubricate the full length of the track channel with silicone spray — open the door completely, apply a light coat of silicone spray along the track, then slide the door back and forth several times to distribute the lubricant along the full roller travel path. Apply a small amount of silicone spray directly to the top and bottom pivot pins as well. Test the door through several complete open-close cycles; a properly adjusted and lubricated bifold door should fold and unfold with finger-tip pressure and close with a single smooth motion that requires no lifting, shoving, or special technique.
Professional finish carpenters who install and service bifold door hardware always check the door frame itself for plumb and square before adjusting any door hardware — a door frame that has racked out of plumb due to foundation settlement or seasonal wood movement cannot be corrected by hardware adjustment alone, because the adjustment range built into bifold hardware assumes a plumb frame and reaches its limits quickly when the frame is significantly out of square. Hold a level against the vertical frame jamb on both sides of the door opening; if the frame is more than ¼ inch out of plumb over the door height, the hardware adjustment may not be able to fully correct the door's appearance, and shimming the floor bracket or adjusting the top track mounting may be necessary before the door can be made to hang and operate correctly.