
Build a Wooden Window Box Planter for $20
Cedar boards, exterior screws, and two hours — the window box that adds more curb appeal per dollar than any other single project
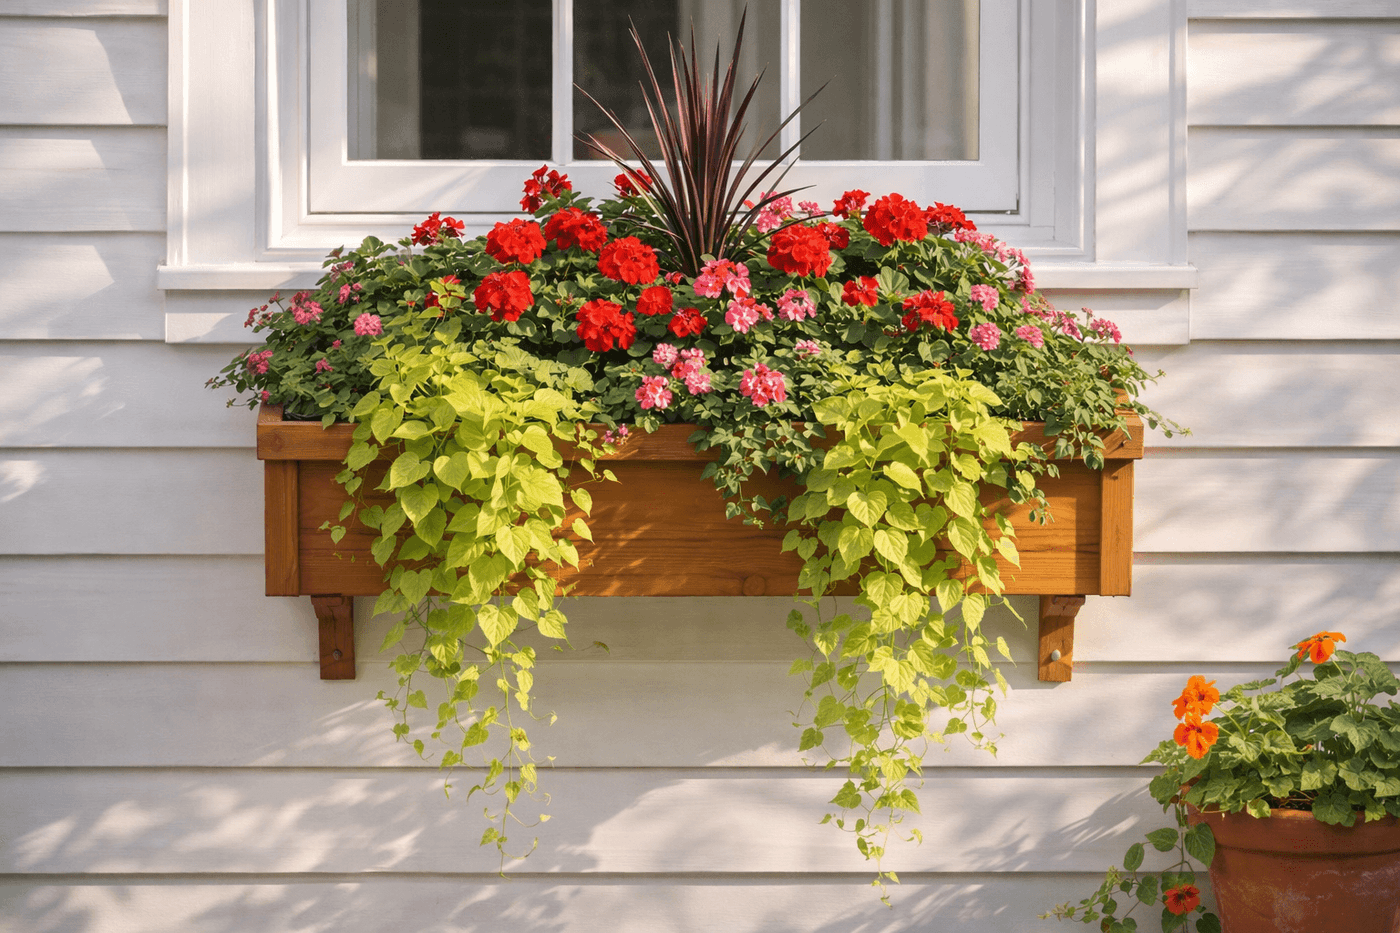
Window boxes have an outsized effect on how a house reads from the street relative to how simple and inexpensive they are to add — a window with a well-planted box beneath it looks cared-for and considered in a way that the same window without one simply doesn't, regardless of everything else going on with the facade. A cedar window box built from 1×8 lumber costs about $20 in materials, takes two hours to build, and lasts through many seasons of planting before the wood even begins to show its age. The build is beginner-friendly — four boards, basic joinery, and six drainage holes — and the mounting is straightforward with L-brackets into wall studs. The design payoff, once the box is planted with trailing petunias, geraniums, and sweet potato vine cascading over the sides, is the kind of visual transformation that makes the whole front of a house look like it received significantly more attention than a single Saturday afternoon project.
What You Need
- Cedar 1×8 lumber — for the front panel and two end pieces; cedar's natural oils resist moisture and soil contact decay without any treatment, making it significantly more durable for outdoor planters than pine, which begins to soften at soil contact points within two to three seasons (~$8–12 for the lengths needed)
- Cedar 1×6 lumber — for the back panel and bottom; the back panel cut from 1×6 rather than 1×8 creates a slight front-to-back slope that directs drainage water toward the front drainage holes rather than allowing it to pool against the back wall mounting (~$5–8)
- Exterior wood screws, 1⅝" and 2" — for all box joinery; pre-drill every fastener location to prevent splitting in cedar, which is softer than pine and more prone to splitting at screw entry points near edges
- Wood glue, exterior-rated — for reinforcing every joint before screwing; a glued and screwed window box joint handles the combined weight of wet soil, plants, and rainfall without the progressive loosening that fasteners alone develop over multiple seasons
- Heavy-duty L-brackets, qty 4 — two per window box, mounted into wall studs; a planted window box with wet soil can weigh 30 to 50 pounds depending on box length, and brackets into studs rather than drywall anchors are the only mounting method that handles that load safely through years of use (~$4–6 per bracket)
- Drill with ½" spade or paddle bit — for the drainage holes in the bottom panel; four to six evenly spaced holes prevent standing water accumulation in the soil that causes root rot
- Sandpaper, 120-grit — for smoothing all surfaces and slightly rounding the top edges of the box so the finished piece feels crafted rather than constructed
- Exterior paint or stain — white paint is the most versatile finish for any house color; bold colors like cobalt, red, or black make a strong architectural statement on the right facade (~$8–10 for a sample pot that covers one or two boxes)
- Stud finder, level, and measuring tape — for accurate bracket placement that keeps the box mounted level and secured into framing rather than drywall
How to Build It
- Measure the window width before cutting any lumber — the box should be two to four inches narrower than the window frame width on each side so it sits visually centered beneath the window without extending beyond the frame edges. A box that matches the window width exactly looks slightly too large when viewed from the street; one that is four to six inches narrower on each side reads as proportionally correct and intentional from the curb distance at which it will primarily be seen.
- Cut all pieces before beginning assembly — front panel from 1×8 at your determined box length, back panel from 1×6 at the same length, two end pieces from 1×8 at eight inches each, and bottom panel from 1×6 at the same box length. The back panel cut from 1×6 rather than 1×8 produces a back wall that is approximately two inches shorter than the front wall, creating the slight forward drainage slope that keeps water moving toward the drainage holes rather than pooling at the back of the box against the wall.
- Drill four to six evenly spaced drainage holes in the bottom panel using a ½-inch spade bit before assembling the box — drilling drainage holes in an assembled box requires awkward positioning and produces less precise results than drilling the flat panel on a work surface. Space the holes evenly across the panel width, positioning the outermost holes at least two inches from each end to prevent splitting at the panel edges.
- Assemble the box by attaching the front panel to both end pieces first — apply wood glue to the contact faces, position the front panel so its top edge aligns with the top edge of the end pieces, and drive two pre-drilled exterior screws through each end piece into the front panel end grain. Working front-panel-first gives you a stable L-shaped assembly to work from for the remaining joints rather than trying to hold four pieces in position simultaneously.
- Attach the back panel to both end pieces using the same glue-and-screw technique, positioning its top edge two inches lower than the front panel top edge to create the drainage slope. Confirm the box sits flat on all four bottom corners before the glue sets — a box that rocks on uneven end pieces produces a wall-mounted planter that can never be shimmed perfectly level regardless of how carefully the brackets are installed.
- Install the bottom panel between the front and back panels, flush with their lower edges, gluing all contact surfaces and driving screws through the front and back panels into the bottom panel edges. The bottom panel sits between the front and back rather than below them — this configuration keeps the box bottom from being the first surface exposed to soil moisture contact, which is where wood rot begins in most window boxes.
- Sand the entire assembled box at 120-grit, paying particular attention to the top edges of the front and end panels — round these slightly with the sandpaper to soften the sharp cut edge into a gentle curve that looks deliberate and finished rather than raw and utilitarian. Sharp top edges on a window box read as unfinished from close viewing distance in a way that a few passes of sandpaper completely resolves.
- Mount the painted and dried box beneath the window by locating wall studs with a stud finder, marking bracket positions at stud locations, and confirming level across both bracket positions with a spirit level before driving a single mounting screw. A window box mounted even slightly off level is immediately visible from the street and cannot be corrected without remounting — confirming level before installation takes thirty seconds and prevents the most visible possible mounting error on a curb-facing feature.
Landscape designers who specify window boxes for residential facades always follow the thriller-filler-spiller planting formula rather than filling the box with a single plant variety — one tall, dramatic centerpiece plant (the thriller) such as an upright grass, a bold geranium, or a spike plant at the back center of the box, surrounded by mounding mid-height plants (the fillers) such as calibrachoa, impatiens, or compact petunias, with trailing plants (the spillers) such as sweet potato vine, bacopa, or trailing verbena at the front edge that cascade over the box face toward the ground. The three-layer formula creates the full, layered abundance that makes a window box look professionally planted from the street, while a single-variety planting looks sparse and flat by comparison regardless of how many plants are used or how well they grow.














