
Build a Rolling Garden Cart for $40
Plywood, swivel casters, and three hours — the garden cart that ends the four-trips-to-the-garage problem permanently
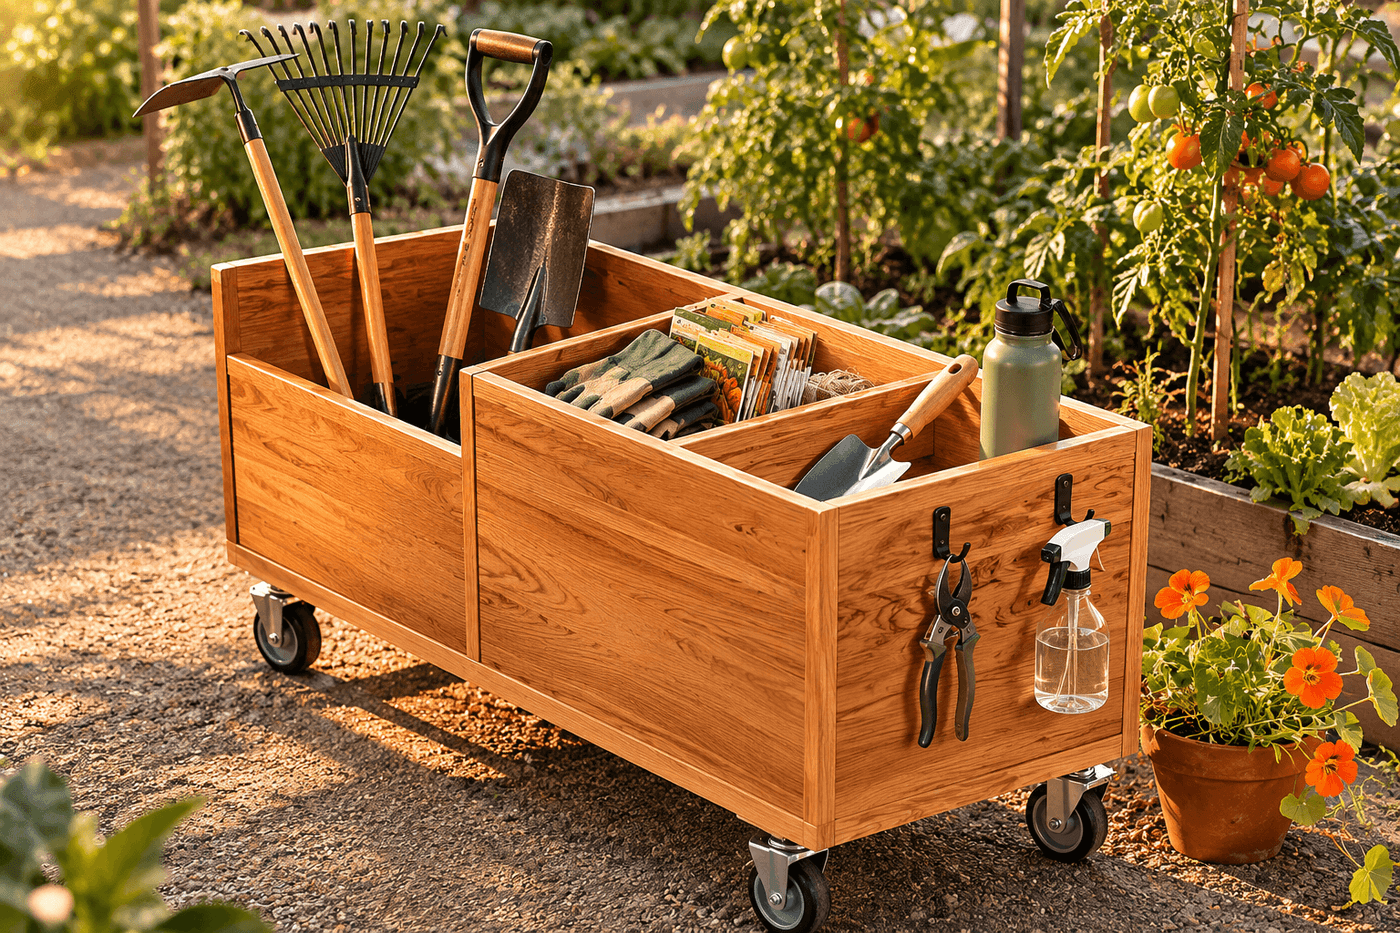
A rolling garden cart solves a problem so specific and so recurring that every gardener who encounters a well-designed one has the same immediate reaction: why did it take this long to build this? The constant trips back to the garage for forgotten tools, the kneeling pad left at the previous bed, the pruners that were definitely somewhere but now cannot be located — all of it ends the first time the cart rolls out with everything loaded and moves through the garden as a complete, self-contained workspace on wheels. The two-compartment design with a central divider addresses both the long-handled tools that need to stand upright and the hand tools, gloves, and small supplies that need to be immediately accessible without rummaging — and four swivel casters handle every surface from lawn to gravel path without the resistance that makes a heavy-wheeled cart a chore rather than a convenience. Forty dollars in materials, three hours of building, and the most useful garden tool you own isn't a tool at all — it's the thing that carries all the tools.
What You Need
- Plywood, ½" thickness, half sheet (2×4 feet) — for the cart base, sides, and divider; ½-inch plywood is rigid enough to hold the weight of loaded garden tools without flexing while remaining light enough that the finished cart is easy to tip and maneuver on two wheels (~$15–18 for a half sheet)
- Swivel casters, 3" diameter, qty 4 — swivel casters on all four corners allow the cart to rotate and navigate tight spaces between beds that fixed-wheel carts cannot manage; look for casters rated for at least 75 lbs each for a fully loaded cart (~$10–14 for a set of four)
- Exterior wood screws, 1⅝" and 2" — for all box joinery and caster mounting; pre-drill every fastener location to prevent splitting at the plywood edges (~$5–6 for a combination pack)
- Wood glue, exterior-rated — for reinforcing every panel joint before screwing; a glued-and-screwed plywood box handles the repeated lateral stress of rolling over uneven terrain significantly better than fasteners alone
- Small screw-in utility hooks, qty 4–6 — for the end panels of the cart; hooks on the exterior end faces create hanging storage for pruners, a small spray bottle, and a bag of fertilizer that would otherwise take up compartment space (~$3–4 for a pack)
- Exterior wood sealant or exterior paint — one to two coats over all surfaces; a rolling garden cart sees regular soil contact, watering spillage, and outdoor storage, and unsealed plywood begins to delaminate at the edges within a single wet season (~$8–10 for a small can)
- Sandpaper, 120-grit — for smoothing all panel edges and corners before sealing; smooth edges on a tool the hands contact constantly are a functional requirement, not a cosmetic preference
How to Build It
- Cut all panels from the half sheet of plywood before beginning assembly — one base panel at 18×24 inches, two long side panels at 12×24 inches, two short end panels at 12×18 inches, one central divider at 12×24 inches, and two small interior divider pieces at 6×8 inches for creating the subdivided compartments on the shallower tool side. Cutting all pieces first allows you to confirm sufficient material and consistent dimensions before any joint is committed.
- Assemble the outer box first — attach the two long side panels to the base panel along their bottom edges with glue and screws, then attach the two end panels between the side panels at each short end. Apply wood glue to all contact faces before driving any screws, and pre-drill every fastener location at least ½ inch from the plywood edge to prevent the edge delamination that occurs when screws are driven too close to the panel edge without pilot holes.
- Install the central divider panel running the full 24-inch length of the cart interior, positioned approximately one-third of the cart width from one long side wall — this asymmetric placement creates the deeper compartment for long-handled tools on the wider side and the shallower divided compartment on the narrower side. The divider should run from the cart base to the full panel height, glued at the base and screwed through the end panels at each end for a rigid installation that handles tools leaning against it from both sides.
- Add the small interior divider pieces on the shallow compartment side by gluing and screwing them perpendicular to the central divider, creating two or three smaller sections sized for hand tools, gloves, and a water bottle. These interior dividers don't need to run the full depth of the compartment — a 6 to 8-inch interior divider piece creates useful organization without restricting access to the full compartment depth for larger items that span multiple sections.
- Sand all edges and surfaces with 120-grit paper, paying particular attention to the top edges of all side and end panels where hands will make the most regular contact during loading and pushing. Plywood edges have a specific tendency to develop splinters at the veneer layer intersections that don't appear until the panel is handled regularly — a thorough sanding pass before sealing addresses this comprehensively and prevents the small but distracting splinter problem that appears after the first week of use.
- Apply exterior sealant or paint to all surfaces including the cart interior — a rolling garden cart that goes unsealed on the interior surfaces develops the moisture-driven delamination at the plywood edges that begins at the base where water pools from watering spillage and soil contact. Two coats of sealant on the interior base and lower walls specifically, with one coat on the remaining surfaces, produces the moisture protection that extends the cart's useful life through many seasons of outdoor use.
- Mount the four swivel casters to the cart base corners using the mounting screws included with the casters, or 1⅝-inch exterior screws driven through the caster mounting plate into the plywood base. Position each caster plate flush with the corner of the base panel and confirm all four swivel freely through a full 360-degree rotation before loading the cart — a caster that binds against the cart base or the adjacent caster produces the resistance that makes rolling the cart feel labored rather than effortless on every terrain.
- Install utility hooks on the exterior faces of both end panels at a height accessible without crouching — two hooks per end panel positioned 4 to 6 inches apart handle the pruners, small spray bottle, and other frequently accessed tools that benefit from exterior hanging rather than interior storage. Load the finished cart on its first garden session, note which items you reach for most frequently, and adjust hook placement and compartment organization based on one week of actual use before considering the build complete.
Professional market gardeners who use rolling tool carts in production growing operations always add a short length of PVC pipe — 2 to 3 inches in diameter, cut to fit the deep tool compartment height — standing upright in the corner of the long-handled tool side to create a dedicated holder for a water bottle or spray bottle that keeps it accessible without occupying the tool compartment space. A bungee cord or short length of hook-and-loop tape wrapped around the PVC pipe and the adjacent cart wall keeps the bottle from tipping during cart movement across uneven terrain. The PVC holder costs about $2 in pipe offcuts and takes five minutes to install, but the instant-access hydration it provides during a long garden session is the practical convenience detail that makes a good garden cart genuinely excellent for extended use.














