
Build a Garden Arbor Bench with Side Trellises for $85
One Saturday, cedar lumber, and two climbing vines — the garden destination that makes every visitor stop and genuinely stare
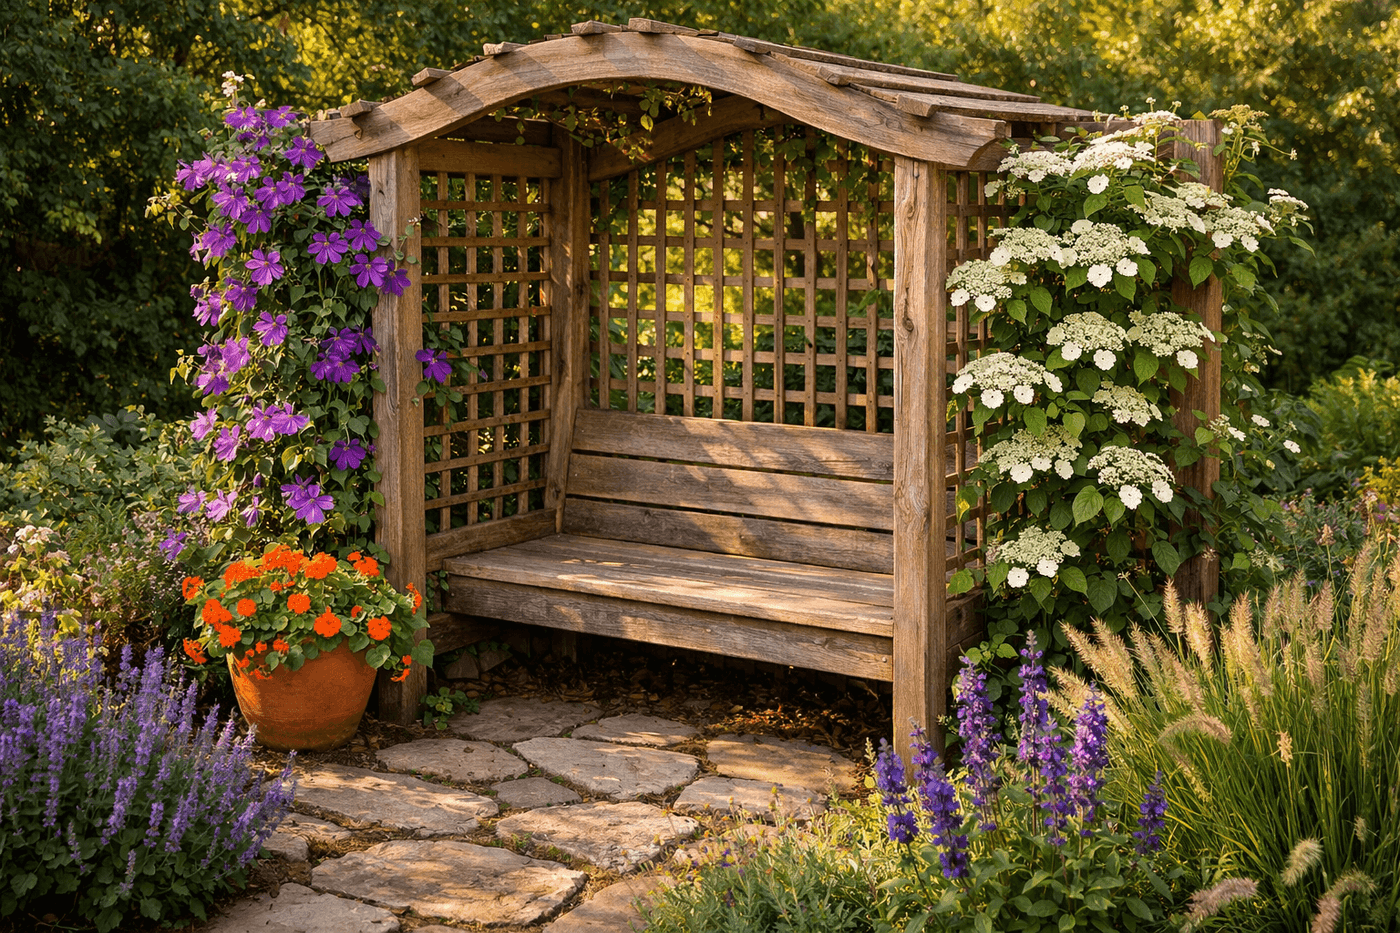
A garden arbor bench is the rare outdoor project that functions as furniture, architecture, and living garden feature simultaneously — and the version you build yourself from cedar for $85 is structurally identical to the pre-built versions that sell for $400 at garden centers, with the added advantage that every dimension is exactly right for your specific space. The design pairs a solid slatted bench with two vertical lattice trellis panels that rise on either side and angle slightly inward overhead, creating the signature enclosed, sheltered feeling that makes this kind of garden seat so compelling to sit in. Plant a climbing vine at the base of each trellis on the day you finish building, and within two seasons you have a structure so thoroughly woven with living foliage and blooms that it looks as though it has always been there — as though the garden grew up around it rather than you built it on a Saturday. This is the project that earns a permanent place in the garden and in every garden photograph you take from that day forward.
What You Need
- Cedar 4×4 posts, 8-foot length, qty 4 — the vertical structural uprights for both trellis side panels; cedar's natural rot resistance makes it the correct choice for posts going into ground contact (~$12–15 each)
- Cedar 2×6 lumber, 8-foot length, qty 3 — for bench seat slats and the horizontal top rails of each trellis panel (~$8–10 each)
- Cedar 2×4 lumber, 8-foot length, qty 4 — for bench frame supports, seat bracing, and trellis panel framing (~$5–7 each)
- Cedar lattice panels, 2×8-foot, qty 2 — pre-made cedar lattice is significantly faster than building a custom grid and holds up equally well to vine weight over multiple seasons (~$15–20 each)
- Exterior structural screws, 3" and 1⅝" — structural screws rather than standard deck screws for the post-to-frame connections that carry the full weight of the structure (~$8–10 for a combination pack)
- Post anchors or concrete tube forms, qty 4 — surface-mount post anchors secured to a patio or poured concrete pads for in-ground installation; post anchors are significantly faster and keep wood out of direct soil contact (~$5–8 each)
- Exterior wood glue — for reinforcing every structural joint before screwing
- Miter saw or circular saw — for cutting posts, framing lumber, and seat slats to length
- Drill with driver and pilot bit set — pre-drill every fastener location to prevent splitting in cedar
- Level, measuring tape, speed square, and clamps — essential for keeping a six-hour build square and plumb throughout assembly
- Climbing vines, qty 2 — clematis and climbing hydrangea are the most rewarding choices for arbor trellises; both are vigorous, long-lived, and produce spectacular bloom displays once established (~$15–25 each)
How to Build It
- Plan the full cut list and mark all lumber before making a single cut — four posts at your chosen height (7 feet works well for most adults seated beneath the trellis panels), bench seat slats at 48 inches for a comfortable two-person bench width, frame members at consistent lengths, and top rail pieces that angle slightly inward if you want the classic arbor lean. Cutting everything first means the assembly phase moves without interruption and you can confirm all dimensions are correct before committing to the build sequence.
- Install the four post anchors in your chosen location, spacing the two front posts 48 inches apart and the two rear posts directly behind them at a depth that matches your lattice panel width — typically 18 to 24 inches front to back. Use a level and measuring tape to confirm all four anchor positions are perfectly square before setting them permanently; a post layout that is even slightly out of square produces a finished structure that visually reads as crooked regardless of how carefully everything above it is built.
- Set all four posts in their anchors and brace them plumb with temporary diagonal bracing before attaching any framing — posts that shift during framing attachment produce racked panels that cannot be corrected without removing and resetting the posts. Confirm plumb in two directions on every post with a level before driving the anchor bolts, and leave the temporary bracing in place until at least two horizontal frame members are fully secured on each side panel.
- Build the bench frame between the two front posts and the two rear posts by attaching 2×4 horizontal rails at bench height — 17 to 18 inches from the ground — across both the front-to-back and side-to-side spans using exterior structural screws driven through pre-drilled pilot holes. Apply wood glue to every joint face before screwing; a glued and screwed bench frame carries the dynamic load of two seated adults through years of outdoor use without the joint creep that fasteners alone eventually develop.
- Install the bench seat slats across the frame rails, spacing them approximately ⅜ inch apart using a scrap piece of wood as a consistent spacer between each slat. Pre-drill and countersink every fastener location in the seat slats — cedar splits readily at screw entry points without pilot holes, and a split seat slat on a bench that will be used daily is both unsightly and uncomfortable in the most literal sense.
- Frame the lattice panels by attaching 2×4 horizontal top and bottom rails between each front-and-rear post pair on both sides of the structure, positioning the bottom rail just above ground level and the top rail at your desired trellis height. Cut the lattice panels to fit the framed opening and secure them with 1⅝-inch screws driven through the lattice border into the frame rails every twelve inches — lattice that is only secured at the corners will bow outward under vine weight within a single growing season.
- Attach the overhead top rails between the two front posts and the two rear posts at full post height, then add angled connecting rails between the front and rear top rails on each side if you want the classic inward lean of a traditional arbor. The top rail connection is the structural joint that determines the long-term rigidity of the whole assembly — use structural screws at minimum, and add metal post cap connectors at each joint for a connection that won't loosen through years of seasonal wood movement.
- Plant one climbing vine at the base of each trellis panel on the day the structure is complete, positioning the root ball six inches from the post base and guiding the first stems toward the lattice with a short bamboo stake. Water deeply and mulch generously around each plant, then attach the first reaching stems to the lower lattice squares with soft garden twine — the vines will find the lattice on their own within weeks, and from that point the structure begins its slow, beautiful transformation into the living garden room it was always meant to become.
Landscape architects who design garden structures for long-term vine integration always orient arbor benches so the open front faces north or northeast rather than south — a south-facing opening receives direct afternoon sun straight into the seated occupant's face, which makes the bench uncomfortable to use during the warmest part of the day that it was designed to shelter from. A north or northeast orientation means the trellis panels and their eventual vine canopy shade the bench interior during afternoon hours while the open front still receives pleasant morning light, creating the naturally cool, dappled seating environment that makes a vine-covered arbor bench the place everyone in the garden gravitates toward on a warm day. The orientation costs nothing to adjust at the planning stage and is nearly impossible to correct after the posts are set.














