Blind Slat Repair: Fabric Tape Fix in 15 Minutes
One torn slat doesn't mean a new blind — a strip of color-matched tape and fifteen minutes means nobody notices it was ever damaged.
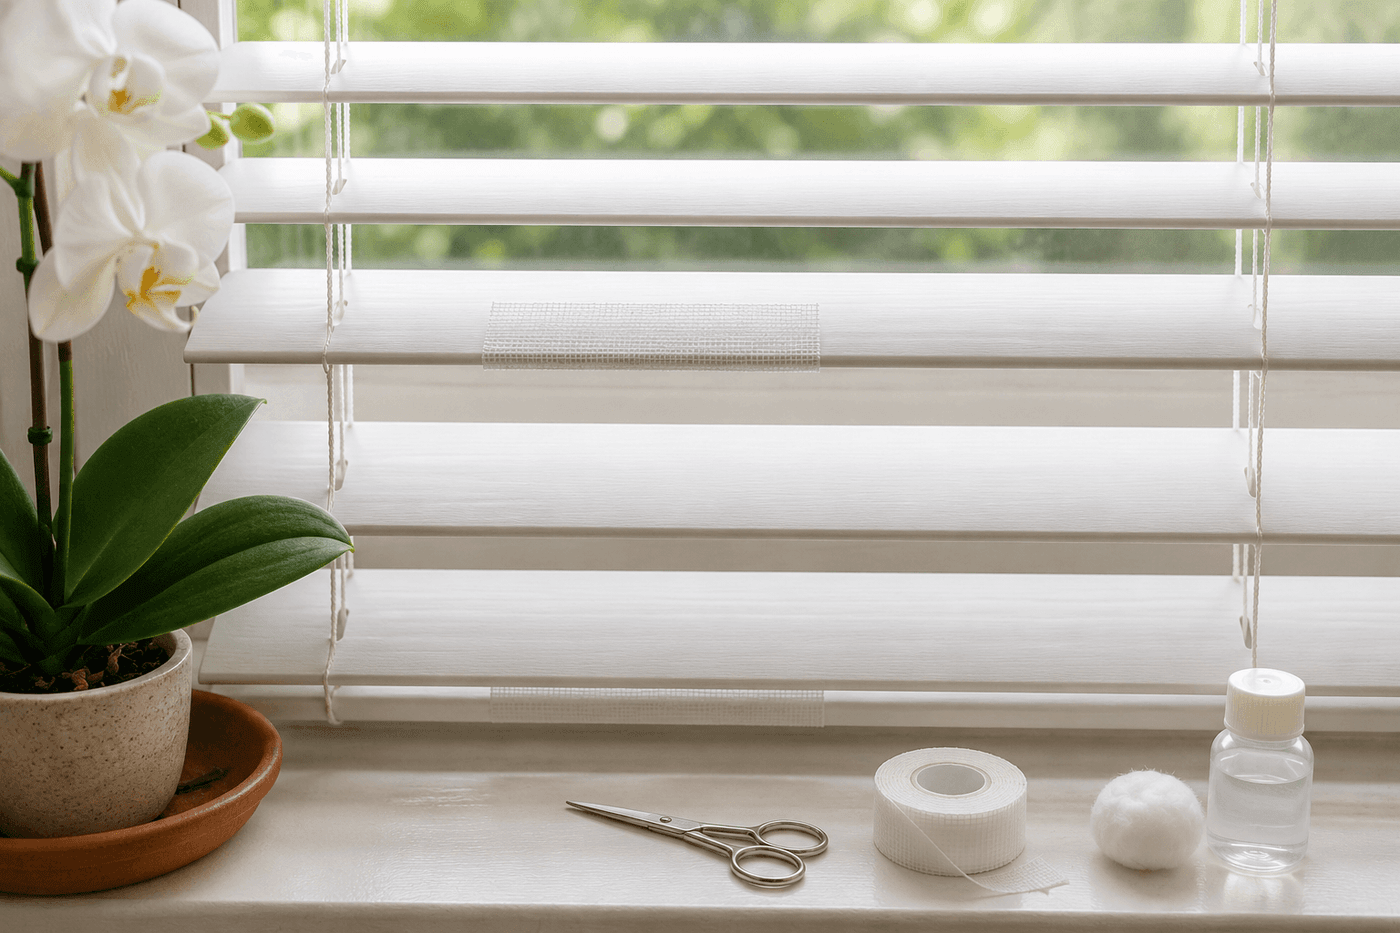
A single torn or cracked blind slat has a way of becoming the only thing you see every time you look at a window — that one bent, split, or dangling strip that makes a perfectly functional blind look like it belongs in a rental that nobody cares about. Replacing the entire blind because one slat is damaged is exactly the kind of unnecessary expense that this fix exists to prevent, and the repair takes fifteen minutes, costs under $5 in fabric tape if you don't already have some on hand, and produces a result that is genuinely difficult to spot at normal viewing distance. The technique works on horizontal vinyl and aluminum blinds of any color, handles tears, cracks, and bent breaks with equal effectiveness, and the same roll of tape fixes every damaged slat in the house once you have it. This is the Friday repair that costs almost nothing, takes almost no time, and eliminates something that has been quietly bothering you every morning when you open the blinds.
What You'll Need
- Color-matched fabric repair tape — white, cream, and beige cover the vast majority of residential blinds; look for Tear-Mender, Bondex, or generic fabric tape at hardware or craft stores (~$3–5 per roll that fixes dozens of slats)
- Scissors — for cutting tape to precise length and rounding the corners of each patch
- Rubbing alcohol and a cotton ball — for cleaning the slat surface before tape application; dust and finger oils are what cause tape edges to lift within days of application
- Ruler or straightedge — for measuring tape length to match the slat width exactly
- Bone folder or credit card edge — for pressing tape firmly and evenly onto the slat surface to eliminate air bubbles
- Clear nail polish — optional, for sealing tape edges on high-touch slats that get handled frequently during blind operation
How to Fix It
- Lower the blind fully and tilt the slats to the flat, horizontal position — working on a slat that is angled or partially raised makes accurate tape placement nearly impossible and almost guarantees a crooked patch that draws more attention than the original damage.
- Realign the damaged slat by gently pressing any bent or separated sections back into their original flat position before cleaning or taping — tape applied over a slat that is still warped locks the warp in permanently, while tape applied to a properly realigned slat holds the repair flat and invisible.
- Clean the damaged area thoroughly with rubbing alcohol on a cotton ball, wiping along the full length of the slat on both the front and back faces and letting it dry completely before touching the tape. This is the step most people skip and the direct reason tape patches peel within a week — alcohol removes the invisible layer of dust, skin oil, and cleaning product residue that prevents adhesive from bonding to the slat surface.
- Measure and cut a tape patch to match the exact width of the slat — no wider, no shorter — then round all four corners of the patch with scissors before applying. Square tape corners lift faster than rounded ones because they present a thin, easily-caught edge; a 30-second corner-rounding step meaningfully extends how long the patch stays flat and adhered.
- Apply the tape patch centered over the damage on the front face of the slat, pressing from the center outward toward the edges to eliminate air bubbles as you go. Work slowly across the full patch surface rather than pressing down all at once, which traps air underneath and creates visible bubbles that catch light and make the repair more noticeable than the original tear.
- Press firmly along the entire patch using a bone folder, credit card edge, or your thumbnail, paying particular attention to the edges and corners where lifting begins. Apply consistent pressure for 30 full seconds rather than a quick press-and-release — prolonged pressure is what activates the adhesive bond fully and is the difference between a patch that lasts months and one that begins peeling within days.
- Repeat on the back face of the slat with a second identically sized and rounded patch, positioned to align precisely with the front patch so both edges match when the slat is viewed from either side. A front-only repair is visible from behind when light comes through the window — the back patch completes the repair and makes it genuinely undetectable from both directions.
- Seal the patch edges with a thin line of clear nail polish if the repaired slat is one that gets handled regularly during blind operation — run the brush along each edge of both patches and let dry five minutes. This edge seal is standard practice for high-wear fabric repairs and is what keeps the corners from catching and peeling during the daily open-and-close cycle that puts the most stress on any blind slat repair.
Window treatment installers and blind repair technicians who service high-volume rental and commercial properties use one color-matching technique that makes fabric tape repairs nearly undetectable even on off-white or cream blinds where a pure white tape patch reads as visibly brighter than the surrounding slats: lightly sand the tape patch surface with 400-grit sandpaper using a single gentle pass after the adhesive has fully cured for 24 hours. New fabric tape has a slight sheen that doesn't match the matte, slightly dusty surface of an aged blind slat — the fine sanding pass dulls that sheen to match the surrounding texture without compromising adhesion, and the result is a patch that matches not just the color but the surface quality of the existing slats. On cream or yellowed blinds, a single pass of a slightly warm-toned marker along the tape edge before sealing with nail polish brings the patch color into closer alignment with aged slat material than any pre-colored tape option available off the shelf.