Squeaky Hinge Fix: Silent Cabinets for Free
WD-40 to break down the rust, petroleum jelly applied to the pin and worked through the barrel — and the kitchen cabinet that has been announcing every meal for months goes completely silent in about twenty minutes for free.
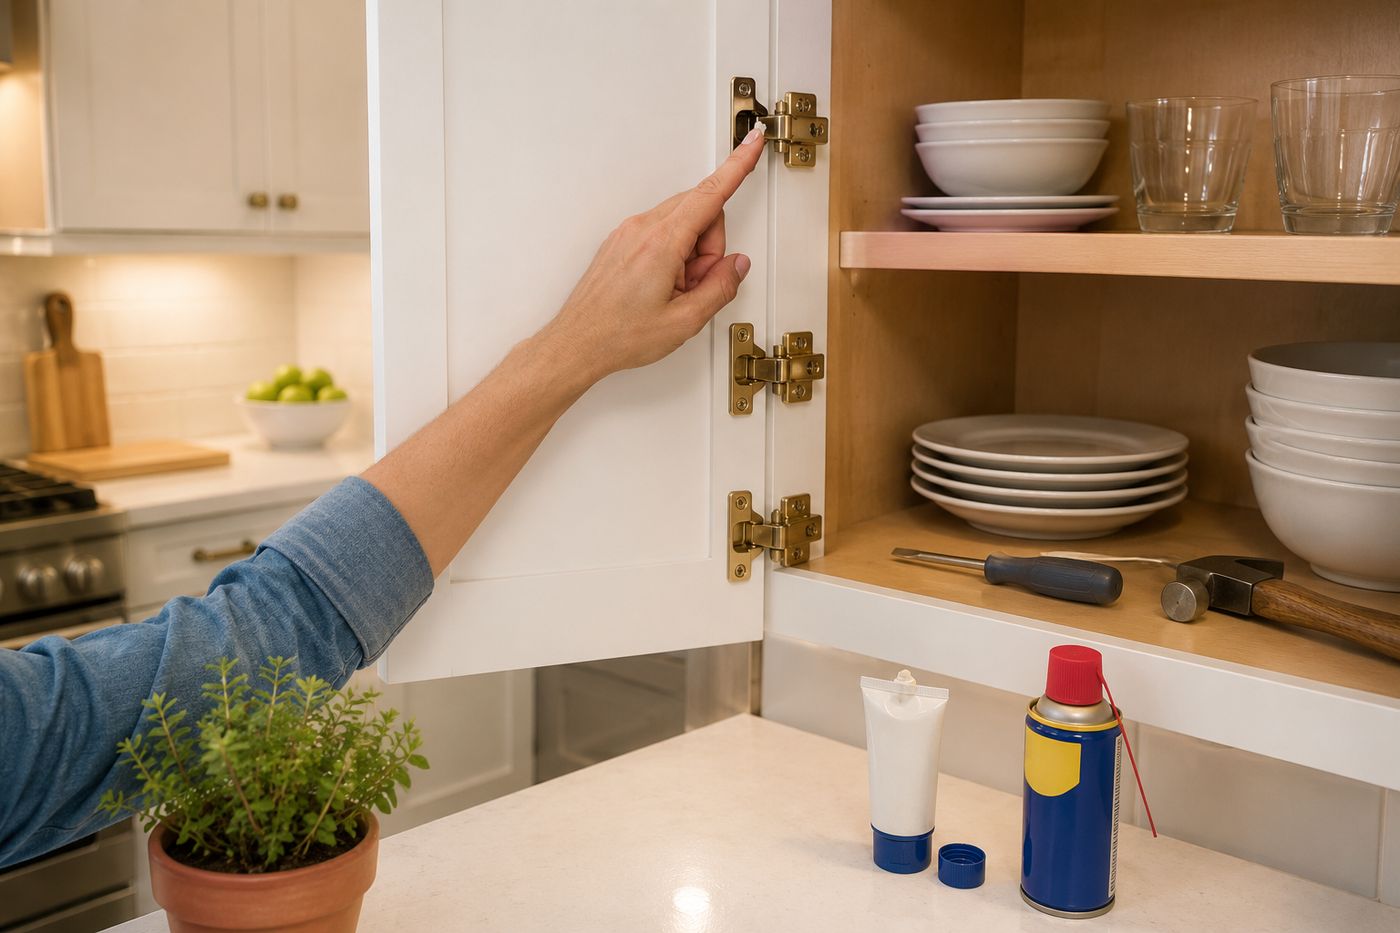
A squeaky cabinet hinge is one of those household sounds that operates on a specific psychological trajectory — initially noticed and mildly annoying, then gradually tuned out until it is completely invisible to the people who live with it, then suddenly and forcefully audible again the moment a houseguest reacts to it. The fix is almost always the same regardless of which cabinet, which hinge type, or how long it has been squeaking: the hinge pin is dry, and the right lubricant applied in the right sequence eliminates the friction that produces the noise. The critical distinction that separates a fix that lasts from one that quiets the squeak for two weeks before it returns is lubricant choice — WD-40 is a solvent and penetrating oil that breaks down rust and old dried lubricant effectively but evaporates quickly from the hinge barrel and leaves the metal surfaces dry again within days; petroleum jelly is a thick, stable lubricant that stays in the hinge barrel through thousands of open-and-close cycles and eliminates the squeak permanently rather than temporarily. Using both in the correct sequence — WD-40 to clean and penetrate first, petroleum jelly to lubricate lastingly second — is the specific two-step approach that addresses every version of the cabinet hinge squeak in a single twenty-minute session that costs nothing if both products are already in the house.
What You'll Need
- Petroleum jelly (Vaseline) — the primary lubricant for this repair; the thick, stable consistency allows it to cling to the hinge pin surface and remain in the hinge barrel through sustained use rather than dripping or evaporating within days; petroleum jelly does not attract dust, does not run down cabinet surfaces, and does not stain painted or stained wood at the hinge area; a standard tube or jar found in virtually every bathroom medicine cabinet is sufficient for every hinge in an entire kitchen with significant remaining (~$0 if already owned, $3–4 if purchasing)
- WD-40 — used only as the first step on hinges with visible rust or significant squeak resistance; WD-40 penetrates into the hinge barrel and breaks down the oxidation and dried lubricant that prevents the petroleum jelly from reaching the metal-on-metal friction surfaces; apply, allow 60 seconds to penetrate, wipe away excess, and then apply petroleum jelly over the cleaned hinge surfaces; do not rely on WD-40 alone as the final lubricant since it evaporates and the squeak returns (~$0 if already owned, $5–7 if purchasing)
- Alternative lubricants that work equally well as petroleum jelly:
- Bar soap or candle wax — rub directly on the hinge pin; the wax leaves a solid lubricant film that works identically to petroleum jelly at zero cost from items already in the house
- White lithium grease — the most durable option for heavily used hinges; lasts longer than petroleum jelly under high-cycle conditions; available at hardware stores (~$5–7)
- Olive oil or vegetable oil — effective short-term lubricant that is already in the kitchen; less durable than petroleum jelly and may become rancid over time in a warm kitchen environment; acceptable for an immediate fix when petroleum jelly is not available
- Clean cloth or paper towels — for wiping excess WD-40 from the hinge exterior before petroleum jelly application, and for wiping any petroleum jelly that transfers to the cabinet surface during the working phase
- Small flathead screwdriver — for tapping hinge pins partially upward to expose the pin shaft for direct lubricant application; insert the screwdriver tip at the bottom of the hinge pin and tap gently upward to raise the pin approximately ¼ inch, which exposes the pin shaft without removing the pin completely from the hinge barrel
- Hammer — light taps only; used in combination with the flathead screwdriver to raise the hinge pin; the weight of the cabinet door resists upward pin movement and requires gentle mechanical assistance rather than finger pressure alone
How to Fix It
- Conduct a full kitchen squeak audit before treating any individual hinge — open and close every cabinet door while listening for squeaks, noting which specific hinges are the noise source within each door (upper hinge, lower hinge, or both), and assessing whether the squeak has the dry-friction quality of a lubrication issue or the metal-on-metal grinding quality of a hinge that is bent or damaged beyond lubricant correction. A squeak that sounds like two dry surfaces sliding against each other responds to lubrication; a grinding or scraping sound combined with visible hinge damage or a door that catches on its frame requires hinge adjustment or replacement rather than lubrication.
- Apply WD-40 to visibly rusted hinges first — spray a one-second burst directly at the top of the hinge pin where it enters the barrel, allow 60 seconds for the penetrating oil to work into the rust layer between the pin and the barrel interior, and work the door back and forth several times to distribute the WD-40 throughout the barrel. The WD-40 dissolves the rust film that is mechanically preventing smooth pin movement and provides the clean metal surface that the subsequent petroleum jelly application can actually contact; petroleum jelly applied over rust film sits on the rust rather than lubricating the metal beneath it and provides little lasting benefit.
- Wipe the hinge exterior clean of excess WD-40 with a paper towel before applying petroleum jelly — the WD-40 has completed its cleaning function and any remaining WD-40 on the surface would thin the petroleum jelly and reduce its staying power in the hinge barrel. The hinge should feel clean and slightly tacky from the WD-40 residue but not wet or oily when the petroleum jelly application begins.
- Raise the hinge pin slightly using the flathead screwdriver and hammer — open the cabinet door fully, position the flathead screwdriver tip at the bottom of the hinge pin shaft, and tap gently upward with the hammer to raise the pin approximately ¼ inch above the hinge barrel top. This partial raising exposes the middle section of the pin shaft where the most friction occurs during door operation and where lubricant applied to the exposed section is most efficiently worked into the barrel by subsequent door movement.
- Apply petroleum jelly to the exposed hinge pin shaft — use a fingertip rather than a tool for the most controlled application; the fingertip applies exactly the amount needed at exactly the location needed without overloading the hinge with excess lubricant that runs down the door surface. Apply a thin, even coat to the full exposed pin section and to the top rim of the hinge barrel opening where the pin enters; the barrel rim is a high-friction contact point that is accessible for direct lubricant application only when the pin is partially raised.
- Tap the pin back down with the screwdriver and hammer until it is fully seated in the hinge barrel — the pin should return to its original position with the pin head flush against the top of the hinge barrel; a pin that is not fully seated allows the door to shift laterally on the hinge, which eventually produces the hinge stress that causes screws to loosen and squeaks to return. Confirm the pin is fully seated by feeling for any upward protrusion at the pin head rather than relying on visual assessment alone.
- Work the door through ten to fifteen full open-and-close cycles immediately after lubricating each hinge — the petroleum jelly is viscous enough that it does not distribute itself through the full barrel depth by gravity alone; the mechanical action of the pin rotating within the barrel during door use is what distributes the lubricant from the application point to every friction surface throughout the full barrel depth. The first few cycles after lubrication may still produce a quieter version of the squeak as the lubricant distributes; this should resolve completely by the fifth or sixth cycle.
- Work through every cabinet in the room in a single session rather than addressing squeaking hinges individually as they are noticed — hinges that are currently silent are often on the verge of squeaking as their lubrication approaches depletion, and a whole-kitchen lubrication session that takes twenty minutes prevents the situation of fixing one squeak per week for the next two months as each hinge reaches the same dry condition at a slightly different time. A properly lubricated hinge on a kitchen cabinet at average use frequency should remain squeak-free for two to three years before requiring another lubrication pass.
Finish carpenters and cabinet installation specialists who service and maintain residential cabinetry as part of warranty and maintenance programs consistently identify one hinge maintenance practice that eliminates recurring squeak problems entirely rather than addressing them after they develop: include hinge lubrication as an annual kitchen maintenance task performed at the same time as other seasonal home maintenance — typically in spring alongside smoke detector battery replacement and HVAC filter changes. A hinge lubricated annually on a schedule never reaches the full lubrication depletion that produces the squeak because the petroleum jelly layer is refreshed before it thins to the point of dry friction. Cabinet specialists who recommend this annual lubrication schedule to clients report eliminating service calls for squeaking hinges entirely — a call that is almost always triggered by a hinge that has gone two to four years without any lubrication rather than one that has developed a mechanical problem. The full kitchen takes fifteen minutes to lubricate on the annual schedule versus the twenty-minute reactive repair after squeaks have developed; the proactive approach is both faster and permanently eliminates the sound rather than waiting for it to return.