DIY Projects

Recent Content

Cedar Birdhouse: Why the Drain Holes Matter

Cedar Birdhouse: Why the Drain Holes Matter

Build a simple cedar birdhouse in an afternoon for about $15. Drilling drain holes in the floor keeps rain from pooling and rotting the nest. Beginner-friendly.

Renter-Safe Over-Sink Cutting Board Trick for Tiny Kitchens

Renter-Safe Over-Sink Cutting Board Trick for Tiny Kitchens

No counter space? Slide a cutting board over your sink for instant prep room. No drilling, no residue, deposit safe. Easy renter win in 5 minutes!

Dollar Store Tinsel Tree: The Cone Base That Stands

Dollar Store Tinsel Tree: The Cone Base That Stands

Turn a $1 foam cone and dollar-store tinsel into a glittery tabletop Christmas tree for under $8. A weighted base keeps it from tipping. Thrifty Tuesday!

Install Pipe Foam Insulation in 45 Minutes for $20

Install Pipe Foam Insulation in 45 Minutes for $20

Frozen pipes are a nightmare waiting for a cold snap. Snap on foam pipe sleeves in 45 minutes for $20 and sleep easy all winter. Zero plumbing skills needed!

Magnetic Pan Rack Trick: Renter Cabinet Door Fix

Magnetic Pan Rack Trick: Renter Cabinet Door Fix

Cabinet chaos? This clip-on door rack hack adds storage for lids and cutting boards with zero drilling and zero residue. Deposit safe!

logo
  • Home Improvement
  • DIY Projects
  • Interior Design
  • Gardening & Outdoor
  • Real Estate
  • Home Improvement
  • DIY Projects
  • Interior Design
  • Gardening & Outdoor
  • Real Estate
  • ​

Make Leather-Look Luggage Tags in 40 Minutes for $12

Make Leather-Look Luggage Tags in 40 Minutes for $12

The difference between a tag that survives a baggage carousel and one that rips in a week is a double-layered strap with a properly set rivet.

[#~image_alt_1~#]
DIY projects

Holiday travel season means suitcases getting tossed around, and a flimsy paper or single-layer tag is usually the first casualty. The step that separates a tag that lasts for years from one that tears off within a few trips is doubling the material around the strap hole and setting a rivet through both layers. A single layer concentrates every tug on one thin spot, while a reinforced, riveted hole spreads that force across the whole tag. Faux leather also never frays when cut, so you skip hemming completely. This beginner-friendly project makes four tags in about 40 minutes for $12, which makes it a perfect last-minute handmade gift for the traveler on your list.

What You'll Need

  • Materials (~$12 total):
  • 1 sheet of 9x12-inch faux leather or heavy vinyl, ~$5
  • 4 sets of 3/8-inch double-cap rivets or snap fasteners, ~$3
  • 4 pieces of 1/2-inch-wide faux leather cord or ribbon, 10 inches each, ~$2
  • Clear business card sleeves or printed paper cards, ~$2
  • Tools (likely on hand):
  • Sharp scissors or a rotary cutter
  • Ruler and pencil
  • 1/8-inch hole punch or a hammer with a nail
  • Hammer and a scrap of wood to work on
  • Fine-tip permanent marker for stamping or lettering

How to Do It

  1. Measure and mark eight rectangles, 2.5 by 4 inches, on the back of the faux leather. Two layers per tag give the strap hole the strength it needs, so you always cut twice as many pieces as tags.
  2. Cut along your lines with sharp scissors, rounding the corners slightly. Rounded corners snag less on bags and won't curl or peel up over time.
  3. Write or stamp the name on the front of four pieces using a permanent marker. Do it before assembly, because lettering on a flat, unassembled piece is far easier to keep neat and straight.
  4. Punch a hole near the top edge of each piece, about 1/2 inch from the edge. Stack each front piece on its backing and punch both at once so the holes line up perfectly.
  5. Cut a window into each backing piece, or glue a clear card sleeve on it, to hold a contact card. A removable card lets you update phone numbers without remaking the tag.
  6. Set the rivet through both layers' holes, then hammer it on a scrap of wood. Hammering on wood prevents dents in your table and makes the rivet cap seat flat and tight.
  7. Loop the cord through the hole and knot it, or fold it and pull the ends through. Tug firmly to test; a secure loop means the tag won't slide off the handle.
  8. Test by tugging the tag hard in several directions. If the rivet wiggles, tap it once more. Fixing it now beats losing a tag at the baggage claim.
DESIGNER TIP

Professional leatherworkers burnish and seal cut edges so they never look raw. On faux leather, a quick pass with a lit lighter held at a safe distance, or a dab of clear nail polish along the edge, seals fibers and gives that finished, stitched-in look. Test on a scrap first to find the right distance.


Related Content

DIY Projects

22 December 2026

Post

Dollar Store Tinsel Tree: The Cone Base That Stands

Turn a $1 foam cone and dollar-store tinsel into a glittery tabletop Christmas tree for under $8. A weighted base keeps it from tipping. Thrifty Tuesday!...

DIY Projects

21 December 2026

Post

Sock Draft Snakes: The Fill Weight That Seals Gaps

Turn old socks and rice into a draft-blocking door snake for about $3. Filling it to the right weight is what keeps it hugging the floor. Easy Monday upcycle!...

DIY Projects

20 December 2026

Post

Make Citrus Sugar Scrub Jars in 30 Minutes for $14

Skip the $20 spa-aisle jars! Mix sugar, oil, and zest into silky citrus scrubs in 30 minutes for $14. Gift-ready, beginner-easy, and smells like sunshine....

DIY Projects

19 December 2026

Post

Make a Stovetop Potpourri Jar Kit in 30 Minutes for $14

Fill your home with real holiday scent! Layer dried citrus, cranberries, and spices into gift-ready jars in 30 minutes for $14. No candles, no fuss....

DIY Projects

18 December 2026

Post

Make a Wooden Bottle Gift Crate in 2 Hours for $22

Gift a bottle in a handmade pine crate with sliding lid! Build it in 2 hours for $22 and make your holiday present look boutique. Beginner friendly and fast....

DIY Projects

17 December 2026

Post

Make Pine Cone Fire Logs in 1 Hour for $12

Turn dryer lint-free scraps into cozy fire-starting magic! Make wax-and-sawdust log rounds in an hour for $12 and light winter fires with zero frustration....

DIY Projects

16 December 2026

Post

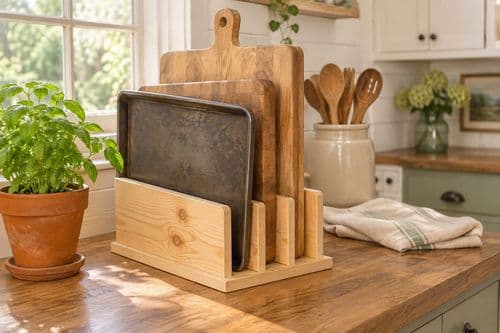
Wooden Cutting Board Stand: The Slot Width That Holds

Build a pine cutting board and baking sheet stand in an afternoon for about $15. The slot width is what keeps boards upright instead of toppling over....

DIY Projects

16 December 2026

Post

Make Beeswax Candle Tins in 1 Hour for $18

Pour your own travel candle tins in an hour for $18. Wick centering and a slow cool keep them burning clean, and they're gift-ready for the holidays....

DIY Projects

14 December 2026

Post

Cork Bulletin Board: Why Edge Glue Beats Center Glue

Turn old wine corks and a thrifted frame into a bold pin-up board for about $12. Gluing the edges first keeps the corks from popping loose....

DIY Projects

14 December 2026

Post

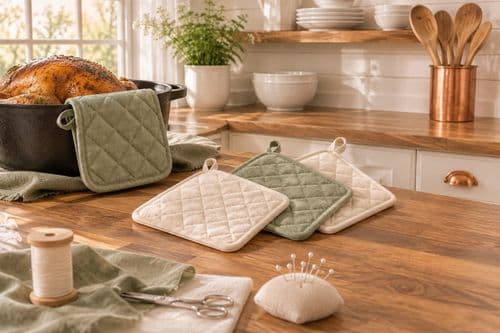
Sew Fabric Pot Holders in 1 Hour for $12

Burned fingers are so last year! Sew insulated pot holders with heat-safe batting in about an hour for $12 and handle holiday roasts like a pro....

DIY Projects

13 December 2026

Post

Make a Wooden Ornament Hanger Rack in 2 Hours for $22

Tangled ornament hooks ruin holiday mornings. Build a slim pine hanger rack with dowel pegs in 2 hours for $22 and finally hang every ornament in order....

DIY Projects

12 December 2026

Post

Make Natural Wood Bowl Dough Rising Cover in 1 Hour for $14

Bake-day hack! Sew a waxed-lined cotton bread proofing cover in an hour for $14 and keep holiday dough from drying out into a crusty, flat-risen letdown....

DIY Projects

10 December 2026

Post

Make Gingerbread Scented Play Dough in 30 Minutes for $8

Mix up soft, spice-scented gingerbread play dough in 30 minutes for $8. Cozy, kid-safe, and the perfect rainy December afternoon rescue. Squish away!...

DIY Projects

09 December 2026

Post

Make Beeswax Citrus Pomander Balls in 1 Hour for $12

Studded oranges that smell like the holidays and last for years? Make clove pomander balls in an hour for $12. Sticky fingers, big payoff....

DIY Projects

03 December 2026

Post

Side Table to Pet Feeder: The Bowl Rim Cutout

Turn a thrifted side table into a pet feeding station for about $25. Cutting the hole smaller than the bowl rim keeps bowls from sinking or sliding. (158 chars)...
Terms and ConditionsDo Not Sell or Share My Personal InformationPrivacy PolicyPrivacy NoticeAccessibility NoticeUnsubscribe
Copyright © 2026 DIY HomeBoost