Silent Doorbell: The Touch-the-Wires Test Tells You
A doorbell has three possible failure points, and guessing which one is broken wastes time — one simple test with the button's two wires tells you immediately whether the problem is even at the button at all.
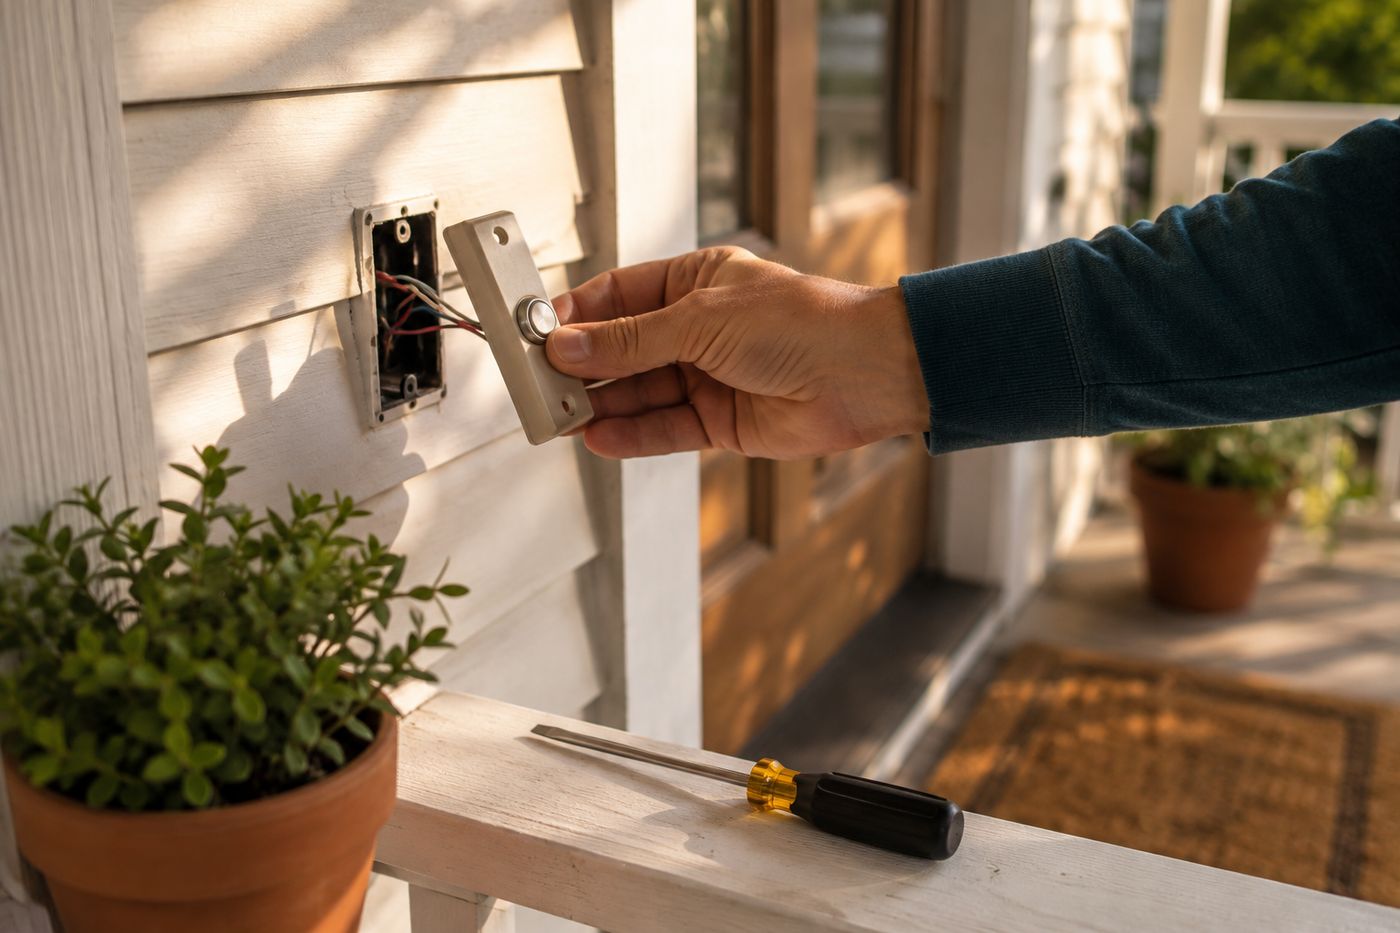
A doorbell system has exactly three components that can fail — the button, the chime unit, or the transformer — and troubleshooting all three at once wastes time on parts that were never the problem. The single test that actually narrows this down fast is touching the button's two disconnected wires directly together: if the chime rings, the button itself is the faulty part, since you've just proven the rest of the system works fine without it. If nothing happens when the wires touch, the button is innocent and the problem lives further down the line, in the chime mechanism or the transformer instead. That one test eliminates an entire category of possible causes in seconds, which is why it's worth doing first rather than jumping straight to replacing a part that might not be the issue at all. Since low voltage runs through this whole system, testing it directly like this is safe. Most doorbell failures turn out to be the button anyway, and the whole fix — testing, cleaning corrosion, or swapping a cheap replacement button — costs about $10 and takes roughly 20 minutes.
What You'll Need
- Screwdriver, matching the button plate screws
- Fine sandpaper, for cleaning corroded wire ends
- Replacement doorbell button (if needed) — about $6-8
- Fresh batteries (if using a wireless system) — about $4
- Soft brush or cloth, for cleaning dust from the chime mechanism
- Multimeter (optional, only needed if testing the transformer)
How to Do It
- Check whether your doorbell is wireless first — if so, simply replace the batteries in both the button and the chime, and confirm they're still paired, before doing any further troubleshooting.
- Remove the two screws holding the button plate and pull it away from the wall, exposing the two wires behind it.
- Unscrew the two wires from the button terminals, keeping track of which wire came from which terminal.
- Touch the two bare wire ends together directly — if the chime rings, the button itself is faulty and everything else in the system is working fine; if nothing happens, move on to checking the chime unit and transformer instead.
- Sand any visibly corroded or discolored wire ends lightly with fine sandpaper before reconnecting them to a new button, since corrosion alone can prevent a good connection even with fresh hardware.
- Connect the wires to a new button if that's what the wire test pointed to, then reattach the plate to the wall.
- Remove the chime unit's cover if the button tested fine, and look for stuck plungers or heavy dust buildup around the striker bars, gently cleaning and freeing anything that looks gummed up.
- Test the transformer with a multimeter, usually located near the electrical panel or in the basement, only if neither the button nor the chime turned out to be the problem — this is the least common cause but worth checking last.
Electricians who service doorbell systems regularly often recommend swapping out an original doorbell button preemptively when it's more than 10-15 years old, even if it's still technically working, because the internal contacts wear out gradually and tend to fail during exactly the moments — a package delivery, a guest arriving — when a missed ring actually matters. A proactive swap on an aging button avoids that inconvenient failure timing entirely.