Repair Crumbling Concrete Steps for $22
A bonding agent, a bag of vinyl patcher, and 90 minutes — the crumbling step edge you've been ignoring is fixed before lunch
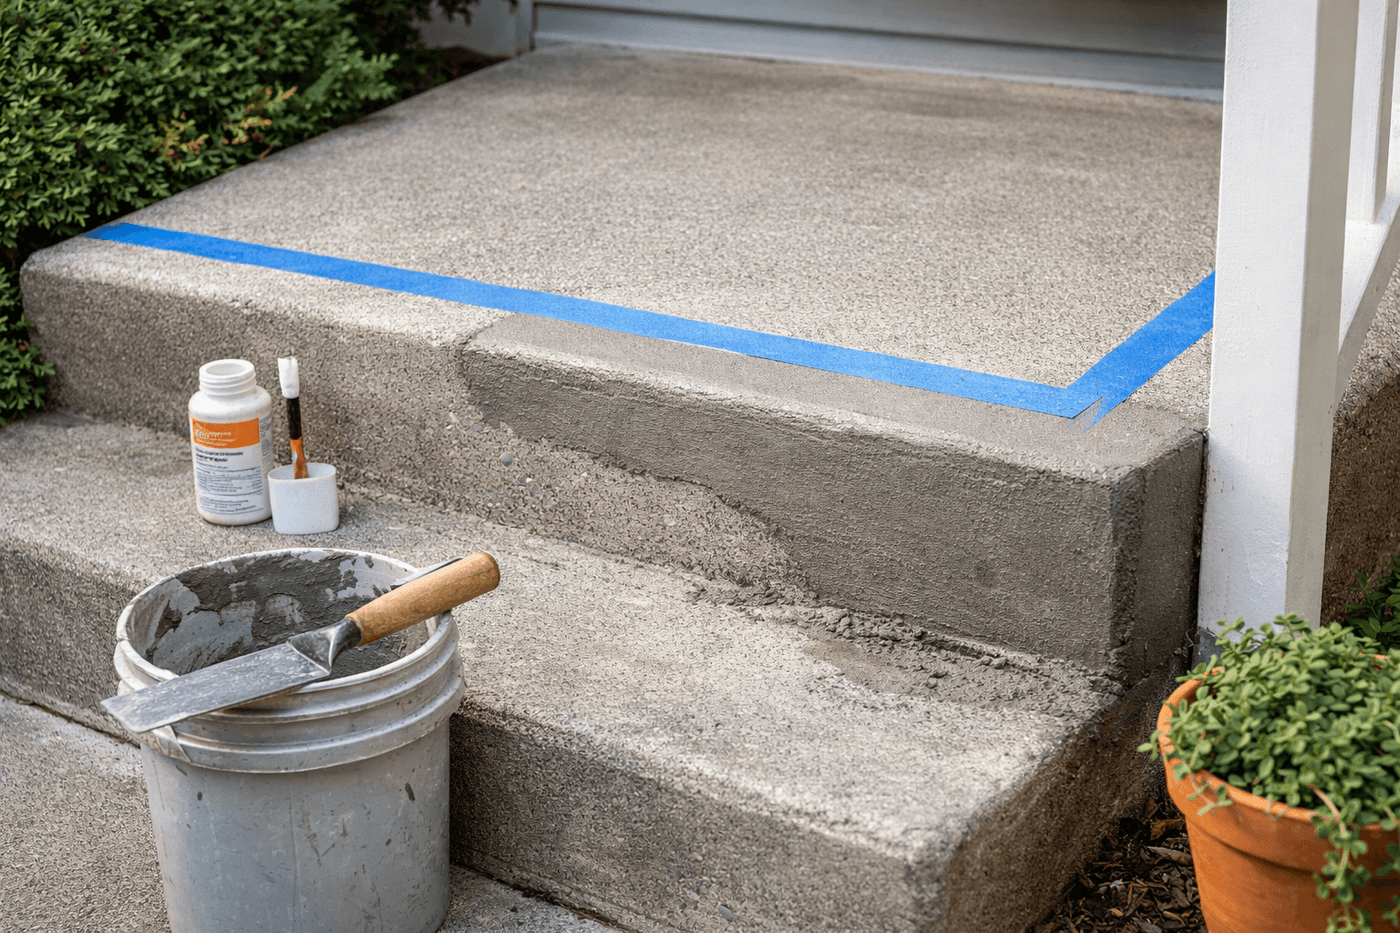
A crumbling concrete step edge occupies a specific category of home repair — the kind that is easy enough to ignore as purely cosmetic right up until the moment a guest nearly goes down on it and the ignoring becomes genuinely indefensible. The repair is straightforward, the materials cost $22, the whole job takes ninety minutes, and the finished patch cures overnight to a color match close enough that most people cannot identify which step was repaired without being told. Vinyl concrete patcher is specifically formulated to bond to existing concrete and flex slightly with freeze-thaw cycles rather than cracking away from the parent material the way standard mortar does — and the concrete bonding agent that goes on first is the detail that makes that bond permanent rather than temporary. Two products, ninety minutes, and a crumbling step that has been a liability and an eyesore becomes structurally sound and visually clean for a repair cost that is a small fraction of what a masonry contractor would charge for the same result.
What You Need
- Vinyl concrete patcher, 10 lb bag — not standard mortar mix; vinyl patcher contains polymer additives that give the cured repair flexibility through freeze-thaw cycles, which is why vinyl patches stay bonded where standard mortar repairs consistently fail by the second winter (~$12–15)
- Concrete bonding agent — brushed onto the prepared repair surface before applying patcher; the single most important product in the entire repair and the one most DIYers skip, which is exactly why most DIY concrete repairs fail within a season (~$7–10 for a bottle that handles multiple repairs)
- Margin trowel — for pressing patcher firmly into the repair area and shaping the edge to match the original step profile; a margin trowel's straight edge and pointed tip give far more control over edge shaping than a standard flat trowel (~$8–12)
- Stiff bristle brush — for scrubbing loose concrete and debris from the repair area during prep, and for applying the bonding agent evenly across the damaged surface
- Wire brush or cold chisel and hammer — for removing any remaining loose or delaminating concrete around the repair edges; patch compound applied over loose concrete fails at the loose layer rather than bonding to sound material beneath it
- Mixing bucket and stir stick — for mixing the vinyl patcher to the correct stiff consistency; a margin trowel works as the stir stick for small batches
- Painter's tape — for masking clean step edges adjacent to the repair area to produce sharp, defined patch boundaries
- Damp sponge or brush — for the final surface smoothing pass that blends the patch texture into the surrounding concrete
- Safety glasses and work gloves — concrete products are alkaline and cause skin and eye irritation on contact
How to Fix It
- Remove all loose, crumbling, and delaminating concrete from the repair area using a wire brush, cold chisel, or the corner of a margin trowel — tap the surrounding concrete with a coin or screwdriver handle and listen for a hollow sound that indicates delamination beneath a surface that looks intact. Patch compound applied over delaminated concrete bonds only to the delaminated layer, which then fails as a unit and takes the patch with it; sound concrete beneath the repair is the only foundation a lasting patch can bond to.
- Vacuum or brush all dust, debris, and loose particles from the repair area completely — concrete bonding agent applied over dusty or debris-covered surfaces bonds to the debris layer rather than the concrete, which produces exactly the failure mode you're trying to prevent. A clean, sound, dust-free concrete surface is the single most important preparation outcome in the entire repair process.
- Tape adjacent clean edges with painter's tape to define the repair boundary and protect step surfaces you don't want patcher on — apply tape firmly along any clean concrete edge that borders the damaged area, pressing the tape edge down completely so patcher cannot bleed underneath it during application.
- Apply concrete bonding agent to the entire prepared repair surface using a stiff brush, working it into every crevice, corner, and rough texture of the damaged area in a thorough, even coat. Allow the bonding agent to become tacky — typically ten to fifteen minutes in moderate temperatures — before applying any patcher. Applying patcher to wet bonding agent before it reaches the tacky stage significantly reduces the bond strength the agent is designed to provide; the tacky stage is when adhesion is at its peak.
- Mix the vinyl concrete patcher in your bucket according to package directions, adding water gradually until the mixture reaches a stiff, non-slumping consistency similar to firm peanut butter. Patcher mixed too wet is easier to work but shrinks significantly more as it cures, which creates the surface cracking that allows water infiltration and eventual freeze-thaw failure — mix it stiffer than feels comfortable and work it into place with deliberate pressure rather than relying on a fluid mix to fill the repair area.
- Press the mixed patcher firmly into the repair area in layers no deeper than half an inch at a time for deep repairs, working each layer with the margin trowel to eliminate air pockets and ensure full contact with the bonding agent-coated surfaces. Air pockets within the patch create weak points that crack under foot traffic and freeze-thaw pressure regardless of how well the surface appears cured.
- Shape the step edge profile with the straight edge of the margin trowel, matching the angle, radius, and surface plane of the original undamaged step as closely as possible. Work the trowel in smooth, confident strokes rather than repeated short passes — each trowel contact pulls the patcher surface slightly, and too many passes creates a rough, disturbed surface texture that is difficult to smooth later.
- Smooth the finished patch surface with a damp sponge or brush using light circular motions to blend the patch texture into the surrounding concrete and eliminate any trowel marks — this final pass is what produces the blended, natural-looking finish that makes the repair nearly invisible after curing. Remove painter's tape immediately after this smoothing pass while the patcher is still workable, pulling tape back at a shallow angle to produce clean, sharp repair edges. Keep foot traffic off the repair for at least twenty-four hours and avoid wetting the surface for seventy-two hours to allow full curing strength to develop.
Masonry contractors who specialize in concrete step restoration always apply a penetrating concrete sealer over the entire step surface — not just the repair area — within seven days of completing a patch repair. Sealing the full step surface serves two purposes: it slows moisture infiltration into both the new patch and the surrounding original concrete through the freeze-thaw cycles that cause most concrete step deterioration, and it produces a uniform surface sheen across the entire step that makes the repaired area visually indistinguishable from the original concrete even in raking light that would otherwise reveal slight color or texture differences between old and new material. A bottle of penetrating concrete sealer costs about $12 at any hardware store and protects the full investment of the repair through multiple seasons of winter weather.