Peeling Paint Fix: Spot Prime in 45 Minutes
Scrape, sand, prime, topcoat — and the garage trim that has been quietly embarrassing you for a year is fixed before lunch for $12.
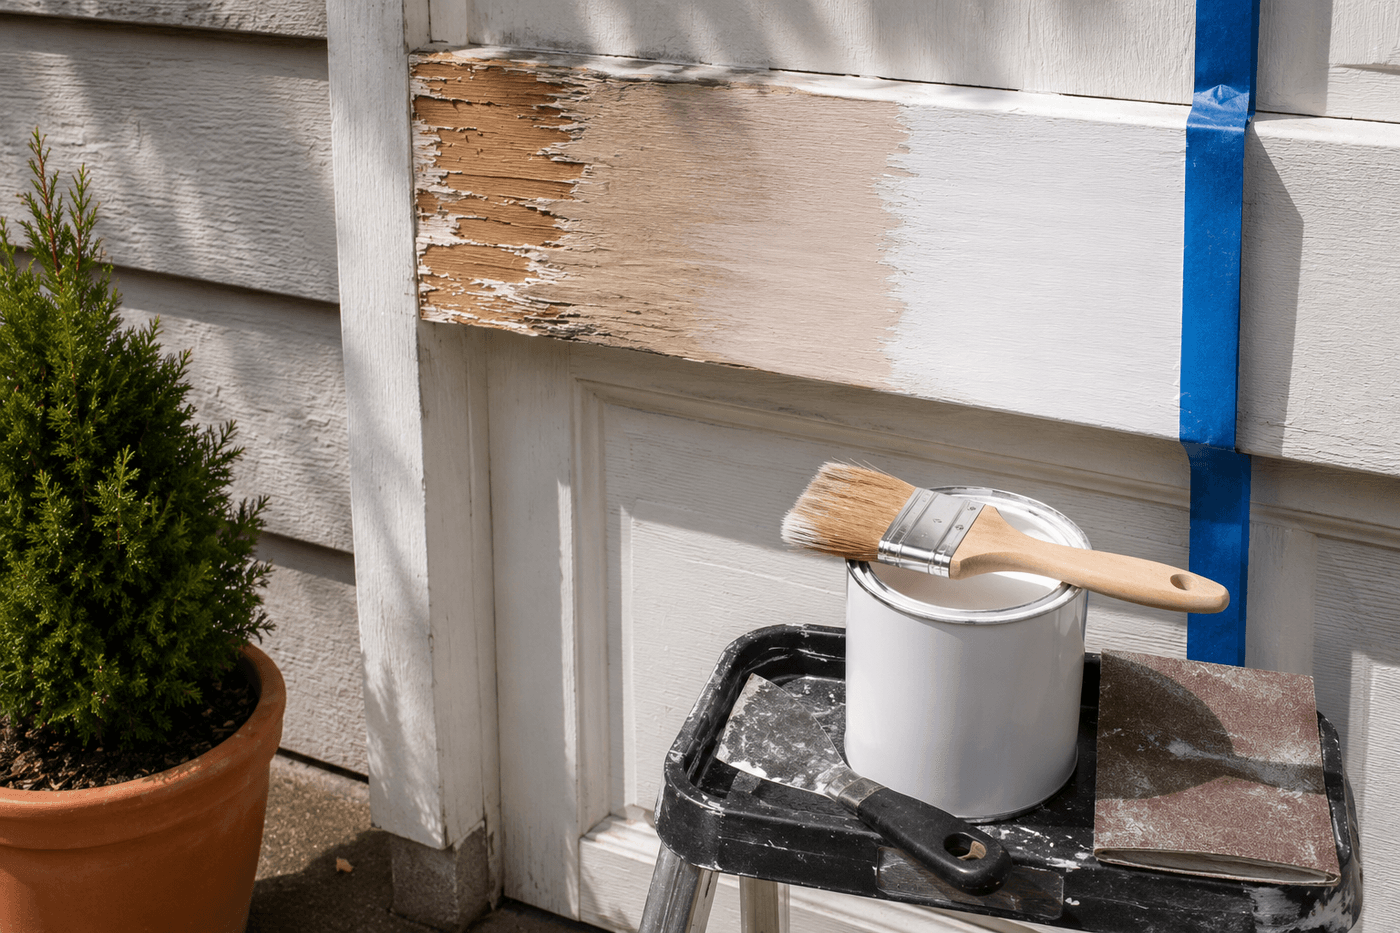
Peeling exterior paint has a particular talent for being simultaneously too small to feel like a project worth scheduling and too visible to stop noticing — the section of trim that catches your eye every time you pull into the driveway, that you have mentally noted a hundred times and actively addressed exactly zero times because the gap between noticing and doing feels larger than the repair actually is. The repair is scrape, sand, prime, topcoat — four steps, 45 minutes, $12 in primer and a touch-up brush if the matching paint is already in the garage. The priming step is the one that separates a repair that holds for years from one that starts peeling again before the next spring, and it is the step that most people skip during touch-up work because it adds a drying wait and feels like an unnecessary extra step on a small repair. It is not optional: bare wood exposed by paint failure is actively absorbing and releasing moisture with every weather cycle, and topcoat applied directly to unsealed bare wood sits on a surface that will never allow it to bond permanently. Primer seals the wood, provides the mechanical grip that topcoat requires to adhere durably, and is the complete explanation for why properly primed repairs last and improperly primed ones do not.
What You'll Need
- Paint scraper — a stiff-blade 3-inch or 4-inch scraper for flat surfaces; a pull scraper or detail scraper for curved profiles and narrow trim pieces; the blade must be sharp to remove paint cleanly rather than tearing and gouging the wood underneath (~$6–10 if not already owned)
- Sandpaper, 80- and 120-grit — 80-grit for leveling the scraped area and feathering the hard paint edges that would show as a ridge under the finished repair; 120-grit for the final smoothing pass before priming; a sanding block produces more consistent pressure than bare fingers on flat surfaces
- Exterior spot primer — Zinsser Bulls Eye 1-2-3 or similar water-based exterior primer in a small can; oil-based primers provide superior adhesion on bare wood but require mineral spirits cleanup; water-based primers are the practical choice for a 45-minute repair session (~$8–12 for a quart that covers many spot repairs)
- Matching exterior topcoat paint — the leftover paint from the original exterior paint job stored in the garage is the ideal match; if no paint is available, take a paint chip from an inconspicuous area to the hardware store for color matching; a pint covers multiple repairs (~$8–15 if purchasing new)
- Natural bristle or quality synthetic brush, 2-inch — for applying primer and topcoat to trim; foam brushes produce a smoother finish on flat trim surfaces but cannot reach into profiles and details that a bristle brush handles naturally
- Tack cloth or damp rag — for wiping all sanding dust from the repair area before priming; sanding dust between primer and bare wood significantly reduces adhesion quality
- Painter's tape — for protecting adjacent surfaces during priming and topcoat application on trim repairs near siding, windows, or other color boundaries
- Drop cloth — for protecting plantings, walkways, and decking surfaces below the repair area from paint drips and sanding dust
- Safety glasses and dust mask — for scraping and sanding; older exterior paint on homes built before 1978 may contain lead and requires additional precautions including an N100 respirator and wet scraping to prevent dust generation
How to Fix It
- Assess the paint failure type before scraping — paint that peels in large sheets lifting cleanly from the wood indicates a moisture problem behind the paint film from interior humidity or bulk water intrusion that will cause the new repair to fail identically if the moisture source is not addressed first. Paint that peels in small areas with the paint film breaking rather than lifting cleanly from the substrate is surface failure from UV degradation, poor original adhesion, or inadequate surface prep at the time of original painting — and this type responds well to spot repair without addressing a moisture source.
- Conduct a full exterior walk-around with the scraper in hand before starting any repair — tap gently on suspect areas with a knuckle and listen for a hollow sound that indicates paint that is delaminated from the wood but has not yet visibly bubbled or peeled, press on any slightly raised paint surface to feel for the give that indicates loosely bonded paint, and mark every area that needs repair with a piece of tape. Addressing all failing areas in a single session is significantly more efficient than the alternative of returning to the same areas repeatedly as new failures become visible.
- Scrape every loose and bubbling paint section firmly, working the scraper at a low angle to the surface and pushing rather than pulling where possible — pushing the scraper at a 20–30 degree angle to the paint surface removes loose paint more cleanly than pulling, which tends to dig the blade tip into the wood underneath. Continue scraping until every paint edge surrounding the bare area is firmly adhered with no flex or give when pressed with a thumbnail; paint that feels firm to the touch but lifts with thumbnail pressure will peel again within one season and should be removed now.
- Sand the scraped area with 80-grit sandpaper to accomplish two things simultaneously — smoothing the bare wood surface to remove raised grain and tool marks from scraping, and feathering the surrounding paint edges so they slope gradually from full paint thickness to bare wood rather than presenting as an abrupt cliff edge. An unfeathered paint edge creates a visible ridge under the finished repair that catches light and announces the patch from across the yard; a properly feathered edge blends invisibly under primer and topcoat. Follow with 120-grit for the final smoothing pass.
- Wipe all sanding dust from the repair area with a tack cloth or slightly damp rag and allow to dry completely before priming — sanding dust sitting on bare wood when primer is applied creates a weak interface layer between the wood surface and the primer film that reduces adhesion and is the direct cause of primer that appears to bond initially but releases from the substrate within one or two weather cycles.
- Apply exterior primer to the full bare wood area plus approximately 1 inch of overlap onto the surrounding intact paint on all sides — the overlap onto intact paint is what seals the feathered paint edge and prevents moisture from migrating under the repair from the edges. Apply in smooth strokes following the wood grain direction, loading the brush moderately rather than heavily to prevent runs on vertical surfaces, and confirm complete coverage of every area of bare wood before moving to the drying step.
- Allow the primer to dry completely per the product label — typically 30–60 minutes for water-based exterior primers in warm, dry conditions but potentially longer in cool or humid weather. Do not estimate dryness by touch alone on a repaired surface; primer that feels dry to a light touch may still be soft enough to be disturbed by brush strokes during topcoat application, which drags the primer surface and creates texture variation that shows through the finished paint. Confirm dry time by checking the product label and accounting for ambient temperature and humidity.
- Apply the matching exterior topcoat in one or two thin coats rather than one heavy coat — thin coats self-level and dry to a smoother finish that matches surrounding aged paint more closely than thick coats, which dry to a slightly raised surface texture that catches light differently from the surrounding paint and makes the repair visible. Blend the topcoat strokes outward from the repair center into the surrounding intact paint in the final brush pass to eliminate the boundary between new and existing paint as completely as possible.
Exterior painting contractors and restoration specialists who refinish historic and high-end residential properties use one topcoat color-matching technique that makes spot repairs virtually invisible even when the existing exterior paint has faded significantly from its original color — which is the specific challenge that makes most DIY touch-up repairs visible: have the touch-up paint tinted to approximately 5–10% lighter than the matched color rather than to the exact current paint chip color. Freshly applied exterior paint, regardless of how precisely it is matched to the existing color, dries slightly darker and more saturated than aged exterior paint that has lost a portion of its pigment density to UV exposure over years of weathering. Touch-up paint mixed to the exact current aged color reads as slightly darker than the surrounding surface once dry, which is more visually obvious than a slight lightness would be because the eye reads darker as a shadow or stain rather than as a patch. Exterior painting professionals consistently request this slight lightening adjustment when ordering touch-up paint for aged surfaces — and homeowners who make the same request at the paint counter produce repairs that age into perfect invisibility within one season rather than remaining a visible lighter or darker patch for the lifetime of the repair.