Grilling Station Setup: Organized for $40
One focused hour, a magnetic tool strip, a rolling cart, and a degreaser — and every cookout this summer starts on time instead of with a ten-minute tool hunt.
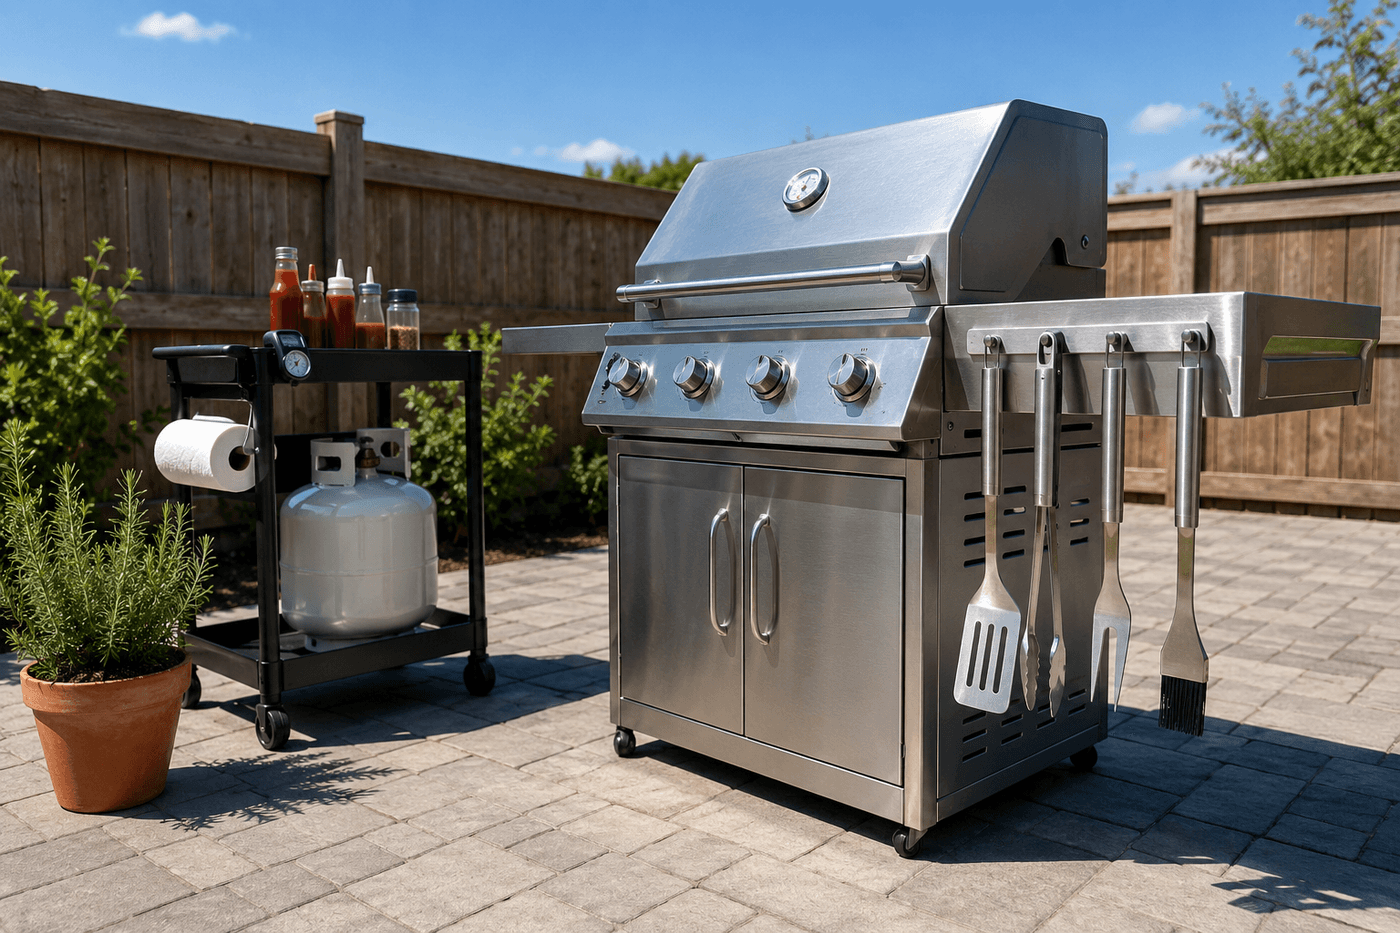
Every cookout that starts with a tool hunt, an empty propane tank, or ten minutes of wiping down surfaces before anything can be set on them is a cookout that begins with friction — and friction at the start of something that is supposed to be enjoyable has a way of coloring the whole experience. A grilling station that is cleaned, organized into dedicated zones, and stocked with visible supplies that tell you at a glance whether you need to restock before guests arrive eliminates every one of those friction points permanently rather than resolving them one at a time each cookout. The investment is about $40 in a magnetic tool strip, a small rolling cart, and any tools or supply containers needed to complete the system — plus one focused hour of degreasing, wiping, sorting, and mounting that produces a setup you will benefit from at every single cookout for the rest of the season. The zone concept is what makes the difference between organized and merely tidy: tools in a dedicated reachable zone, condiments and supplies in a dedicated accessible zone, and fuel reserves in a dedicated visible zone where checking stock before a cookout takes three seconds rather than a moment of discovery when it is too late to do anything about it.
What You'll Need
- Magnetic tool strip — 12–18 inch stainless or powder-coated magnetic bar; mounts to the grill side shelf, an adjacent fence post, or a wall-mounted bracket within arm's reach of the cooking surface; holds spatulas, tongs, grill brush, and thermometer in a visible, single-reach configuration (~$10–15)
- Small rolling cart or side table with shelf — a 2-tier rolling utility cart or a small outdoor side table with an undershelf; holds spices, sauce bottles, paper towels, and serving platters on the top surface and fuel reserves, charcoal, or cleaning supplies on the lower shelf; rolling allows repositioning for different grilling configurations (~$15–25)
- Matching grilling tool set — if replacing a mismatched accumulation; a 3-piece stainless set (spatula, tongs, fork) provides all essential tools in a matching configuration that hangs cleanly on the magnetic strip without the visual chaos of tools from four different sources (~$12–18 for a quality set)
- Heavy-duty degreaser spray — Simple Green, Krud Kutter, or dedicated grill degreaser; the exterior surfaces of a grill station accumulate a combination of grease splatter, airborne cooking oil, and charcoal dust that standard all-purpose cleaner does not cut effectively (~$5–8)
- Grill brush and scraper — for cleaning the cooking grates as part of the initial deep clean session; replace if the existing brush has loose or worn bristles, which are a food safety concern on cooking surfaces (~$8–12 for a quality replacement)
- Microfiber cloths and paper towels — for the wipe-down phase; microfiber for surfaces, paper towels for degreaser application and initial grease removal before the microfiber pass
- Small waterproof storage containers or bins — for corralling loose items on the cart surface; a bin for spice packets, a bin for sauce bottles, and a container for single-use items like skewers and aluminum foil prevents the cart surface from becoming a flat accumulation zone within two cookouts (~$5–8 for a set of small bins)
- Propane gauge or tank weight scale — the specific tool that eliminates the surprise empty tank discovery; a magnetic propane level indicator or a simple kitchen scale confirms fuel level in 30 seconds before every cookout (~$5–10)
The Setup Sequence
- Clear the entire grilling area completely before cleaning anything — remove every item from every surface, including the grill side shelves, any adjacent table or cart, and the surrounding patio area within the cooking zone. Cleaning around accumulated items misses the heavily soiled areas that items were covering, and the full clear reveals the true scope of the grease and charcoal accumulation that builds invisibly between cookouts.
- Clean the grill exterior and all station surfaces with heavy-duty degreaser — spray generously on the grill exterior panels, side shelves, and handle surfaces, allow the degreaser to dwell for the time specified on the product label (typically 2–5 minutes for heavy grease), then wipe thoroughly with paper towels followed by a microfiber cloth. The grill exterior accumulates cooking oil and grease splatter that bonds to the surface finish over multiple cookouts and requires a proper degreaser rather than a wipe with a wet cloth to remove fully.
- Clean the cooking grates with a grill brush while the grill is cold — a cold grate brush removes carbonized food residue more effectively than a hot grate brush for the initial deep clean, and confirms the brush condition before the season's first serious use. Replace the grill brush if bristles are loose, sparse, or bent in a way that prevents consistent grate contact; a worn grill brush is both ineffective and a food safety concern if metal bristles transfer to food.
- Sweep the patio area surrounding the grill station with particular attention to the area directly behind and beside the grill where charcoal dust, ash, and grease splatter accumulate in a radius that extends further than most grillers realize — the zone of active contamination around an outdoor grill typically extends 3–4 feet in every direction and produces a visibly different patio surface color compared to the surrounding clean area once it is identified and addressed.
- Mount the magnetic tool strip at the most accessible position relative to the cooking surface — the ideal position is within a single arm's reach of the primary cooking zone without requiring any movement away from the grill, which is the placement that actually produces the behavior change of returning tools to the strip after each use rather than setting them on the nearest available surface. Test the mounting position by standing at the grill and reaching naturally for the strip location before committing the mounting screws.
- Establish the three dedicated zones before returning any item to the station — the tool zone (magnetic strip within cooking reach), the supply zone (cart top surface with containers for spices, sauces, and single-use items), and the fuel and reserve zone (lower cart shelf or designated floor area with propane, charcoal, and lighter fluid in a visible, inventoriable arrangement). The zone boundaries do not need to be marked or labeled for adults, but the act of deliberately assigning each zone before filling it is what prevents the gradual zone collapse that turns a clean organized station back into a flat accumulation surface within three cookouts.
- Stock each zone with the items that belong there — hang matching tools on the magnetic strip in a consistent left-to-right order (spatula, tongs, fork, brush, thermometer is a natural functional sequence), fill the supply zone containers with the condiments and spices used at every cookout rather than the full contents of the pantry, and place fuel reserves in the designated zone with a propane gauge attached so stock level is visible without lifting the tank.
- Establish a pre-cookout 90-second inventory check as a standing habit — check propane level on the gauge, confirm tool zone is complete, confirm supply zone has the sauces and spices needed for the planned menu, and confirm paper towel roll is adequate. This 90-second check, done before the first guests arrive rather than after, is the specific habit that eliminates the surprise supply shortage that the previous system produced repeatedly — because it converts the discovery of a shortage from a problem that interrupts hosting into a routine check that produces a brief errand rather than a crisis.
Professional caterers and outdoor event chefs who set up temporary grilling stations for large-scale events consistently apply one station design principle that home grillers almost never implement and that produces the most significant improvement in cookout efficiency per dollar spent: place a second set of tongs at the supply zone cart rather than only at the grill tool strip. The single most common grilling workflow interruption is needing to handle raw protein, set the tongs down, reach for something at the supply zone, and then pick the raw-protein tongs back up — or worse, cross-contaminating by reaching for a supply item with the raw tongs. A designated second set of tongs at the supply zone that is never used for raw protein eliminates this workflow break entirely and is the specific tool addition that professional outdoor chefs identify as the highest-impact single equipment change for a home grilling station. The second tongs cost $8–12 and eliminate a food safety and workflow friction point that affects every single cookout, which makes it the most straightforward cost-benefit calculation in outdoor cooking equipment.