Disposal Leak Fix: Diagnose and Repair in 30 Minutes
Dry everything, run water, watch where it comes from — and the exact repair the disposal needs reveals itself in about thirty seconds.
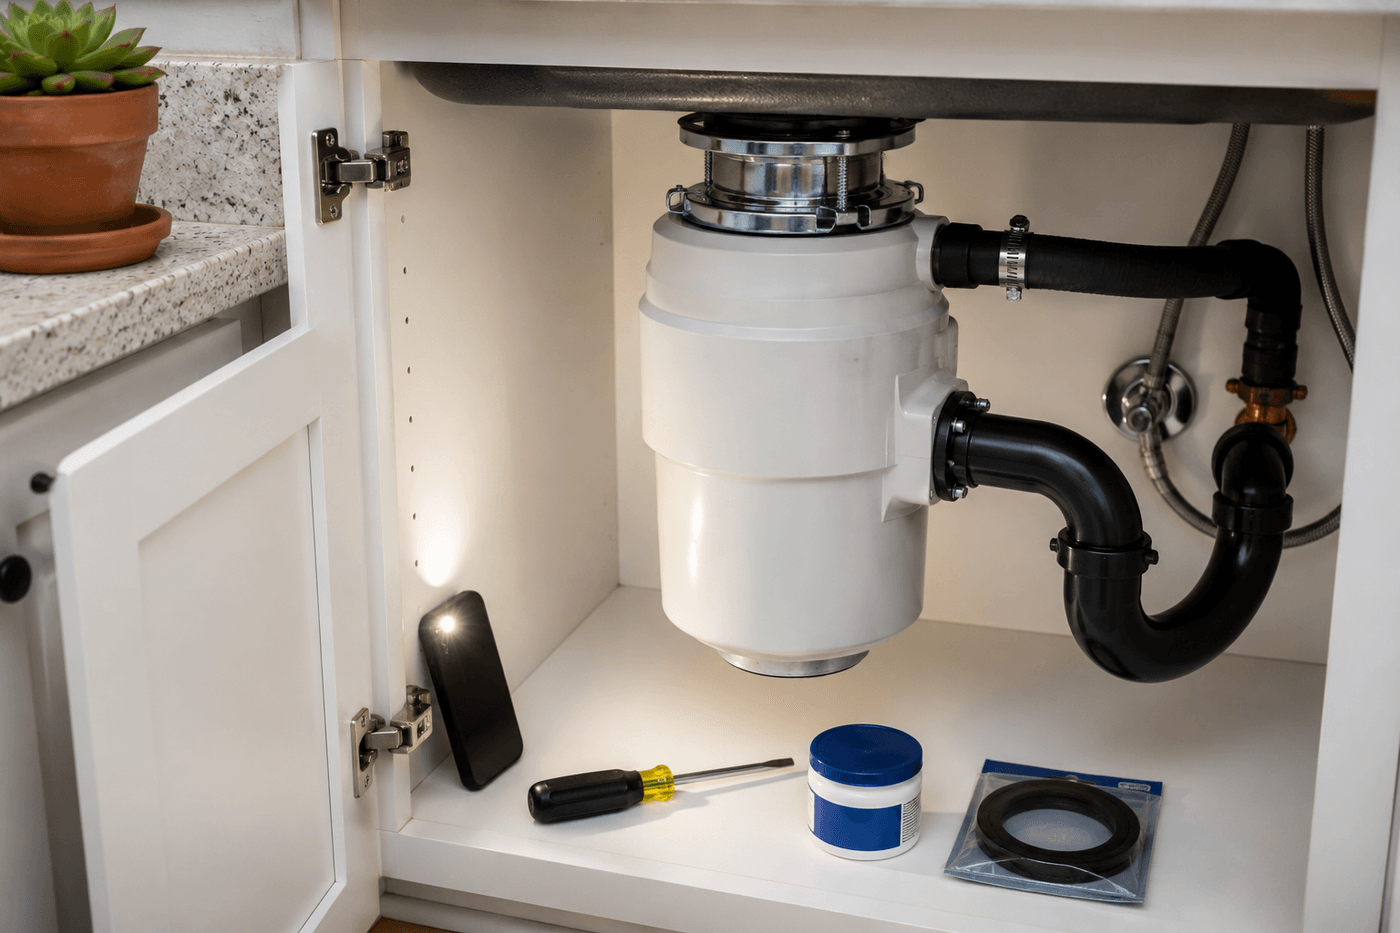
Water pooling under the kitchen sink is one of those discoveries that produces an immediate and disproportionate sense of dread — the mental image of mold, cabinet damage, and a plumber's invoice arriving simultaneously before a single cabinet door is opened. The reality is that the overwhelming majority of garbage disposal leaks originate at one of three completely accessible connection points that are fixable in 20–30 minutes with tools already in the house, and the diagnosis that tells you which connection is the source takes about thirty seconds of watching after the cabinet is dried out and water is run. A failed plumber's putty seal at the sink flange, a loose hose clamp at the dishwasher connection, or a failing gasket at the discharge pipe — these are the three causes that account for essentially every disposal leak that is not the disposal itself failing internally. Knowing which one you have before reaching for any tool is what makes the difference between a 30-minute repair and an hour of exploratory tightening that may or may not address the actual leak source.
What You'll Need
- Flashlight or phone torch — essential for seeing inside the cabinet clearly enough to locate the leak origin point; under-sink cabinet lighting is almost never adequate for diagnostic work
- Dry towels and paper towels — for drying every surface inside the cabinet completely before the diagnostic water run; a wet cabinet surface makes it impossible to identify a new leak from the existing moisture
- Flathead screwdriver — for tightening the hose clamp at the dishwasher drain connection; most disposal hose clamps use a slotted screw that a standard medium flathead tightens in seconds
- Phillips screwdriver — for the discharge pipe mounting bolts on most disposal models; confirm the bolt head type on your specific disposal before the repair begins
- Adjustable pliers or channel-lock pliers — for loosening and retightening the mounting ring that secures the disposal to the sink flange during a top-seal repair
- Plumber's putty — for resealing the sink flange if the top leak diagnosis is confirmed; a standard tub of plumber's putty is the complete repair material for flange seal failure (~$3–5 at any hardware store)
- Replacement rubber gasket for discharge pipe — a standard 7/8-inch rubber gasket fits most disposal discharge pipe connections; available at hardware stores for under $3 and is worth having on hand before the repair begins if the discharge pipe connection is the suspected leak source
- Replacement hose clamp — if the existing dishwasher drain hose clamp is corroded and cannot be tightened effectively; a standard #16 or #20 worm gear hose clamp fits most disposal dishwasher inlet connections (~$2–3)
- Bucket and towels — for catching water during the disconnection phase of a flange seal repair; the water remaining in the drain trap releases when the discharge pipe is disconnected
- Putty knife or plastic scraper — for removing old plumber's putty from the sink flange during a top-seal repair; old putty that has hardened must be fully removed before new putty is applied or the new seal will be uneven
How to Diagnose and Fix It
- Diagnose before touching any connection — clear everything from under the sink, dry every surface inside the cabinet completely with towels including the disposal body, all pipe connections, and the cabinet floor, then run water into the sink for 30–60 seconds while watching with a flashlight from inside the cabinet. The location where water first appears identifies the leak source with complete certainty: water appearing at the top of the disposal where it meets the sink means a failed flange seal; water at the side connections means a hose clamp or gasket issue; water appearing to drip from the bottom center of the disposal body means internal seal failure that requires unit replacement.
- Fix a dishwasher hose clamp leak — the simplest of the three repairable leaks — by locating the hose clamp where the dishwasher drain hose connects to the disposal inlet on the upper side of the unit, and tightening the clamp screw with a flathead screwdriver until the clamp band compresses the hose firmly against the inlet fitting. Tighten in small quarter-turn increments and dry the connection between each increment to confirm when tightening has resolved the leak, rather than overtightening a corroded clamp that splits the hose rather than sealing it. Replace the clamp entirely if it is visibly corroded, stripped, or will not tighten — a new clamp installs in three minutes and costs $2.
- Fix a discharge pipe gasket leak — water appearing at the side of the disposal where the large discharge pipe connects to the unit — by first attempting to tighten the two or three mounting bolts that secure the discharge pipe flange to the disposal body. If tightening the bolts does not resolve the leak, the rubber gasket inside the connection has degraded and needs replacement: loosen and remove the mounting bolts, pull the discharge pipe free from the disposal outlet, remove and discard the old gasket from the inside of the discharge pipe fitting, press the new gasket firmly into position, realign the discharge pipe with the disposal outlet, and reinstall and tighten the mounting bolts evenly in an alternating pattern to compress the gasket uniformly around the full connection circumference.
- Prepare for a flange seal repair — the most involved of the three repairable leaks — by turning off the disposal at the wall switch and unplugging it from the outlet under the sink before touching any mounting hardware. Place a bucket under the discharge pipe connection, disconnect the discharge pipe from the disposal body by removing its mounting bolts, and allow any residual water in the trap to drain into the bucket before proceeding with the disposal removal.
- Remove the disposal from the mounting assembly by rotating the unit counterclockwise approximately one-quarter turn — most disposals use a twist-lock mounting system where counterclockwise rotation disengages the unit from the mounting ring. Support the disposal body with one hand while rotating with the other; an unmounted disposal is significantly heavier than it appears and drops quickly when the twist-lock releases, which can damage the discharge pipe connection or injure the hand that is not supporting the unit.
- Access the sink flange by loosening the three mounting screws on the mounting ring that remained attached to the underside of the sink after the disposal was removed — loosening these screws reduces the clamping pressure on the flange and allows the flange to be pushed up through the sink drain opening from below. Remove all old plumber's putty from the underside of the flange and from the sink surface around the drain opening using a putty knife, cleaning until both surfaces are completely free of old putty residue.
- Reseal the flange by rolling fresh plumber's putty into a rope approximately ½-inch diameter and pressing it evenly around the underside of the flange rim before reinserting the flange into the sink drain opening from above. Press the flange firmly down into the opening, then go back under the sink and retighten the three mounting ring screws evenly — tightening each screw a small amount before moving to the next rather than fully tightening one before starting the others — until the flange is firmly seated and excess putty squeezes out around the flange edge at the sink surface. Wipe away the excess putty from above, reattach the disposal to the mounting ring with a clockwise quarter-turn, reconnect the discharge pipe, and run water to confirm the seal is complete before plugging the disposal back in.
- Confirm all repairs are complete by drying the cabinet interior thoroughly and running water for a full two minutes — longer than the initial diagnostic run — while watching every connection point with the flashlight. A leak that appears only after extended water flow was not visible during a short diagnostic run and should be caught during this confirmation step rather than discovered again after the cabinet is reloaded with cleaning supplies. Confirm the disposal operates correctly after any repair that involved removal and reinstallation before considering the repair fully complete.
Licensed plumbers who service residential kitchen plumbing consistently recommend one preventive practice that extends the life of all three repairable disposal connections significantly beyond what unmanaged connections achieve: add a quarterly under-sink inspection to the household maintenance calendar — open the cabinet, run water for 60 seconds, and check every connection point with a flashlight before any water appears on the cabinet floor. A disposal connection that is beginning to weep — producing a small amount of moisture at a connection point that has not yet developed into active dripping — is detectable by this inspection as a small water stain or mineral deposit ring around the connection that was not present at the previous inspection. Catching a weeping connection before it becomes an active leak allows a simple tightening or gasket replacement that takes five minutes rather than the more involved repair and cabinet drying-out process that an undetected leak requires after weeks of slow water damage. Plumbers who implement this inspection protocol with maintenance clients report a dramatic reduction in the under-sink cabinet water damage that accounts for a significant portion of residential kitchen repair costs — because the slow leak that causes cabinet floor swelling, mold growth, and eventual structural damage is always a leak that was detectable and addressable long before the visible damage appeared.