Descale a Clogged Shower Head in 10 Minutes for Free
White vinegar, a plastic bag, and an overnight soak — the shower head that dribbles and sprays sideways is restored to full pressure before the weekend
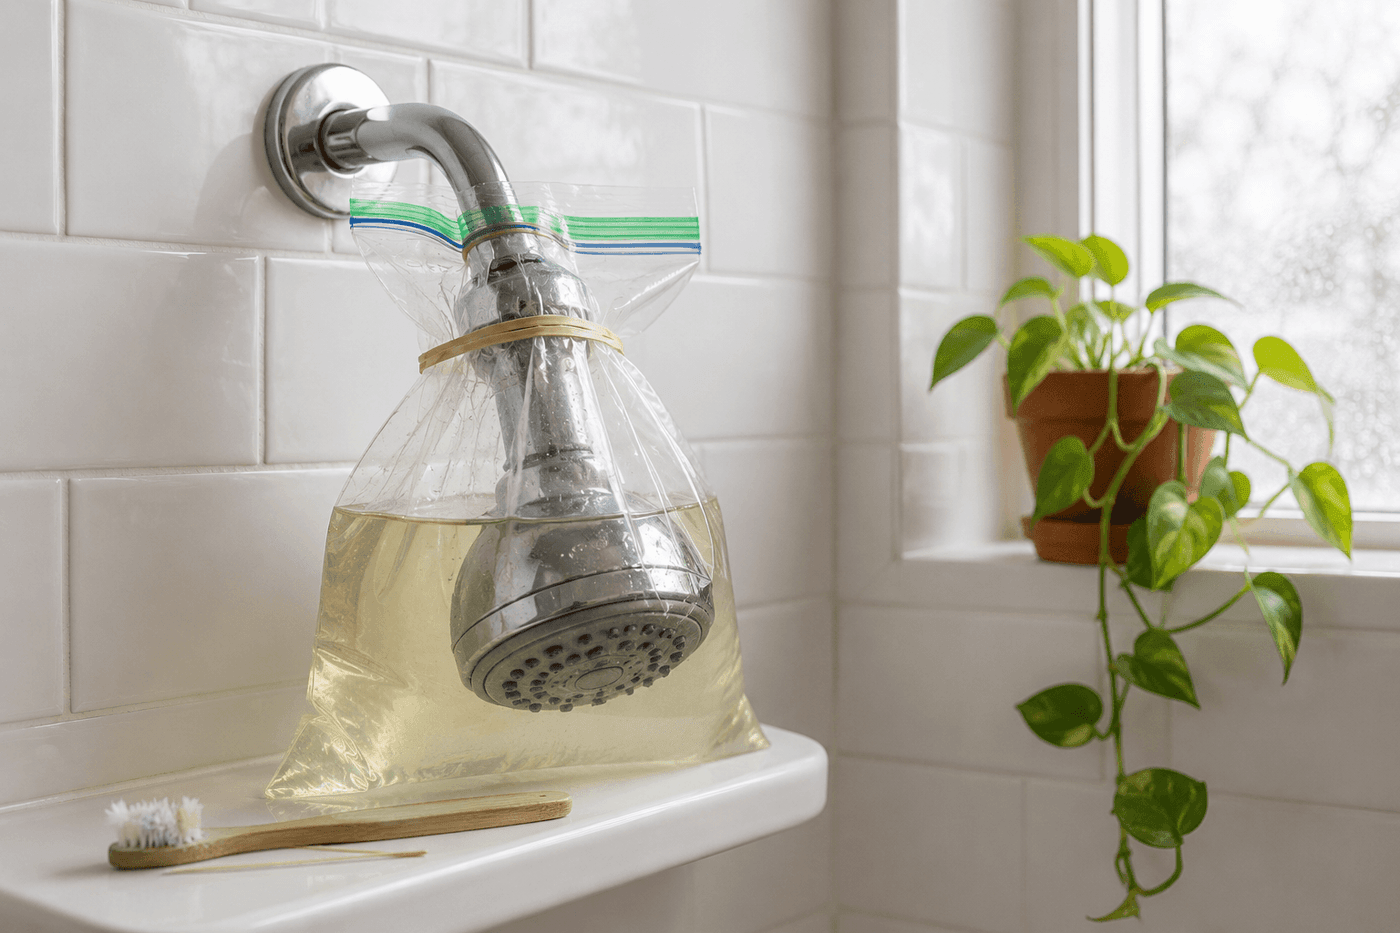
A shower head that sprays in three directions except the one you're standing in, dribbles where it used to flow, or delivers a fraction of its original pressure is not a shower head that needs replacing — it is a shower head that needs a bag of white vinegar and an overnight soak. Mineral deposits from hard water accumulate inside the nozzle holes over months and years of daily use, restricting flow until the pressure that should reach you is diverted into spray patterns that serve no one. The acetic acid in white vinegar dissolves calcium and magnesium mineral deposits completely in two to four hours of contact, and the ten minutes of active work required — removing the head, setting up the soak, scrubbing the nozzles after — is all that separates you from the shower performance you had when the fixture was new. This works on shower heads that have been declining for months and produces a result dramatic enough that it consistently catches people off guard how different their shower feels the morning after.
What You Need
- White distilled vinegar — enough to fully submerge the shower head in a standard zip-lock bag; typically one to two cups depending on shower head size. Do not substitute apple cider vinegar, which leaves a faint residue on shower head finishes and introduces sugars that can promote bacterial growth in the nozzle channels (~$3 for a large bottle)
- Zip-lock plastic bag, gallon size — large enough to contain the full shower head face submerged in vinegar; for a shower head that cannot be removed, the bag is filled with vinegar and secured around the shower arm with the head submerged inside it
- Rubber bands, qty 2–3 — for securing the vinegar-filled bag to the shower arm when cleaning in-place rather than removing the head; the bands need to hold the bag firmly enough that the vinegar stays in contact with the full nozzle face throughout the soak period
- Adjustable wrench — for removing the shower head if it requires more than hand-turning to unscrew; wrap the shower arm connection in a cloth before applying the wrench to protect the finish from jaw marks
- Old toothbrush — for scrubbing the nozzle face after soaking to remove the loosened mineral deposits that the vinegar has dissolved but that remain in the nozzle holes until physically cleared
- Toothpick or straightened paperclip — for clearing individual nozzle holes that remain blocked after the toothbrush scrubbing; the tip size of a toothpick is nearly identical to the diameter of a standard shower head nozzle hole and clears them without enlarging or damaging the opening
- Plumber's tape, optional — for rewrapping the shower arm threads before reinstalling the shower head if the original tape is worn or absent; fresh plumber's tape on clean threads prevents dripping at the connection and takes thirty seconds to apply (~$2–3 for a roll)
How to Do It
- Assess whether to remove the shower head or clean it in-place before gathering any supplies — a shower head with a clearly visible connection at the shower arm that turns freely by hand is faster and more thoroughly cleaned after removal, because the full nozzle face and the interior screen filter are both accessible for scrubbing. A shower head whose connection is corroded, very tight, or finished in a material that wrench jaws might damage is better cleaned in-place with the bag-and-rubber-band method, which requires no tools and no risk of thread damage or finish marking.
- Remove the shower head if proceeding with the removal method — wrap a cloth around the connection point before applying the adjustable wrench to protect the finish, turn counterclockwise until the head unscrews completely from the shower arm threads, and set it aside. Examine the shower arm threads for old plumber's tape residue and wipe them clean with a cloth before reassembly; reinstalling over deteriorated old tape can cause a slow drip at the connection that appears fine for the first few days and then develops into a persistent leak.
- Check the interior screen filter on a removed shower head before soaking — most shower heads have a small mesh screen just inside the connection opening that catches debris from the water supply and becomes clogged independently of the nozzle mineral buildup. Remove this screen by pulling it out with needle-nose pliers or a toothpick, rinse it under running water, and soak it alongside the head rather than reinstalling a partially clogged screen over freshly cleaned nozzles that will immediately lose pressure through the screen restriction.
- Submerge the shower head completely in white vinegar in the zip-lock bag — pour enough vinegar to cover the entire nozzle face with the head lying face-down in the bag, seal the bag, and set it aside in a place where it can remain undisturbed for the soak period. For the in-place method, fill the bag with vinegar, hold it up around the shower arm with the head submerged inside, and secure three rubber bands around the arm above the bag opening to hold it in position.
- Soak for a minimum of two hours for light to moderate mineral buildup and overnight for a shower head that has never been cleaned or that has been declining noticeably for more than six months. The vinegar contact time is what determines how completely the mineral deposits dissolve — a two-hour soak loosens most deposits enough for toothbrush scrubbing to remove them, while an overnight soak on heavily scaled nozzles dissolves the deposits so completely that the toothbrush pass removes almost nothing because the vinegar has already done the work.
- Scrub the nozzle face thoroughly with the toothbrush after removing from the vinegar — work the bristles across the full nozzle face in circular motions, paying particular attention to any nozzle hole that still appears discolored or visibly restricted after the soak. The loosened mineral scale should come away readily under toothbrush pressure; deposits that resist after an overnight soak are rare and typically respond to a second targeted application of undiluted vinegar held directly on the resistant area for ten additional minutes before scrubbing again.
- Clear any individual nozzle holes that remain blocked after scrubbing by inserting a toothpick tip gently into each hole and rotating it slightly — the toothpick dislodges the last fragment of mineral deposit without enlarging the hole or damaging the nozzle material. Work methodically across the full nozzle face rather than randomly, confirming each hole is open to a toothpick tip before moving to the next; a shower head with two or three remaining blocked nozzles will still produce uneven spray patterns even after the majority are cleared.
- Reinstall the shower head after rinsing it thoroughly under running water — apply fresh plumber's tape to the shower arm threads in the clockwise direction if the original tape is worn or absent, hand-tighten the shower head until snug, then apply one additional quarter turn with the cloth-wrapped wrench. Run the shower on hot for two to three minutes before your first use to flush any remaining dissolved mineral fragments and loose vinegar residue through the newly cleared nozzles and down the drain.
Plumbers who service residential shower fixtures always check the flow restrictor inside the shower head connection during descaling visits — a small plastic disc with a central hole that is required by water conservation regulations in most jurisdictions, and that accumulates mineral deposits on its own independent of the nozzle scaling that is the more visible pressure problem. The flow restrictor can be removed with a toothpick or small flathead screwdriver and soaked alongside the shower head, and in some cases removed entirely on older fixtures without creating a code violation, which produces a noticeable additional pressure improvement beyond what nozzle descaling alone achieves. Knowing the restrictor exists and addressing it during the descaling session rather than only cleaning the visible nozzle face is the step that most consistently produces the full pressure restoration that makes a descaled shower head feel genuinely like a new fixture.