Deep Clean Ceiling Fans in 15 Minutes for Free
An old pillowcase, a microfiber cloth, and fifteen minutes — the ceiling fans you've been avoiding all winter are clean and summer-ready before lunch
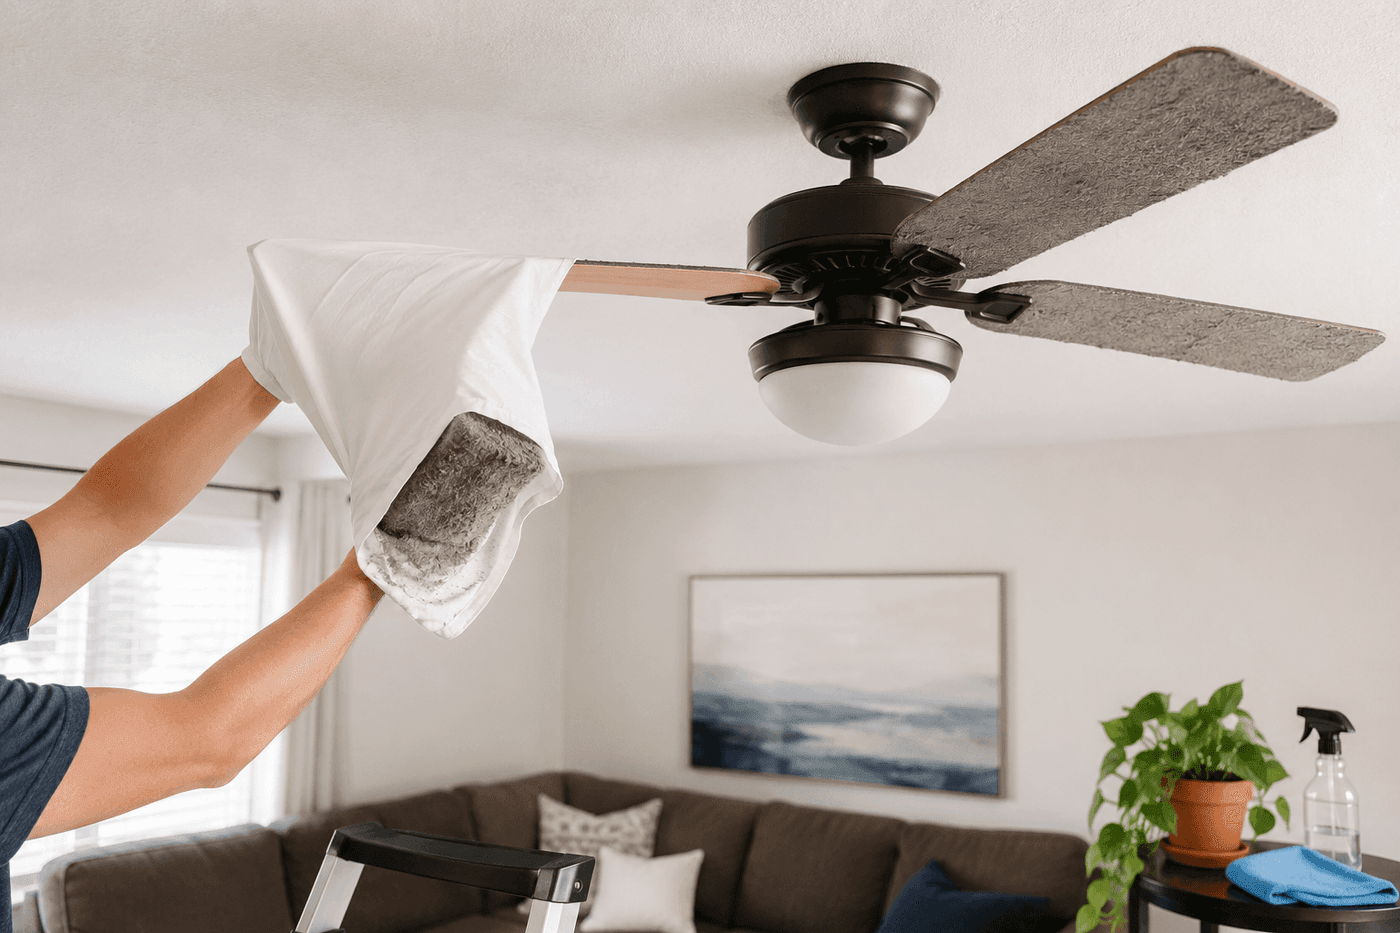
Every spring there is a moment — usually when someone turns on a ceiling fan for the first time after months of dormancy — where a winter's worth of accumulated dust launches off the blades in a visible cloud and settles on every surface in the room below. The pillowcase method exists specifically to prevent that moment, and it is so elegantly simple that it feels like a trick: slip an old pillowcase over each blade, pull it back toward you along the blade length, and the entire accumulation of dust that would otherwise rain down stays trapped inside the fabric. The full fan cleaning that follows — motor housing, light fixtures, surrounding ceiling — takes fifteen minutes per fan, costs nothing, and means the first spin of summer air circulation happens without the allergen explosion that skipping this step reliably delivers. Twice a year, fifteen minutes, and ceiling fans serve their function without advertising how long it has been since anyone looked up at them.
What You Need
- Old pillowcase — any standard pillowcase that fits over ceiling fan blades, which are typically 4 to 6 inches wide; a pillowcase with a tighter weave captures finer dust particles more completely than a loose-weave fabric that allows fine dust to escape through the fabric during the pulling motion
- Microfiber cloths, qty 2–3 — one dry for the initial motor housing and blade bracket wipe, one slightly damp with all-purpose cleaner for any sticky grime or grease accumulation on the housing or light fixture surfaces
- All-purpose cleaner in a spray bottle — applied to the cloth rather than directly to the fan to prevent dripping onto furniture and floors below during overhead cleaning
- Step ladder or step stool — sized to bring the fan blades within comfortable reach without overextending; never clean ceiling fans while standing on furniture that isn't rated for standing load
- Replacement bulbs if needed — the fan cleaning session is the natural moment to replace any burned-out or dim bulbs while the ladder is already positioned under the fan; bringing up the correct replacement bulb type saves a second ladder setup
- Screwdriver — for tightening any loose screws on the fan canopy, blade brackets, or light fixture housing that become apparent during cleaning; a fan that wobbles slightly in operation is almost always fixed by tightening the canopy screws at the ceiling mount rather than requiring any adjustment to the blade brackets
How to Do It
- Turn the fan off completely and allow the blades to come to a full stop before positioning the ladder beneath it — cleaning a slowly spinning fan blade is a genuine injury risk, and a blade that appears stationary but is still completing a very slow rotation after power-off can move unexpectedly when touched. Confirm the wall switch is off before climbing rather than relying on the pull chain position as confirmation of the power state.
- Slide the pillowcase opening over the first blade from the blade tip toward the motor housing, enclosing the full blade length within the pillowcase fabric before beginning the dust collection stroke. The pillowcase needs to enclose the blade from below as well as above — a pillowcase that only covers the top surface of the blade collects the top surface dust but allows the typically heavier dust accumulation on the blade underside to fall freely during the stroke.
- Pull the pillowcase back toward the blade tip in a single smooth stroke while maintaining gentle downward pressure on the fabric against both the top and bottom blade surfaces simultaneously — this single stroke is what traps the complete blade dust load inside the pillowcase rather than allowing it to fall. Work slowly enough to maintain fabric contact with the full blade surface throughout the stroke; a fast pull that lifts the fabric from the blade surface releases the dust before it is fully inside the pillowcase.
- Repeat for every blade without emptying or shaking out the pillowcase between blades — the accumulated dust from multiple blades remains trapped inside the pillowcase throughout the full cleaning pass, and shaking or turning the pillowcase out between blades defeats the containment purpose of the method by releasing the captured dust back into the room air. After all blades are complete, carry the pillowcase directly to the washing machine or shake it out outdoors.
- Wipe the blade bracket connections at the motor housing with a dry microfiber cloth after the pillowcase pass — these connection points accumulate the same dust as the blade surfaces but in a heavier, more compressed layer because they are structural joints where air movement from the spinning blade compacts dust against the hardware surfaces rather than simply depositing it on flat surfaces. A blade bracket connection that has never been wiped can carry several times the dust load of the blade surface above it.
- Clean the motor housing and canopy with a microfiber cloth slightly dampened with all-purpose cleaner — apply the cleaner to the cloth rather than spraying it onto the fan, which risks dripping cleaner into the motor housing through any ventilation slots in the housing cover. Work around the full circumference of the housing and canopy, paying attention to any decorative texture or grille work where dust compacts into the surface recesses and requires the cloth to be worked into the detail rather than simply wiped across the face.
- Address the light fixture if present — remove glass shades or globes if they unscrew easily and wipe both the exterior and interior surfaces with a dry microfiber cloth; the interior of a glass globe accumulates dust that is invisible from below but significantly reduces the light output of the bulb inside it. Replace any burned-out bulbs while the globe is already removed and the ladder is in position, and check that the wattage of any replacement bulbs matches the maximum wattage rating printed inside the fixture socket.
- Check the rotation direction switch on the fan motor housing — typically a small slide switch on the motor body — and confirm the blade pitch and rotation direction are set correctly for summer operation. Counter-clockwise rotation viewed from below pushes air downward to create the cooling downdraft that makes a ceiling fan useful for comfort cooling; clockwise rotation used in winter pulls cool air up and pushes warm air down from the ceiling along the walls. A fan running in the wrong direction for the season provides no comfort benefit and increases energy use without any corresponding improvement in the room's perceived temperature.
HVAC technicians who service residential cooling systems always check ceiling fan blade pitch during seasonal maintenance visits — each blade should be angled at the same pitch relative to horizontal, typically 12 to 15 degrees, and blades that have warped or whose brackets have loosened and shifted produce a wobble during operation that most homeowners attribute to a balance problem requiring weighted balancing kits. A wobbling fan whose blade pitches are inconsistent can often be corrected entirely by checking that every blade bracket screw is fully tightened and that all blade pitches match by holding a protractor or pitch gauge against each blade — the wobble that seemed to require a balancing kit disappears when the mechanical cause of the imbalance is addressed rather than compensated for with external weights.