Clean Refrigerator Coils for Better Efficiency for Free
A vacuum brush attachment and twenty minutes — the annual maintenance task that lowers your energy bill and extends your appliance's life
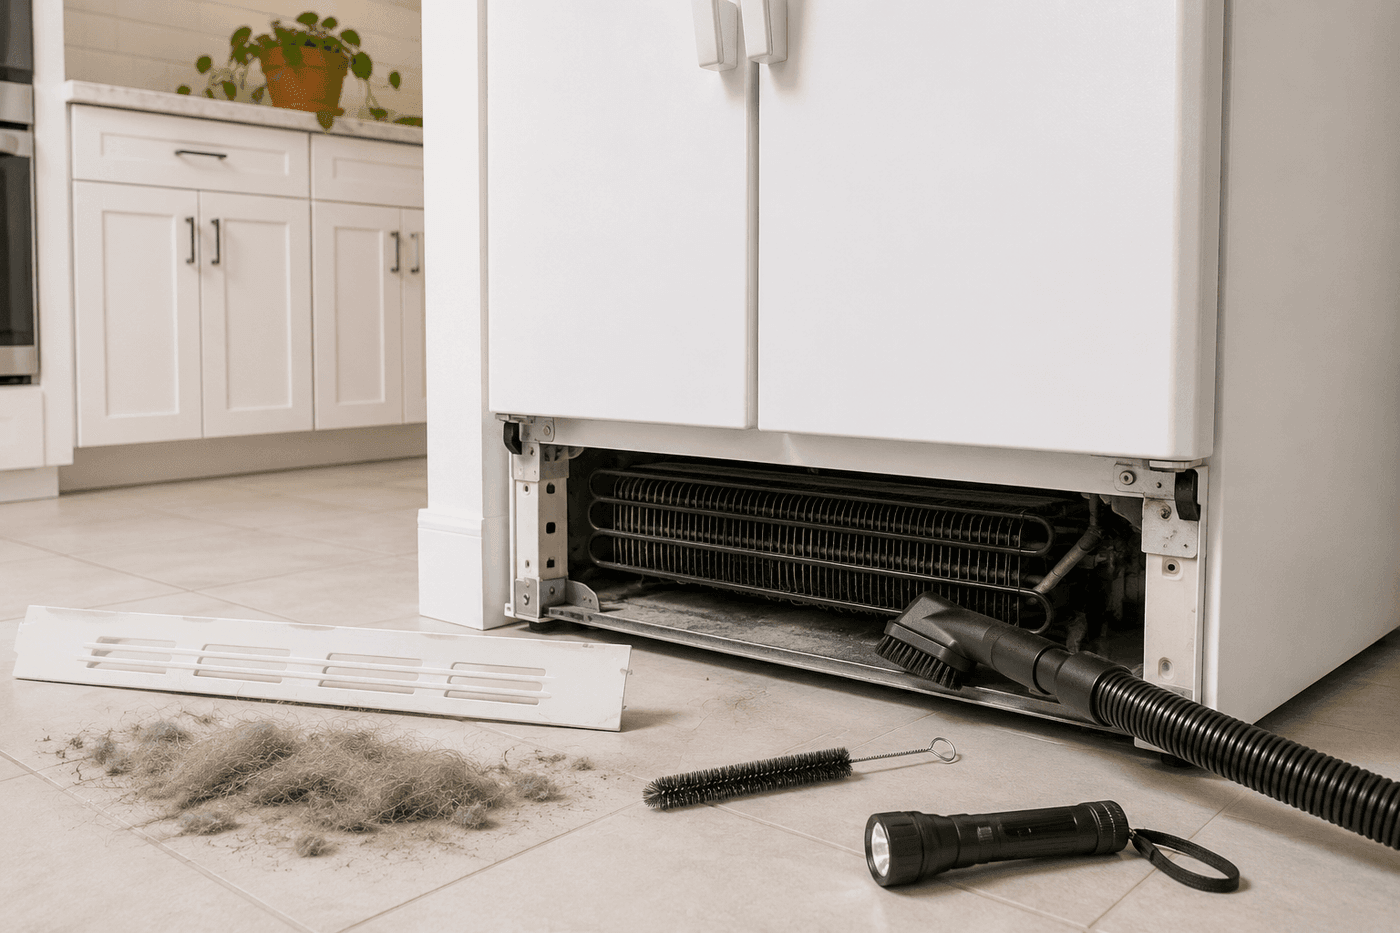
Your refrigerator is the one appliance in your home that runs continuously, every hour of every day, for decades — and the condenser coils that allow it to do that job are almost certainly coated in a layer of dust, pet hair, and debris that is quietly forcing the compressor to work significantly harder than it should, raising your energy bill and shortening the appliance's serviceable life in the process. Cleaning those coils takes twenty minutes, costs nothing, requires no tools beyond the vacuum you already own, and produces the kind of immediate measurable improvement in efficiency that you can actually feel in subsequent energy bills. Appliance repair professionals consistently identify dirty condenser coils as one of the most common and most preventable causes of premature compressor failure — a failure that typically costs $400 to $600 to repair or triggers a full appliance replacement. Twenty minutes of annual maintenance against that outcome is not a difficult calculation. This is the home maintenance task with the most favorable effort-to-return ratio on any list.
What You Need
- Vacuum cleaner with brush attachment — the brush attachment is specifically required rather than a bare suction nozzle; brush bristles dislodge dust that has compacted between coil fins and allow the suction to remove it, while a bare nozzle held against the coils simply moves air around the compacted dust without lifting it
- Refrigerator coil brush — a long, narrow, flexible brush designed specifically for reaching deep into condenser coil arrays and around the compressor housing where the vacuum brush attachment cannot reach; available at appliance stores and online for $5–8 and reusable indefinitely (~$5–8 if not already owned)
- Flashlight or phone torch — for seeing into the coil area clearly before and after cleaning to confirm all visible dust accumulation has been removed and to check the coil condition for any damage or corrosion
- Damp microfiber cloth — for wiping the front grille panel and the floor area beneath and behind the refrigerator that becomes accessible when the appliance is pulled forward
- Helper, optional — for pulling the refrigerator forward from the wall; most refrigerators can be pulled forward by one person with careful technique, but a helper makes the process faster and reduces the risk of floor scratching from uneven pulling pressure
How to Do It
- Locate your refrigerator's condenser coils before moving anything — on most refrigerators manufactured in the last thirty years, the condenser coils are located at the bottom front of the appliance behind a removable grille panel, accessible without moving the refrigerator at all. On older models and some specific brands, the coils are located at the back of the appliance and require pulling the refrigerator forward to access. Check the bottom front of your refrigerator for a snap-on or screw-secured grille panel before assuming you need to move the appliance.
- Unplug the refrigerator before beginning any cleaning — reach behind the appliance to access the power cord, or turn off the dedicated circuit at the breaker if the outlet is inaccessible. The condenser coils and compressor are part of the electrical system of the appliance, and cleaning them with the refrigerator powered introduces an unnecessary shock risk from contact between wet cleaning cloths or tools and powered components near the coil array.
- Remove the front grille panel by snapping it free from its retention clips — most modern refrigerator grilles simply pull straight toward you at the bottom edge to release the clips, then lift free of the upper retention slots. Some models use one or two Phillips screws at the grille corners rather than clips; check before pulling with force that might crack a clip-retained grille. Set the grille aside and use the damp cloth to wipe both sides clean of the dust accumulation it has been collecting as the first line of debris filtration for the coil area behind it.
- Shine the flashlight into the coil area behind the grille opening to assess the level of dust accumulation before touching anything — this initial look tells you whether you're dealing with a light annual maintenance cleaning or a more significant accumulation that will require the dedicated coil brush in addition to the vacuum attachment. Coils that are lightly dusted clean quickly with the vacuum brush alone; coils packed with compacted pet hair and dust require the long coil brush worked through the array first to loosen the material before the vacuum can remove it.
- Work the coil brush through the condenser coil array in gentle back-and-forth strokes, moving the brush parallel to the coil fins rather than across them — the fins are thin aluminum strips that bend easily under lateral pressure and damaged fins restrict airflow through the coil in the same way that dust accumulation does. Work from the accessible front edge of the coil array toward the back, then switch to the vacuum brush attachment to remove the loosened material the coil brush has dislodged from the fin surfaces and the compressor housing area.
- Vacuum the full coil area thoroughly with the brush attachment, working the brush into every accessible section of the coil array and around the compressor housing — a black cylindrical component typically visible beside or below the coil array. The compressor housing accumulates dust on its surface that insulates it from the surrounding air and causes it to run hotter than its design temperature; cleaning the compressor surface along with the coils is the step that most directly extends compressor life and is the one most people skip when they clean only the visible coil fins.
- Pull the refrigerator forward if your coils are rear-mounted, or to access the floor beneath and behind the appliance — place a folded towel under each front corner of the refrigerator base before pulling to protect the floor from scratching, and pull straight forward rather than at an angle that stresses the water line or power cord connection at the back of the appliance. Clean all visible dust accumulation from the rear coil array and the floor area beneath the compressor, which typically shows a significant accumulation of dust, pet hair, and debris that has been undisturbed since the refrigerator was last moved.
- Reinstall the front grille by reversing the removal sequence — align the upper edge with its retention slots first, then press the lower edge firmly until all clips engage audibly. Plug the refrigerator back in and allow thirty minutes for the compressor to stabilize at its new operating temperature before assessing the sound level change — a refrigerator whose compressor has been laboring under dirty coil conditions often sounds noticeably quieter within the first hour of operation after coil cleaning as the compressor cycles less frequently and runs for shorter periods to maintain cabinet temperature.
Appliance repair technicians who service residential refrigerators always check the condenser fan blade and motor housing during coil cleaning visits — the condenser fan is located in the same compartment as the coils on bottom-mount condenser refrigerators and circulates air through the coil array during compressor operation. A fan blade packed with dust and debris moves significantly less air than a clean blade, reducing coil cooling effectiveness even after the coils themselves are cleaned, and a fan motor housing caked with dust runs hotter than its design temperature and approaches failure faster than one kept clean. While the grille is already removed for coil cleaning, taking thirty seconds to wipe the fan blade with a damp cloth and vacuum the motor housing addresses the second most common source of bottom-compartment efficiency loss at no additional time or cost.