
Vision in Bloom: Crafting Inspirational Spring Mood Boards
Create tactile or digital collages that capture spring's colors, textures, and inspirations to guide your seasonal decor
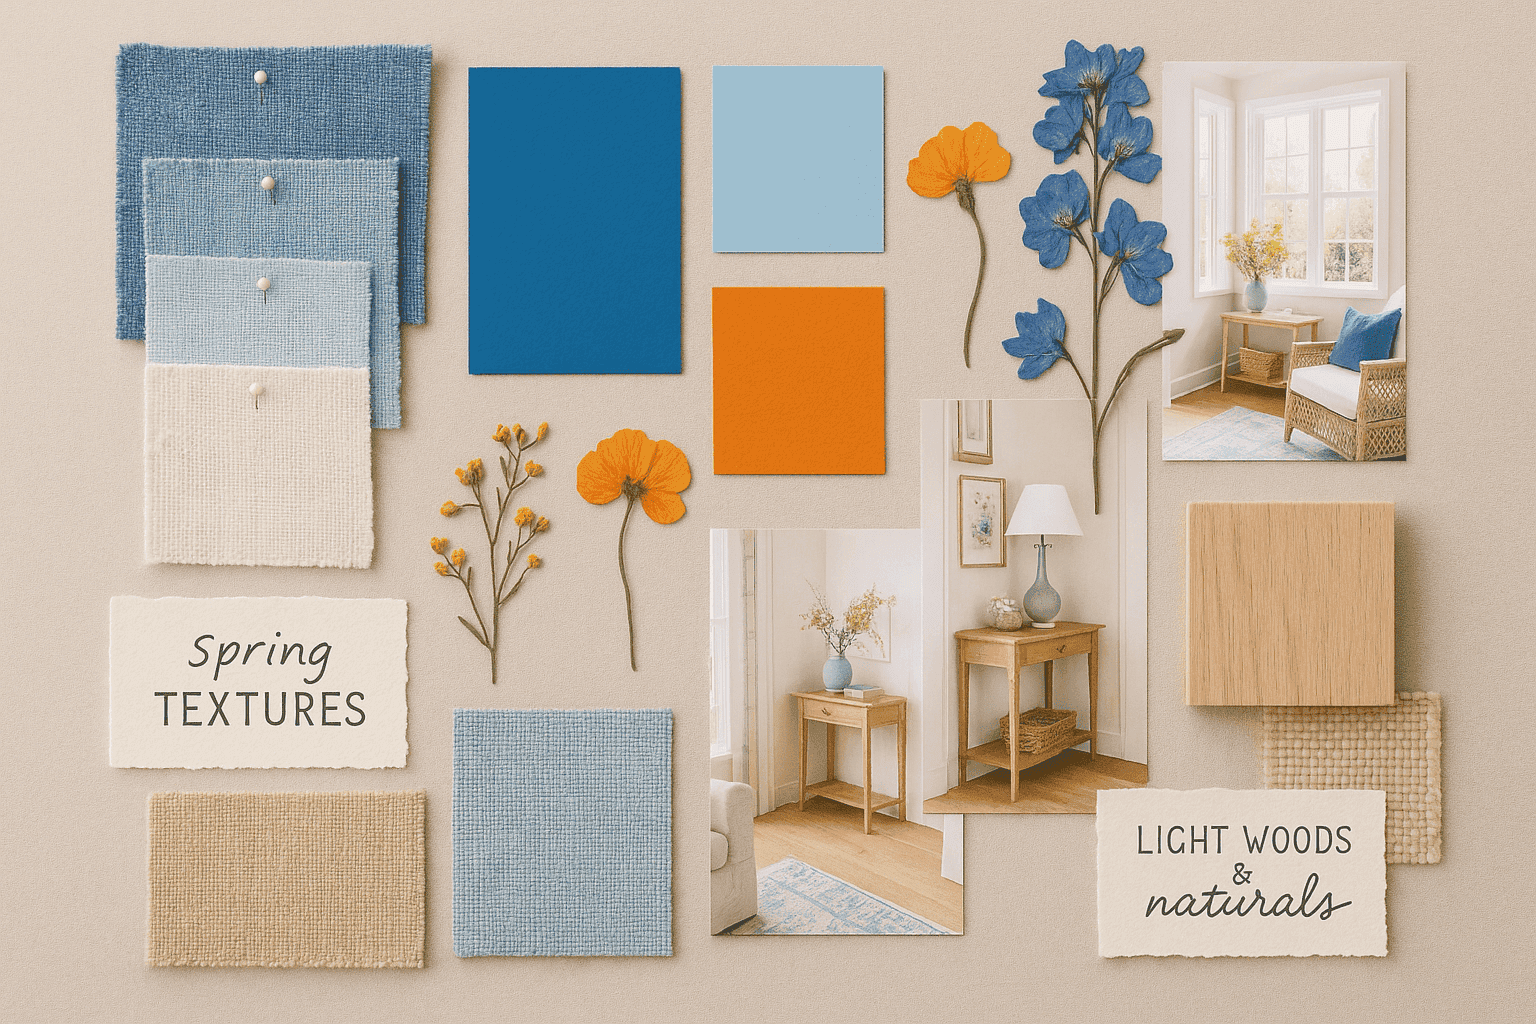
Creating a spring mood board is both a creative exercise and a practical tool that brings focus to your seasonal decor refresh. By thoughtfully collecting and arranging samples, swatches, images, and inspirations that capture spring's essence, you develop a visual roadmap that guides your design decisions while preventing impulsive or disconnected choices. Whether crafted as a tactile pin board or a digital collection, this curated vision helps you identify underlying color themes, texture preferences, and pattern combinations that resonate with your personal spring aesthetic. The process itself becomes a meditative spring ritual—one that encourages mindful observation of the changing season while providing a beautiful piece of seasonal art that evolves with your home.
What You'll Need
| For Physical Mood Boards: |
| • Cork board, poster board, or foam core |
| • Push pins, thumbtacks, or washi tape |
| • Scissors and craft knife |
| • Double-sided tape or glue dots |
| • Decorative paper for background |
| For Digital Mood Boards: |
| • Computer or tablet |
| • Pinterest account or digital board app |
| • Digital design program (Canva, PicMonkey, Photoshop) |
| • Smartphone for capturing inspiration photos |
| • Scanner app for physical items |
| Color Elements: |
| • Paint color cards or chips |
| • Pantone color guides |
| • Colored paper samples |
| • Magazine pages with appealing color schemes |
| • Color photographs of spring scenes |
| Texture Elements: |
| • Fabric swatches (linen, cotton, silk) |
| • Wallpaper samples |
| • Natural materials (pressed leaves, flower petals) |
| • Textured paper (handmade, embossed) |
| • Small material samples (wood, stone, ceramics) |
| Inspiration Sources: |
| • Home decor magazines |
| • Catalogs from favorite retailers |
| • Garden seed packets or plant tags |
| • Nature photography books |
| • Travel brochures of spring destinations |
| Organizational Tools: |
| • Small envelopes or folders for collecting |
| • Removable labels or sticky notes |
| • Fine-point markers for notes |
| • Small paper clips or binder clips |
| • Notebook for additional thoughts |
How To Do It
- Set your intentional focus:
- Decide whether your mood board is for general spring inspiration or a specific project
- Consider which spaces in your home you want to refresh
- Reflect on your emotional goals for the season (energizing, calming, renewal)
- Define practical needs (child-friendly, pet-friendly, entertaining spaces)
- Write a brief statement of intention to guide your selections
- Gather inspiration from nature:
- Take walks to observe emerging spring colors and textures
- Photograph interesting natural elements (blossoms, new leaves, sky)
- Collect small natural specimens to press or preserve
- Notice color combinations that appear in spring gardens
- Pay attention to the quality of spring light in different spaces
- Collect material samples:
- Request fabric swatches from favorite retailers
- Gather paint chips in spring-inspired colors
- Collect wallpaper samples with spring motifs
- Save packaging with appealing colors or patterns
- Cut swatches from magazines showcasing interesting textures
- Curate images that evoke spring:
- Look for images that capture the mood you want to create
- Include pictures of rooms that feel spring-like
- Collect photos of spring rituals that bring you joy
- Find images of architectural details that inspire you
- Look beyond obvious spring motifs for underlying design elements
- Organize and edit your collection:
- Sort materials by color, texture, and theme
- Identify recurring elements or colors that naturally appeal to you
- Eliminate items that don't align with your vision or practical needs
- Look for unexpected connections between different elements
- Select a core color palette (3-5 colors) that emerges from your collection
- Create your physical mood board:
- Choose a board size appropriate for your space and collection
- Consider covering the board with neutral fabric or paper as a base
- Begin by placing larger anchor items first
- Create a general arrangement before securing anything permanently
- Layer smaller items over larger ones for depth and interest
- For digital mood boards:
- Choose a platform that suits your technical comfort level
- Create a template with clean white space for visual breathing room
- Scan physical samples or photograph them with good lighting
- Use consistent sizing and alignment for a professional look
- Add descriptive text where needed for context
- Add personal touches and annotations:
- Include brief notes about why certain elements speak to you
- Add quotes that capture your spring mood
- Record source information for items you might purchase
- Note measurements or specifications for practical planning
- Include samples of items you already own that fit the theme
- Position strategically for inspiration:
- Display your mood board where you'll see it regularly
- Take a photo to keep on your phone for shopping reference
- For digital boards, print a version to keep tangible inspiration handy
- Share with household members to align on spring refresh vision
- Position near the spaces you plan to refresh for easy reference
- Use your mood board as a decision-making tool:
- Refer to your board when making purchase decisions
- Compare potential new items against your established palette
- Use the board to communicate with designers or contractors
- Edit your existing decor based on the board's direction
- Allow the board to evolve as your project progresses
Professional interior designers use mood boards as decision-making frameworks rather than just pretty collages, employing a technique called "weighted composition" to make them truly functional. This approach involves creating visual hierarchy by sizing elements according to their importance in the final design—large swatches for dominant elements like wall colors or major textiles, and smaller samples for accent pieces. Another industry secret is including what designers call "bridges"—transition elements that show how seemingly disparate components will work together in the finished space. For the most sophisticated mood boards, top designers recommend incorporating the principle of "negative activation"—deliberately including one or two elements that slightly contradict or challenge the overall aesthetic. These unexpected components prevent a space from feeling too matched or predictable, much like how a garden benefits from structural elements that contrast with soft blooms. Finally, professional designers always include a "scale indicator"—a reference object that provides context for how textures and patterns will appear in actual size rather than in isolation.














