Upgrade Dollar Store Solar Lights into Garden Art for $2 Each
Basic pathway lights, spray paint, and hot glue — the decorative garden stakes that charge all day and glow all evening for $2 each
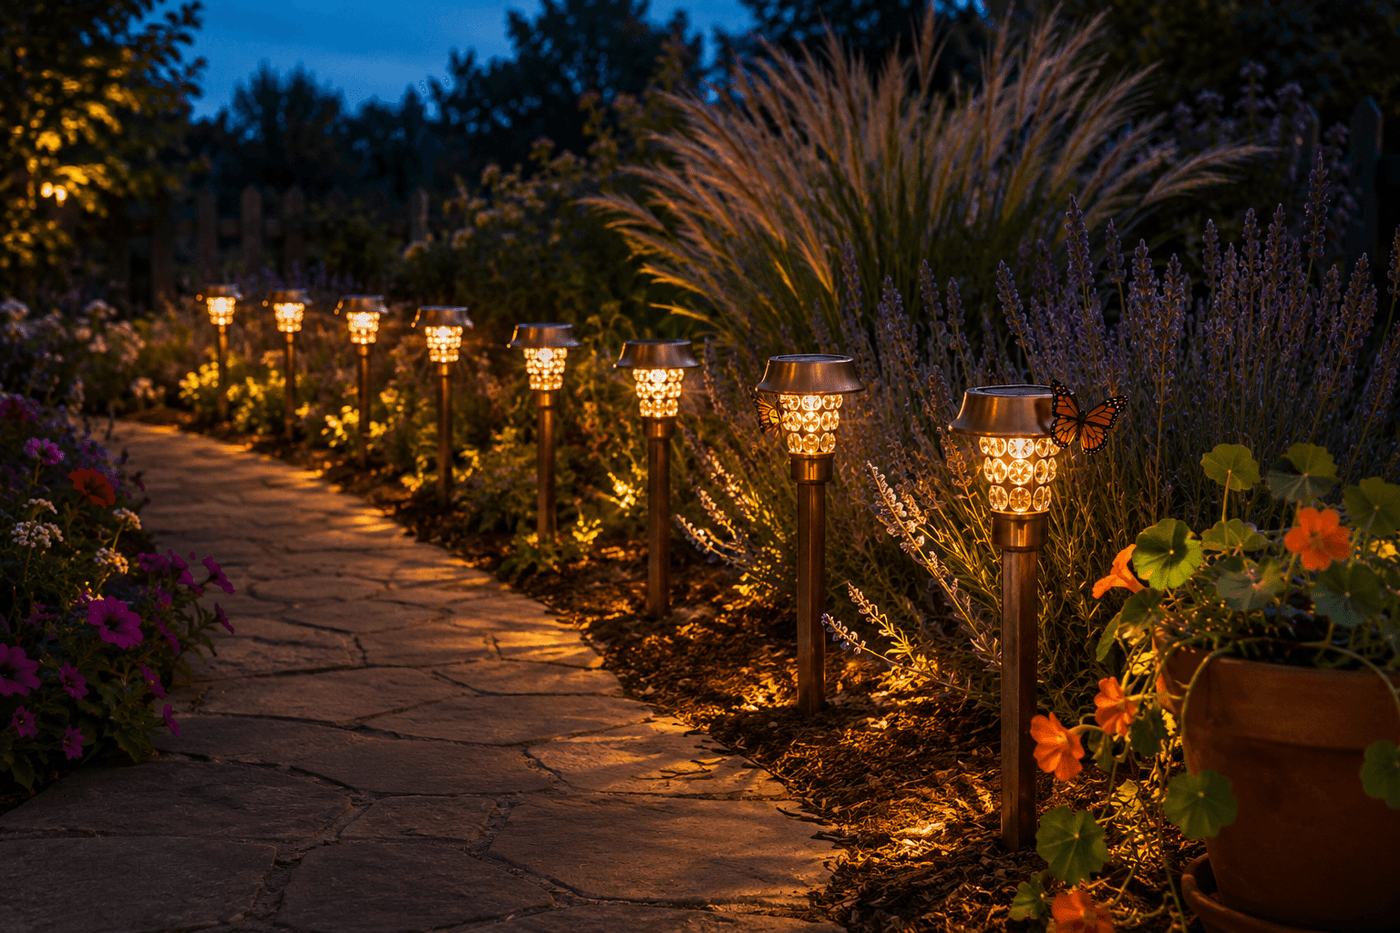
Dollar store solar pathway lights are one of the best raw materials in the budget garden décor world — they contain a functional solar panel, a rechargeable battery, an LED, and an automatic dusk-to-dawn sensor in a package that costs one to two dollars and needs only aesthetic intervention to become something genuinely beautiful. A coat of metallic copper or matte black spray paint on the housing, a ring of glass gems hot-glued around the solar panel, and a decorated wooden dowel replacing the plain plastic stake transforms a forgettable pathway light into a decorative garden stake that looks like it came from a garden center specialty display at eight to fifteen times the actual cost. Make a dozen and line them along a garden path or cluster them in a flower bed, and the garden that looked ordinary in daylight develops a genuinely enchanting quality after dark when the glass gems catch and scatter the warm LED glow across the surrounding plants and soil. Functional, beautiful, and almost free — the math is simply undeniable.
What You Need
- Dollar store solar pathway lights, qty 8–12 — the standard spike-base variety with a round or square housing on top; buy extras since the solar panels and LED mechanisms vary slightly in brightness between dollar store batches, and having extras allows you to test and select the most reliable units (~$1–2 each)
- Metallic spray paint — copper, gold, bronze, or matte black transforms the plastic housing from utilitarian to decorative; Rust-Oleum metallic finishes adhere to plastic without primer if the surface is clean and lightly sanded first (~$6–8 per can, covers all twelve lights with significant paint remaining)
- Glass gems, flat-back rhinestones, or mosaic tile pieces — for adhering around the solar panel housing to catch and scatter the LED light in the evening; flat-back faceted gems produce the most dramatic light scatter effect (~$3–4 for a bag of mixed sizes)
- Hot glue gun with outdoor-rated glue sticks — for securing gems and any decorative elements to the housing; standard hot glue holds well in dry conditions but can soften and release in sustained heat; outdoor or high-temperature glue sticks rated for exterior use hold significantly better through summer temperatures (~$2–3 for outdoor glue sticks)
- Wooden dowels, ¼" diameter, 12" lengths — optional replacement for the plain plastic spike stakes; wooden dowels painted or stained in a coordinating color elevate the visual quality of the finished stake significantly over the original translucent plastic (~$3–4 for a bundle)
- Exterior craft paint or acrylic paint — for painting the wooden dowels and any additional decorative details on the housing; a coordinating color on the dowel that echoes the housing spray paint color produces the most cohesive finished look across a full set (~$2–3 per small bottle)
- Artificial flowers, butterflies, or dragonfly embellishments — optional decorative elements hot-glued to the housing for a themed garden stake design; look for weather-resistant artificial flowers in the dollar store floral section (~$1–2 for a pack)
How to Make Them
- Disassemble each solar light by separating the housing top from the spike stake — most dollar store solar lights twist or pull apart at the connection point between the decorative housing and the plastic stake. Set the stake sections aside and work with the housing tops as your primary decoration canvas; the stake is the last element to address and is the component most benefited by replacement with a painted wooden dowel.
- Clean the plastic housing surfaces thoroughly with rubbing alcohol before any spray paint is applied — dollar store plastic components are often coated with a mold release agent from the manufacturing process that prevents spray paint from bonding properly. A quick wipe with rubbing alcohol removes this invisible barrier and allows the metallic spray paint to adhere cleanly rather than beading and peeling within the first week outdoors.
- Mask the solar panel surface with a small piece of painter's tape before spray painting — the solar panel must remain clear and unobstructed to charge the battery effectively, and metallic spray paint over the panel surface reduces charging efficiency by blocking the light that activates the photovoltaic cells. Press the tape firmly against the panel edges to prevent overspray from bleeding beneath the tape onto the panel surface during the painting pass.
- Spray the housing with two light, even coats of metallic paint, holding the can twelve inches from the surface and working in smooth overlapping passes that cover the full housing without runs or pooling. Apply the first coat, allow fifteen minutes of drying time, then apply the second coat for full, even metallic coverage. The metallic sheen that makes these lights look genuinely decorative rather than simply painted comes from the fine metallic particles lying flat and parallel to the surface — heavy single-coat applications clump the particles and produce a dull rather than reflective finish.
- Apply glass gems around the solar panel housing while the second paint coat is still slightly tacky if using hot glue — slightly tacky paint provides additional mechanical adhesion for the glue bond and produces a more durable attachment than gems applied to fully cured paint alone. Work around the full circumference of the housing in a single ring of gems spaced evenly, or in a random cluster pattern that covers more of the housing surface for maximum light scatter in the evening.
- Allow the full assembly to cure for at least two hours before handling or adding additional decorative elements — the hot glue bond between glass gems and painted plastic reaches its full strength at room temperature over approximately ninety minutes, and gems handled before full cure are significantly more likely to shift or detach when the stakes are pushed into garden soil and subjected to the light lateral forces of outdoor use.
- Prepare replacement wooden dowel stakes by cutting each to the length of the original plastic stake, painting or staining them in a color that coordinates with the housing finish, and allowing them to dry fully before attaching the housing. A copper-painted housing with a dark walnut-stained dowel stake, or a matte black housing with a natural wood dowel, both produce a material combination that looks significantly more intentional and designed than the original all-plastic construction.
- Install the finished lights by pushing the stake into garden soil in direct sun — the solar panel needs unobstructed direct sunlight for at least six hours daily to fully charge the battery for a complete evening of illumination. Place lights in south-facing positions or along paths and bed edges where overhead plant canopy doesn't cast shadow across the solar panels during the primary charging hours of late morning to mid-afternoon. Test each light by covering the solar panel with your hand in a shaded location — a light whose battery is charged should activate its LED immediately when the panel is shaded, confirming the automatic sensor is functioning before the light is placed in its final garden position.
Landscape lighting designers who work with residential garden installations always group solar lights in odd-numbered clusters of three or five rather than spacing them at mathematically equal intervals along a path — equal spacing produces a runway lighting effect that reads as functional rather than decorative, while irregular clusters of three with slightly varying distances between them mimic the organic spacing of natural objects and produce a lighting arrangement that feels intentional and designed rather than installed. They also vary the housing finish across a single installation — alternating copper and gold housings rather than using a single metallic finish throughout — because the subtle color variation between adjacent lights creates the kind of visual rhythm that makes a garden path feel curated rather than uniformly decorated.