
Upcycle Your Old TV Stand Into a Glamorous Holiday Bar Cart
Transform forgotten furniture into a festive beverage station with metallic paint and smart storage
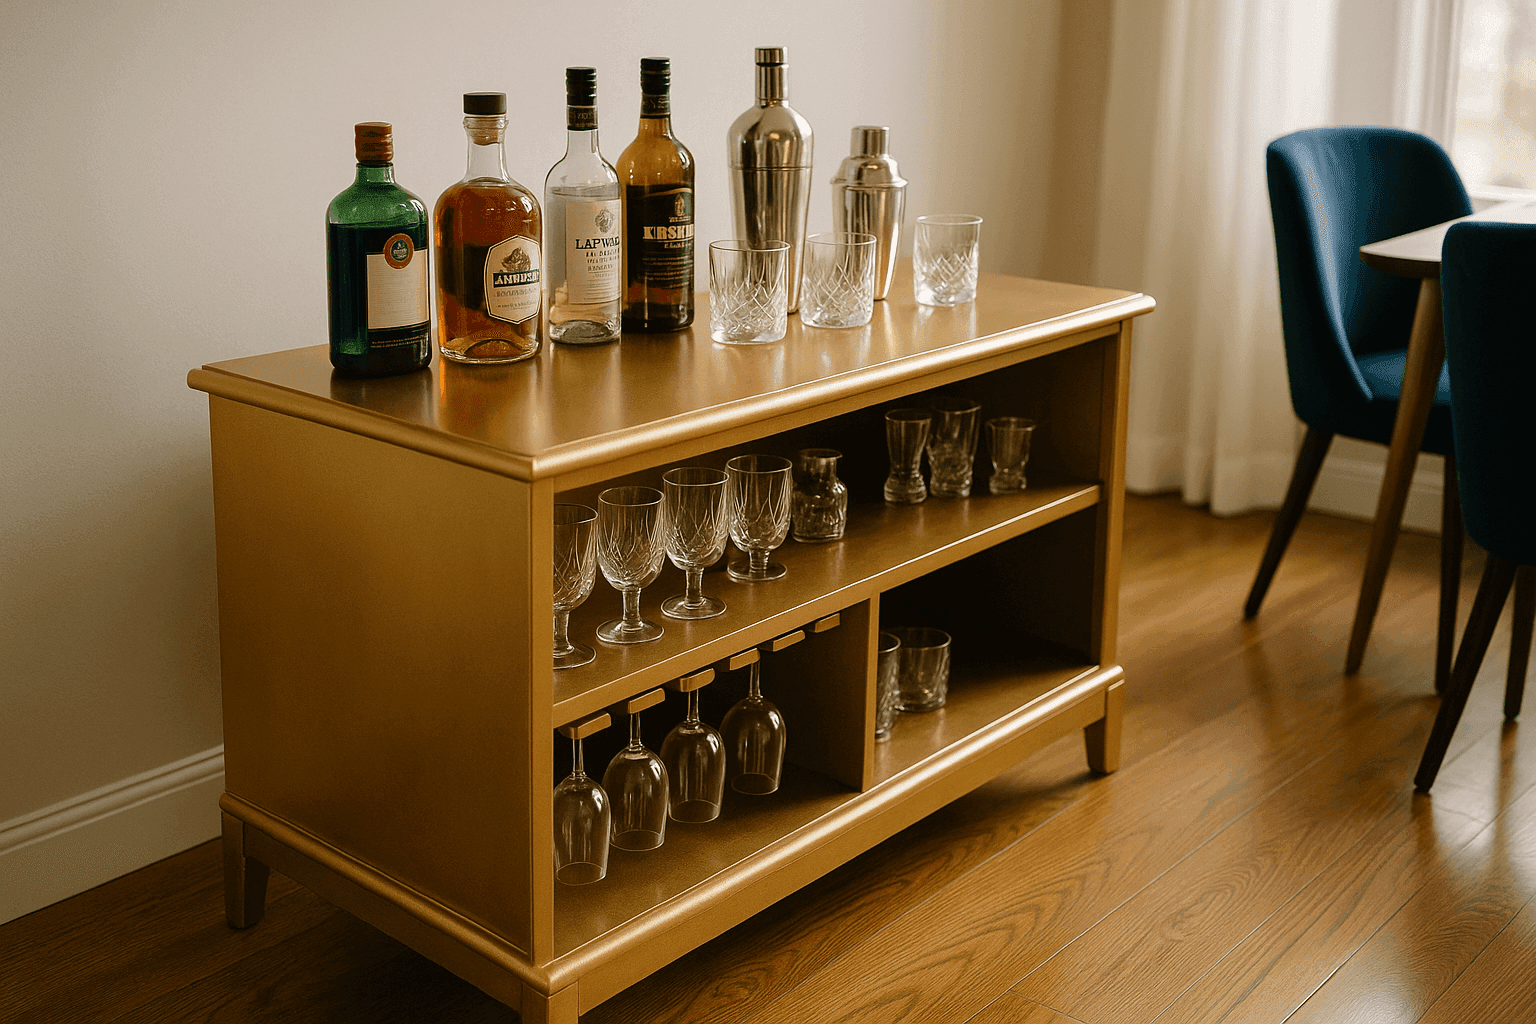
That old TV console sitting unused in your basement or garage since you upgraded to a wall-mounted flat screen has been patiently waiting for exactly this moment—its transformation into a stunning holiday bar cart that becomes the centerpiece of your entertaining space. The beauty of repurposing these outdated pieces is that their original design already includes perfect bar cart features like open shelving for bottle display, enclosed cabinets for hidden storage, and a sturdy flat surface that's ideal for mixing drinks and arranging glassware. This upcycling project costs around $40-60 in supplies depending on your metallic finish choice, takes a weekend to complete including drying time, and produces a custom piece that looks like an expensive boutique find while saving a perfectly functional furniture piece from the landfill. What makes me genuinely excited about this transformation is how dramatically metallic spray paint changes the entire vibe of basic wood furniture—that dated oak or dark espresso TV stand suddenly becomes a glamorous gold, sophisticated silver, or elegant copper showpiece that elevates your entire entertaining setup. The functional upgrade is equally impressive because you're adding wine glass storage underneath using simple wood dowels, creating that professional bar cart feature where stemware hangs elegantly while staying dust-free and accessible. You're not just painting old furniture, you're reimagining its purpose entirely and giving it a second life that's actually more useful and beautiful than its original incarnation.
Transformation Materials
- Surface Preparation:
- Fine-grit sandpaper (120 and 220 grit, $5-7)
- Tack cloth for dust removal ($3-4)
- TSP cleaner or degreaser ($4-6)
- Painter's tape for masking hardware ($4-5)
- Drop cloth or cardboard for workspace protection
- Paint and Finish:
- Spray primer for better adhesion ($6-8)
- Metallic spray paint in chosen finish—gold, silver, copper, or rose gold (2-3 cans, $20-30)
- Clear polyurethane spray for protection ($8-10)
- Optional: contrasting color for interior shelves ($6-8)
- Wine Glass Storage:
- Wood dowel rods, 3/4 inch diameter (2-3 pieces, $6-10)
- Wood glue or construction adhesive ($4-5)
- Optional: matching metallic paint for dowels
- Measuring tape and pencil for marking
- Hardware and Wheels:
- New decorative knobs or pulls (4-6 pieces, $12-20)
- Locking caster wheels for mobility (set of 4, $15-25)
- Screws appropriate for wheel attachment
- Screwdriver or drill for installation
Transformation Steps
- Prep Your Console: Remove all hardware including doors, drawers, and knobs, then thoroughly clean the entire piece with TSP or degreaser to remove years of accumulated dust, grease, and grime—proper cleaning is crucial because paint won't adhere properly to dirty or greasy surfaces no matter how many coats you apply.
- Sand for Adhesion: Lightly sand all surfaces that will be painted using 120-grit sandpaper to rough up glossy finishes and create tooth for primer, then follow with 220-grit for smoothness, wiping everything down with tack cloth to remove all dust particles before proceeding to paint.
- Apply Primer Coat: Working in a well-ventilated area or outdoors, spray an even coat of primer over all exposed surfaces, holding the can 10-12 inches away and using smooth sweeping motions—primer ensures your metallic paint adheres permanently and creates even color without the wood grain showing through.
- Spray Metallic Finish: Once primer is completely dry (follow can directions for timing), apply your metallic spray paint in multiple thin coats rather than one heavy coat to prevent drips and achieve professional results—typically three to four light coats produce the best coverage and most luminous metallic sheen.
- Install Wine Glass Holders: Measure and mark positions for dowel rods underneath a shelf where wine glasses will hang upside down (typically spacing them 4-6 inches apart), cut dowels to span the width minus an inch on each side, then secure with wood glue or construction adhesive for permanent installation.
- Add Mobility with Wheels: Attach locking caster wheels to the bottom corners of your console, choosing wheels tall enough to provide clearance but not so tall that the piece becomes unstable—lockable wheels let you easily move your bar cart for parties but keep it stationary during use for safety.
- Upgrade Hardware: Replace original outdated knobs and pulls with new decorative hardware that complements your metallic finish—consider crystal knobs for glamorous elegance, brass for warm coordination with gold paint, or sleek modern pulls for contemporary sophistication that elevates the entire look.
- Seal and Protect: Once all paint is fully cured (wait 24-48 hours), apply two coats of clear polyurethane spray to protect your metallic finish from spills, condensation rings from cold drinks, and general wear from entertaining use—this sealing step is essential for surfaces that will see moisture and frequent handling.
Interior designers who specialize in entertaining spaces recommend the "two-tone sophistication" technique that takes this transformation from nice to absolutely stunning. Instead of painting everything the same metallic color, paint the exterior in your chosen metallic finish but paint the interior of open shelves and the inside of cabinet doors in a rich contrasting color like deep navy, forest green, or charcoal gray. This unexpected pop of color when you open doors or look at shelves creates visual interest and makes the metallic finish look even more intentional and custom rather than a simple paint job. For maximum functionality, divide your bar cart into logical zones before styling it—designate the top surface for active bartending with cocktail shaker, muddler, and bar tools; use middle shelves for bottle display with your most attractive spirits front and center; reserve enclosed cabinets for backup supplies, extra mixers, and less photogenic items you need but don't want visible. The styling secret that makes these upcycled bar carts photograph beautifully is the rule of odd numbers and varied heights—group bottles and accessories in clusters of three or five rather than even numbers, use books or small boxes to create different height levels so not everything sits flat on shelves, and incorporate at least one organic element like fresh flowers, greenery, or citrus fruits to soften all the hard glass and metal surfaces. This professional styling approach makes your DIY bar cart look like it came from an expensive boutique rather than your basement storage area.














