
Turn a Whiskey Barrel into a Backyard Bar Table for $75
A $40 winery barrel, a cedar tabletop, and two hours — the patio centerpiece that starts every conversation and never needs an introduction
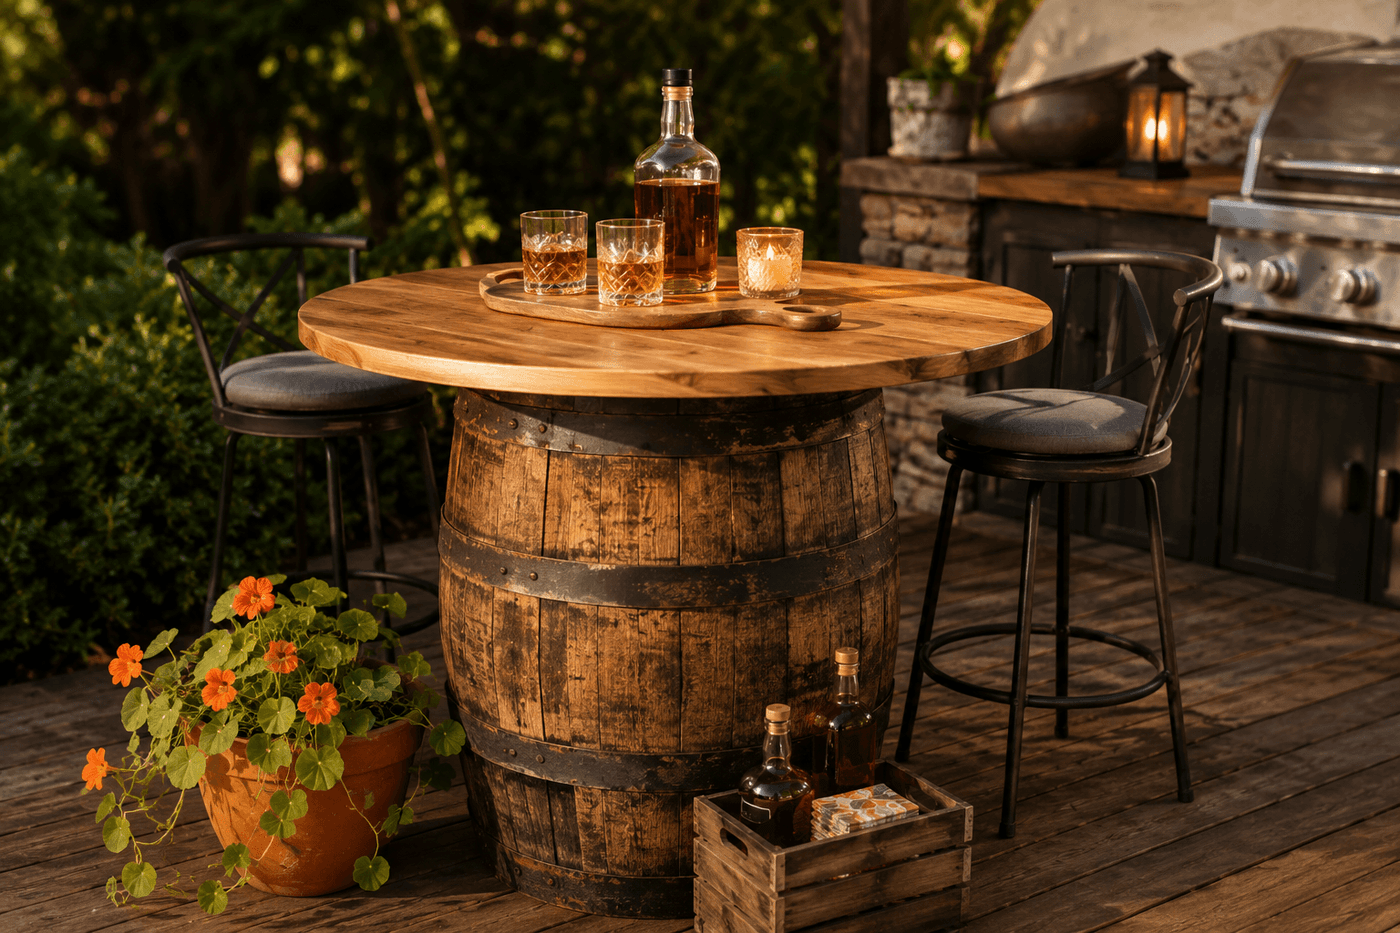
Outdoor furniture stores sell bar-height patio tables for $150 to $400 in materials that look like they were designed in a committee — inoffensive, forgettable, and completely interchangeable with the table at every other house on the street. A genuine used whiskey barrel from a local winery or distillery, topped with a round cedar slab and finished with exterior sealant, costs $75, takes two hours, and becomes the kind of outdoor furniture that guests run their hands along and ask about before they've set their drink down. The weathered oak staves, the original steel bands darkened with age, and the faint bourbon-warmth that a used barrel carries through its first several outdoor summers give this table a character that no amount of money spent on manufactured outdoor furniture can purchase — because character cannot be manufactured, only earned through the original use that the barrel's history represents. This is the patio centerpiece that makes every gathering better without being asked to.
What You Need
- Used whiskey or wine barrel, full size — genuine used barrels from wineries, distilleries, and homebrew supply shops; a full-size whiskey barrel stands approximately 34 to 36 inches tall on its flat end, which is exactly bar height for standing guests. Call local wineries and distilleries directly — most sell used barrels for $30 to $50 and have more supply than they can move (~$30–50)
- Round cedar tabletop, 24–28" diameter, 1½–2" thick — have a lumber yard cut a round from a cedar slab, or purchase a pre-cut round tabletop blank from a craft lumber supplier; the diameter should overhang the barrel top by 2 to 4 inches on all sides for a proportional finished look (~$25–35 depending on diameter and thickness)
- Exterior wood sealant or outdoor polyurethane — two to three coats on the cedar tabletop before it goes outside; a sealed tabletop handles drink condensation, rain exposure, and the physical contact of glasses and bottles without staining, warping, or cracking (~$10–12 for a small can)
- Exterior screws, 2" length, qty 4–6 — for securing the tabletop to the top barrel ring from the underside; driven at an angle through the inside of the top barrel ring up into the cedar tabletop, these screws prevent the top from shifting during use without any visible fasteners on the table surface
- Sandpaper, 120-grit and 220-grit — for smoothing the cedar tabletop through two grits before the first sealant coat; 220-grit on the final pre-seal pass produces the satiny smooth surface that makes the finished tabletop feel genuinely high-quality under hand and glass
- Wire brush — optional, for cleaning any loose debris from the barrel stave surfaces and refreshing the weathered character of the oak before the finished table goes onto the patio (~$4–6)
- Small wooden crate or storage box — to position underneath the barrel as bottle and glassware storage; a crate that slides underneath the barrel creates the self-contained outdoor bar station that makes this setup so functional at a gathering (~$5–10 from a craft store or thrift shop)
How to Build It
- Inspect the barrel before committing to the project — confirm all staves are intact with no cracking or splitting that would compromise the structural integrity of the barrel as a standing base, check that the metal bands are tight against the staves rather than loose and sliding, and confirm the flat barrel end that will become the base sits level without rocking. A barrel that rocks on its base produces a table that shifts under the weight of loaded glasses and is both annoying to use and potentially dangerous when tall drinks are placed on it.
- Clean the barrel exterior with a stiff brush or wire brush to remove loose debris, spider webs, and any flaking residue from the barrel's previous storage environment — the weathered, aged character of the oak is the entire visual point of this project and should be preserved rather than removed, but loose material that would transfer onto hands and clothing during use needs to come off before the barrel enters the entertaining space.
- Sand the cedar tabletop through 120-grit and then 220-grit, working with the grain direction in long strokes that smooth the surface without leaving cross-grain scratch marks visible in the final sealant finish. Pay particular attention to the top face and the edge — the edge of a round tabletop receives significant physical contact from hands and glasses being set down at the table perimeter, and a rough edge on an otherwise beautifully finished top reads as incompletely made rather than intentionally rustic.
- Apply the first coat of exterior sealant to the fully sanded cedar top — brush it on in smooth, even strokes following the grain direction, covering the full top face, the full edge, and the underside perimeter area that will be exposed to weather when the top is in place on the barrel. Allow full drying time per the sealant manufacturer's instructions — typically two to four hours for oil-based products and one to two hours for water-based — before lightly sanding with 220-grit and applying the second coat.
- Apply a third sealant coat after the second has fully dried and been lightly sanded — three coats of exterior sealant on a tabletop that will live outdoors and be regularly contacted by wet glasses and bottles is the finishing standard that produces a surface durable enough to resist water rings, condensation, and incidental weather exposure through multiple outdoor seasons without requiring annual refinishing.
- Position the sealed tabletop centered on the barrel top — with 2 to 4 inches of overhang on all sides — and confirm it sits flat without rocking before marking the screw positions. The top barrel ring is the structural element the screws will anchor into, and the screw positions need to correspond to the ring location rather than to the spaces between staves where there is no solid wood for the screw threads to grip.
- Drive four to six exterior screws from the inside of the barrel upward at a slight angle through the top barrel ring and into the underside of the cedar tabletop — reach inside the barrel top opening to position and drive each screw, angling each one slightly outward so the screw tip enters the cedar top at least ¾ inch from the tabletop edge. Pre-drill pilot holes through the barrel ring before driving the screws to prevent the metal ring from deflecting or the cedar from splitting at the screw entry point.
- Position the finished bar table on the patio in its intended location before adding any accessories — place it near the grill or primary entertaining area where it will naturally draw people rather than in a corner where it functions as additional horizontal storage rather than a genuine gathering focal point. Slide a small wooden crate or storage box underneath the barrel as bottle and glassware storage, step back to assess the full composition, and note with satisfaction that the $75 and two hours invested just produced the most character-filled and conversation-worthy piece of outdoor furniture on the patio.
Outdoor entertaining designers who source and style barrel furniture for residential patios always treat the barrel exterior with a penetrating wood oil — teak oil or Danish oil — before the table goes into service, working the oil into the weathered oak staves with a cloth and allowing it to soak in for twenty-four hours before the first use. The oil treatment serves two purposes: it stabilizes the dried-out stave wood against the cracking that occurs when aged oak is suddenly exposed to outdoor humidity cycling after years of indoor storage, and it deepens and enriches the warm amber tone of the weathered oak in a way that makes the barrel look genuinely luxurious rather than simply aged. A single application of penetrating oil at installation and an annual reapplication each spring extends the visual quality and structural integrity of the barrel table through many years of outdoor entertaining.














