
Tiered Plant Stand: 8 Pots, Cedar Build, $40
Three cedar platforms on angled side supports hold eight pots in the footprint of two — and a crowded patio suddenly has room for more plants.
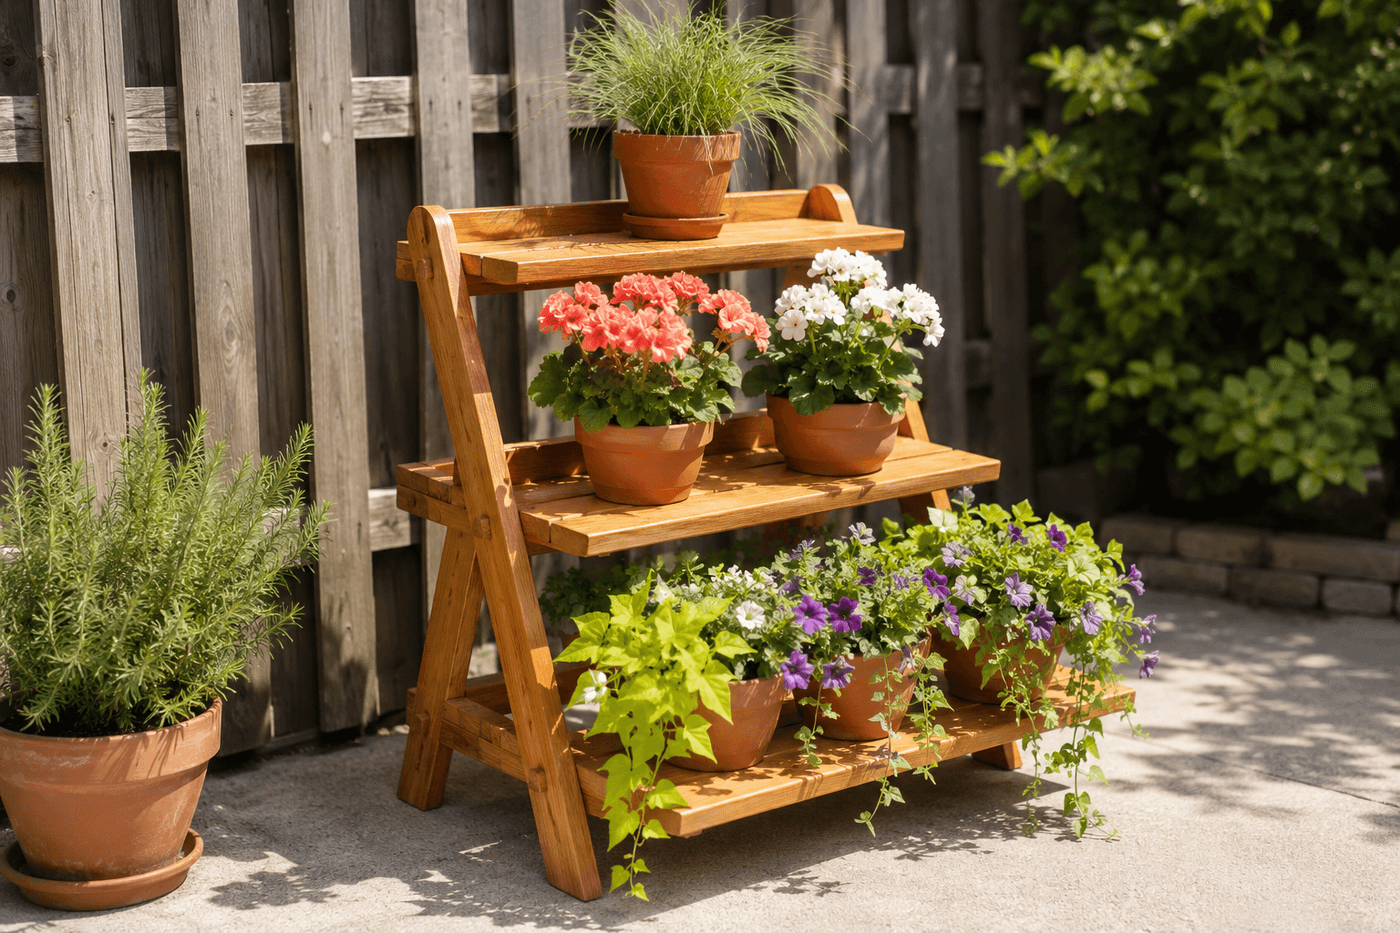
Patio plant crowding is one of those problems that appears gradually — one more pot here, one more pot there — until the outdoor space feels more like a nursery staging area than a place to sit and enjoy the plants you have accumulated. A three-tiered plant stand does not reduce the number of plants; it elevates the display into vertical space that a flat arrangement cannot access, reducing the ground footprint to roughly the size of two pots while accommodating eight across three levels. The stepped platform design is both visually classic and structurally straightforward: two angled side supports carry three platform levels of decreasing depth, with twelve inches of vertical clearance between levels that accommodates standard pot heights without cramping trailing plants between tiers. Cedar is the correct material choice for a stand that will experience constant watering drips, seasonal weather, and the slow moisture accumulation that destroys lesser wood — it resists rot naturally and weathers gracefully without chemical treatment. The drainage groove routed along the front edge of each platform redirects water runoff to the back of the stand rather than dripping onto the plants below, which is the finishing detail that distinguishes a stand built by someone who has actually used one from a plan that only looked at the construction.
What You'll Need
- 1x10 cedar boards, 8 feet — two boards yield all three platform levels cut to width; the 9¼-inch actual width of a 1x10 is sufficient depth for most standard 6–8 inch pots with a small margin at the front and back edges (~$9–11 each, two boards needed)
- 2x4 cedar boards, 8 feet — two boards yield both angled side support pieces; the 2x4 thickness provides the structural cross-section needed to support the combined weight of three loaded platform levels without flexing under dynamic watering loads (~$5–6 each, two boards needed)
- 1x4 cedar boards, 8 feet — one board provides the back rail and optional front lip on each platform level; the back rail prevents pots from being bumped off the back of the stand and adds lateral rigidity to the platform-to-side-support connection (~$5–6 per board)
- Exterior structural screws, 2" and 2½" — 2½-inch for platform-to-side-support connections where maximum thread engagement is critical; 2-inch for rail and lip attachment; stainless or coated exterior screws prevent the rust streaking on cedar that galvanized screws produce within two seasons (~$6–8 per box)
- Exterior wood glue — applied at all platform-to-side-support joints before screwing; Titebond II or similar water-resistant formula; the glue joint carries the primary platform load and the screws maintain alignment during cure and resist seasonal wood movement
- Exterior penetrating sealant — danish oil, teak oil, or dedicated exterior wood sealer applied to all surfaces before assembly; a plant stand experiences more water contact per square foot than almost any other outdoor wood structure and requires thorough sealing on all faces including undersides (~$8–10)
- Router with ¼-inch straight bit — for cutting the drainage groove along the front edge of each platform; if no router is available, a table saw kerf or a hand-chiseled groove achieves the same drainage function less elegantly but equally effectively
- Circular saw or miter saw — for the angled cuts on the side supports that create the stepped silhouette; the angled notch cuts require confident saw control at a consistent angle
- Drill, impact driver, speed square, and clamps
- Sandpaper, 80- and 220-grit — for smoothing all surfaces before sealing, with particular attention to platform top edges where pots slide during arrangement
How to Build It
- Determine platform dimensions before cutting any lumber — measure your largest pot diameter and add 3–4 inches to determine minimum platform width, then measure your tallest pot height and add 3 inches to determine minimum vertical clearance between levels. A stand with 12 inches of vertical clearance between platform surfaces accommodates most standard 6–8 inch pots with trailing plants without the foliage being compressed by the platform above; taller ornamental grasses or standards on the bottom level may need 14–15 inches of clearance and should be measured specifically before the stand dimensions are finalized.
- Cut the three platform boards to graduated widths — a bottom platform of 36 inches wide, a middle platform of 28 inches, and a top platform of 20 inches produces the classic stepped silhouette with visually consistent tier-to-tier reduction. All three platforms are cut from the same 1x10 board at the full 9¼-inch board depth, which produces platforms that are wider than they are deep — the proportionally correct ratio for a display stand as opposed to a storage shelf.
- Cut the angled notches in both side support boards — each notch creates a horizontal shelf surface that the platform boards rest on, positioned at the correct height and depth to produce the 12-inch vertical spacing and the front-to-back stepping of the platform positions. Mark both side supports simultaneously with a pencil and speed square to guarantee the notch positions are identical on both pieces, which determines whether the finished stand is level across every tier or has a visible left-to-right tilt that no amount of shimming fully corrects.
- Sand all boards through 80- and 220-grit before any finishing or assembly — individual flat boards sand efficiently and completely on all faces and edges; the same surfaces in an assembled stand are partially inaccessible behind joints and in corners where sandpaper cannot reach. The platform top faces specifically benefit from a thorough 220-grit final pass that produces a surface smooth enough that ceramic and terracotta pots slide easily during arrangement without scratching either the platform or the pot base.
- Route the drainage groove along the front edge of each platform top face — position the groove approximately ½ inch from the front edge and route to a depth of ¼ inch and width of ¼ inch using a straight router bit. The groove intercepts water running across the platform surface from watering and channels it to run along the groove toward the platform ends rather than dripping over the front edge onto the plants below. Test the drainage function with a small pour of water on the sanded platform before assembly to confirm the groove slope is sufficient for active drainage.
- Apply exterior sealant to all surfaces of all boards — top, bottom, and all four edges of every platform, and all faces of both side supports — with a rag or foam brush, working the oil into the grain and wiping excess after 15–20 minutes. This pre-assembly finishing step reaches every surface completely including the faces that become interior joint surfaces after assembly; these are the surfaces most exposed to moisture migration from the joint and the least accessible for refinishing once the stand is assembled.
- Assemble the stand by setting the side supports on a flat surface, applying exterior wood glue to the notch surfaces of both supports simultaneously, and lowering each platform board into its corresponding notch pair — working from bottom platform to top platform so the completed lower tiers provide a stable base for the increasingly elevated assembly work above. Clamp each platform into its notch position and confirm it is level across its full width before driving 2½-inch screws through the side support faces into the platform end grain through pre-drilled pilot holes.
- Install back rails on each platform by cutting 1x4 cedar to the platform width and screwing it upright along the back edge of each platform surface — the rail height of 3–4 inches provides a backstop that prevents pots from being bumped off the back of the stand during watering and adds significant lateral rigidity to the full structure that the platform-to-side-support joint alone cannot provide. Confirm the completed stand sits flat on all four contact points and does not rock before loading any pots; add a thin cedar shim under any corner that does not make full contact with the patio surface.
Container garden stylists and porch display designers who create plant stand arrangements for residential staging and editorial photography use one plant placement principle for tiered stands that produces the most visually compelling and balanced display regardless of how many plants or how many tiers are involved: place the tallest, most upright plant on the top tier, transitioning to progressively more spreading or trailing varieties on each lower tier, with the most dramatically trailing plants on the bottom tier where their cascading growth hangs freely below the platform edge. This top-to-bottom progression from vertical to horizontal growth habit mirrors the natural layering of a plant community — tall canopy above, spreading understory below, ground-covering growth at the base — and creates the visual depth and movement that makes a tiered stand display read as a designed garden vignette rather than a collection of pots at different heights. Container designers call this the "canopy to cascade" principle, and it is the plant selection and placement framework that produces the lush, intentional look of professional plant displays from the same basic three-tier structure that produces a merely adequate display when pots are arranged by size or color alone.














