Tie-Dye Beach Towels: 3 Towels for $30
Plain white towels in, eye-catching poolside statements out — and every single one comes out completely different.
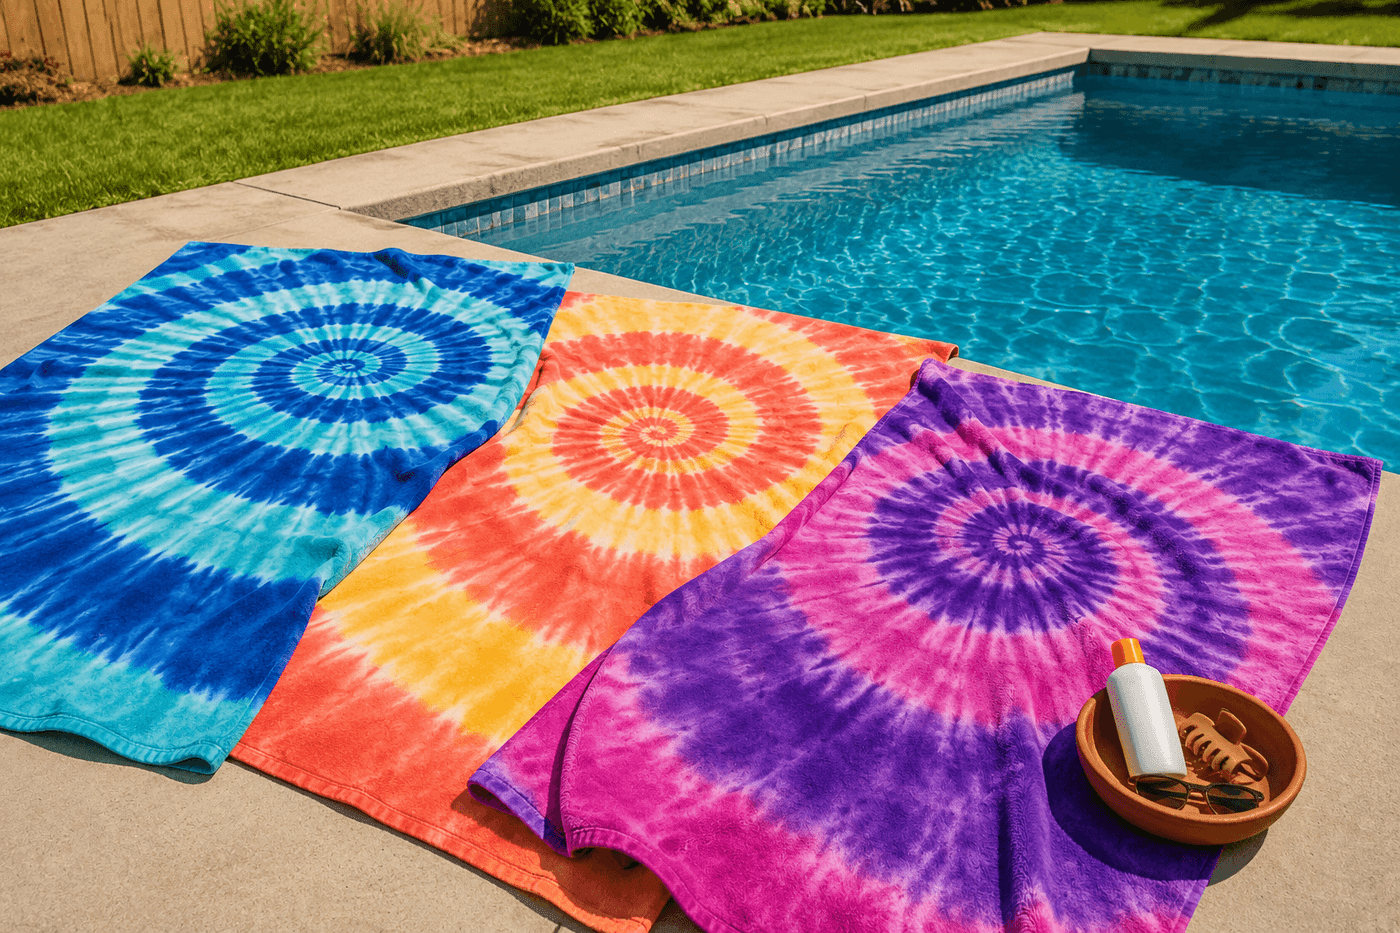
A three-pack of plain white cotton beach towels costs about $18 at any big box store, a tie-dye kit runs about $12, and two hours on a sunny Saturday morning turns those materials into the most-complimented poolside accessories your family will own this summer. Tie-dye has a reputation for being unpredictable in the frustrating sense — muddy colors, disappointing patterns, nothing like what you envisioned — but that reputation belongs entirely to the wrong technique. The spiral is the right technique: foolproof, forgiving, and almost guaranteed to produce results so vibrant and graphic that strangers at the pool will ask where you bought them. Every towel comes out genuinely different from the last even when you use the same colors, and that variation is a feature rather than a flaw. This is one of those rare projects where the reveal moment — unwrapping the plastic after the dye has set — reliably produces the kind of reaction that makes you want to immediately set up and do the whole thing again.
What You'll Need
- Plain white cotton beach towels — 100% cotton only; polyester blends resist fiber-reactive dye and produce faded, washed-out results (~$18 for a three-pack)
- Tie-dye kit — Tulip One-Step or similar; kits include pre-mixed dye bottles, rubber bands, and gloves (~$12); one kit covers three full-size towels comfortably
- Plastic wrap or large zip-lock bags — for wrapping dyed towels during the one-hour setting period
- Rubber bands — at least 8 per towel; most kits include these but having extras on hand is worth it
- Plastic table cover or garbage bags — protect your work surface; dye stains permanently and immediately
- Rubber or latex gloves — included in most kits; dye-stained hands last 3–5 days, which is a long time to explain yourself
- Squeeze bottles — included in most kits; if working from powder dye, you'll need these separately
- Garden hose or utility sink — for the final rinse; this produces a lot of colored runoff and is not a bathroom sink activity
How to Do It
- Soak each towel in plain water until thoroughly wet, then wring out the excess so the towel is damp but not dripping — wet fabric allows dye to spread evenly through the fibers, while dry fabric produces harsh edges and uneven color uptake that looks blotchy rather than graphic.
- Lay the damp towel flat on your protected work surface and locate the center point — for a beach towel, this is where you want the spiral's origin, which will become the most densely colored and visually complex part of the finished design, so dead center produces a balanced result while an off-center pinch creates an asymmetric pattern.
- Pinch the towel at the center point with two fingers and begin twisting in one direction, using your other hand to gather the fabric inward as you twist so the towel coils into a tight, flat disk shape rather than bunching unevenly. Keep the disk as flat and even as possible — a tight, uniform disk produces the clean spiral reveal; a loose or lopsided one produces muddier results.
- Secure the disk with rubber bands stretched across it in four directions — think of dividing the disk into eight equal wedge sections, with each rubber band creating two dividing lines. These bands are what separates your color sections during dye application and creates the defined wedge pattern that makes spirals so graphic and satisfying.
- Apply dye colors in the wedge sections between rubber bands, squeezing the dye bottle directly into the fabric and working it in with gentle pressure so color penetrates all the way through the disk rather than sitting only on top — flip the disk and repeat the same color pattern on the back, which is the step most beginners skip and the reason for pale, washed-out undersides.
- Wrap each finished towel tightly in plastic wrap or seal in a zip-lock bag immediately after dye application, then set aside for a full hour at room temperature — this sealed dwell time is when the fiber-reactive dye permanently bonds to the cotton, and cutting it short produces visibly duller, less saturated color that fades faster in washing.
- Rinse each towel under running water — still rubber-banded — until the water running off it is nearly clear, then remove the rubber bands and rinse again until completely clear. Starting the rinse with the bands on prevents the sections of dye from bleeding into each other during that critical first flush of excess dye.
- Wash all three towels together in the washing machine on a warm cycle with a small amount of detergent — alone, not with other laundry — then tumble dry. The first machine wash removes any remaining unbound dye, and after that the colors are set permanently and the towels can be washed normally for years without significant fading.
Textile artists and surface design instructors who teach fiber-reactive dyeing consistently use one color selection strategy that separates vibrant, graphic results from muddy ones: choose colors that are all analogous or limit your palette to three colors maximum, and always place a light color between any two colors that would mix to make brown. Blue and orange directly adjacent in a spiral will bleed into each other at the edges and produce a muddy brown transition zone — but place white or yellow between them and you get a clean, high-contrast result. The most reliably stunning beginner spirals use a three-color palette from one side of the color wheel: turquoise, cobalt, and purple produce jewel-toned results with clean transitions every time, while red, orange, and yellow read as bold and graphic without any risk of muddy mixing at the seams. Picking your palette intentionally before you touch a dye bottle is the single decision that most determines whether your towels look designed or accidental.