Stop Slugs with Copper Tape Barriers for $10
Thirty minutes of tape application, zero slug damage for the rest of the season — the barrier that actually works
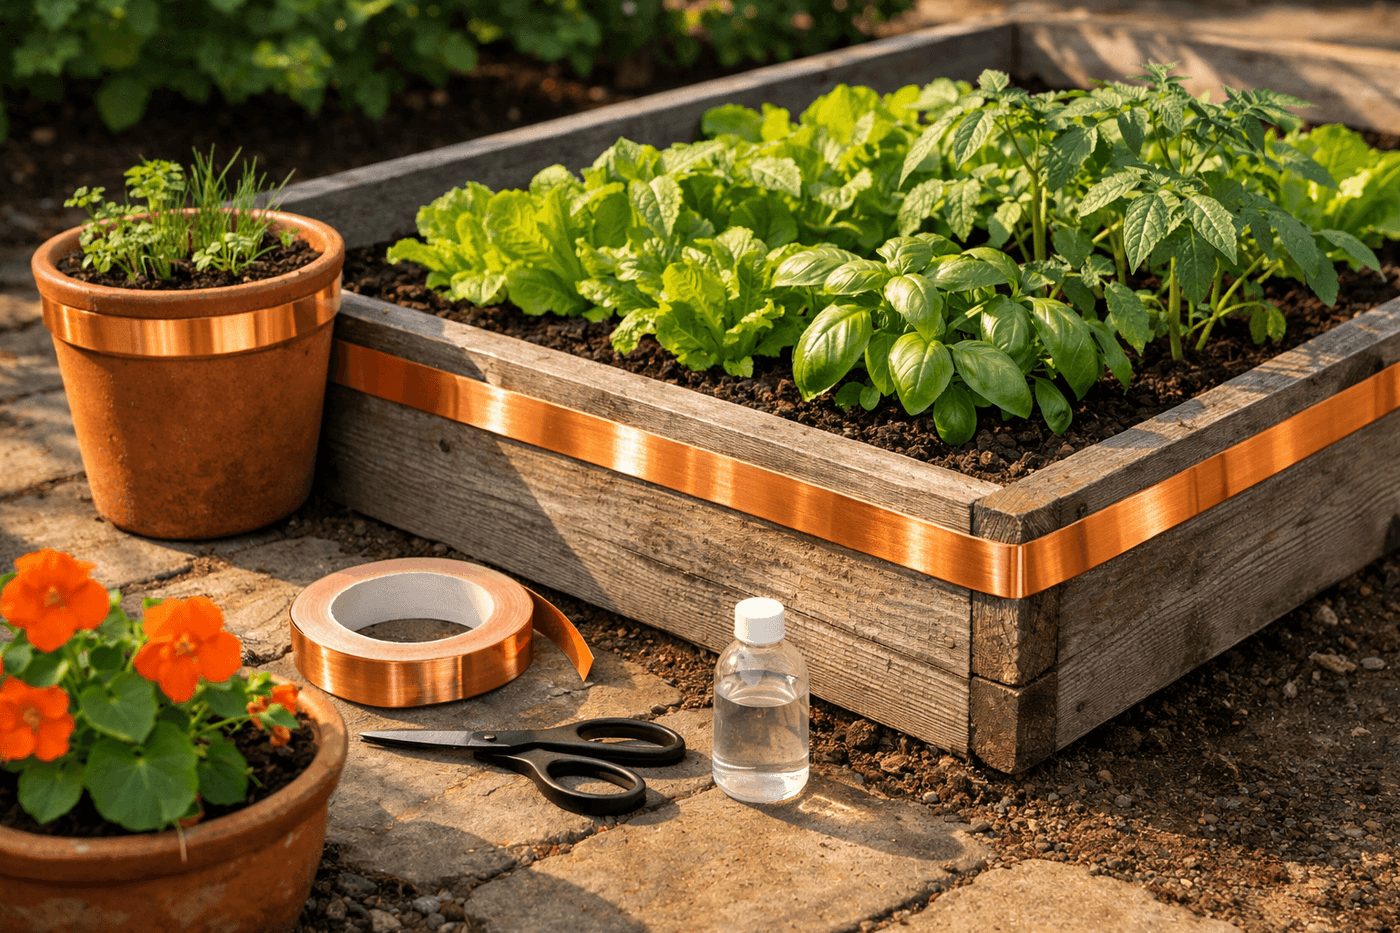
Slugs are the garden pest that every home remedy seems designed to address and none of them quite solve — beer traps require constant refilling, eggshells get washed away or bridged by determined slugs, and iron phosphate baits need reapplication after every rain. Copper tape works on an entirely different principle: the copper reacts chemically with slug slime to create a mild electrical charge that slugs find immediately aversive, so rather than pushing through the barrier the way they push through every other deterrent, they simply reverse direction and leave. Apply a continuous band with no gaps around the perimeter of a raised bed or container, and the barrier works without any further attention through the entire growing season regardless of how much it rains. Two rolls of adhesive copper tape for $10, thirty minutes of application time, and the seedling losses that have been a recurring seasonal heartbreak simply stop happening. This is one of those garden solutions where the mechanism sounds almost too simple to be real — and then you go a full season without a single slug-damaged plant and the skepticism evaporates entirely.
What You Need
- Adhesive copper tape, ½" or 1" width, qty 2 rolls — wider tape is more effective and more forgiving of minor application irregularities; look for tape with a strong outdoor-rated adhesive backing rather than the thin decorative copper tape sold for craft projects, which loses adhesion in outdoor moisture conditions within weeks (~$5 per roll)
- Rubbing alcohol and clean cloth — for cleaning the application surface thoroughly before taping; copper tape adhesive bonds to clean, dry wood or plastic and fails progressively on dusty, oily, or moist surfaces regardless of tape quality
- Scissors or craft knife — for cutting tape to length and making precise overlapping joins at corners and seams
- Measuring tape — for calculating total linear footage needed before starting; running out of tape mid-application and leaving a gap means slugs will find that gap within the first night
- Soft cloth or fingernail — for pressing the tape firmly along its full length after application to ensure complete adhesive contact with the surface beneath
- Flashlight — useful for an evening inspection after first application to confirm no gaps exist that slugs could exploit; slugs are most active at night and will find any gap in the barrier by morning if one exists
How to Apply It
- Calculate the total linear footage of copper tape needed by measuring the full perimeter of every raised bed and container you plan to protect before purchasing tape. Running short mid-application and leaving any section incomplete defeats the entire barrier — a slug that finds a gap in the copper band will exploit it every single night for the rest of the season, and the gap will be invisible to you in daylight while being obvious to a slug navigating by chemical cues in the dark.
- Time your application on a dry day when the surfaces you're taping have had at least twenty-four hours without rain — adhesive copper tape bonds most durably to thoroughly dry wood and plastic, and tape applied to damp surfaces loses adhesion from the inside outward as residual moisture works between the adhesive layer and the substrate over the following days. A barrier that looks perfectly applied but was put on damp wood will be lifting and gapping within two weeks.
- Clean the application surface thoroughly with rubbing alcohol on a clean cloth, wiping along the full perimeter band where the tape will sit and allowing the surface to dry completely before unrolling any tape. Raised bed wood accumulates algae, soil residue, and the remains of previous pest deterrents on its upper surfaces — all of which interfere with adhesive bonding and dramatically shorten how long the tape stays firmly in place through outdoor weather cycling.
- Position the tape on the outer face of the raised bed or container rim, placing it high enough that slugs approaching from ground level cannot bridge it by reaching over the top — at least two inches below the top edge of the bed gives slugs no purchase above the barrier. On containers, wrap the tape around the upper third of the pot exterior where it is most exposed to approaching slugs and least likely to be submerged in puddle water during heavy rain.
- Apply the tape in a continuous, unbroken band around the full perimeter, pressing firmly as you go and keeping the tape perfectly level rather than angled or wavy — a level band with consistent width exposed is both more effective and more visually tidy than a wandering application. Work slowly enough to maintain even tension on the tape as it comes off the roll; tape applied under uneven tension bunches and lifts at the stress points within the first week.
- Overlap the tape ends by at least one inch where the band completes its circuit around the perimeter — this overlap is the most critical join in the entire application because it is the point where a gap is most likely to develop as the tape ends contract slightly in cold weather. Press the overlap firmly for thirty seconds with a fingernail or the back of a spoon to ensure the two tape layers bond completely to each other as well as to the surface beneath.
- Address corners on square raised beds by making a small diagonal cut in the tape at each corner and folding it around the angle rather than trying to wrap continuous tape around a ninety-degree turn — uncut tape wrapping a sharp corner develops stress fractures at the bend point that lift and create gaps within a season. The diagonal fold technique keeps full tape contact with the corner surface and prevents the lifting that otherwise makes corners the weakest point in the barrier.
- Inspect the full barrier at ground level with a flashlight on the first evening after application, looking specifically for any section where the tape is not lying completely flat against the surface or where the ends have not overlapped fully. Address any imperfections immediately rather than waiting to see if they cause problems — slugs navigate by chemical trail and will find a lifting tape edge on the first night it exists, establishing a crossing route that other slugs follow even after the gap is repaired.
Organic market gardeners who rely on copper barriers for commercial seedling production always install the tape before transplanting rather than after the first damage appears — by the time slug damage is visible on a seedling, the plant has already lost significant photosynthetic capacity and the slug population in that bed has already established feeding routes that they return to every night by chemical memory. Installing copper barriers on empty or newly planted beds means slugs never establish those feeding routes in the first place, which is fundamentally more effective than installing a barrier that interrupts an already-established pattern. They also run a second band of copper tape around any irrigation lines or wooden stakes inside the bed that touch the soil and could theoretically provide a bridge route over the perimeter barrier — the perimeter tape stops ninety-five percent of slug access, and addressing the bridge points eliminates the remaining five percent.