
Solar Jar Lanterns: Dollar Store Glow for $4
Pop the solar cap off a pathway stake light, drop it onto a mason jar full of glass gems, wire a hanger around the neck — and a $4 lantern glows all night for free wherever it hangs.
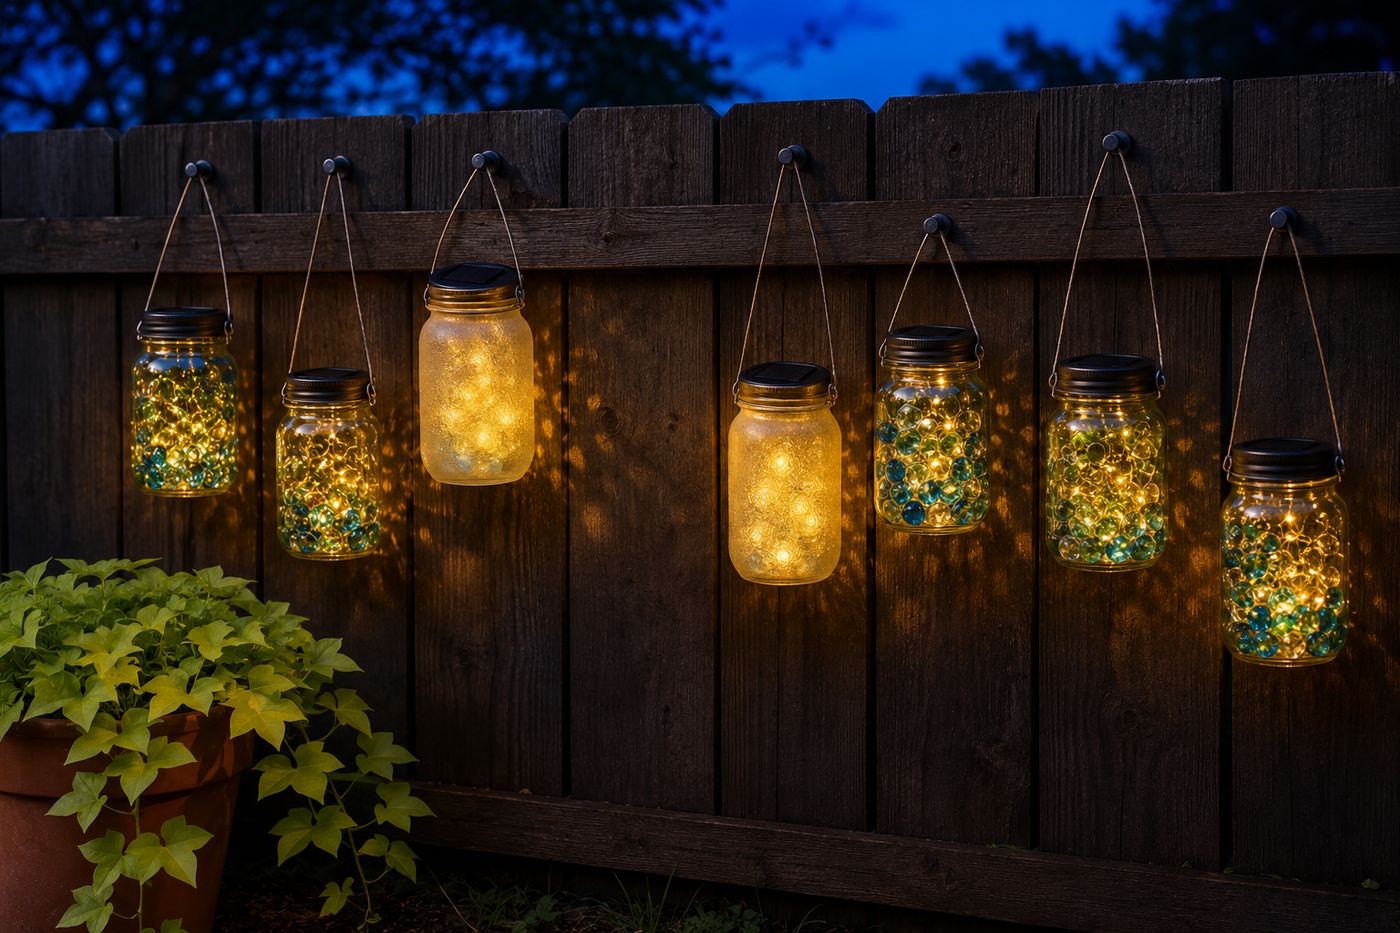
Dollar store solar pathway lights are one of the most underrated raw materials in outdoor DIY — they contain a functional solar panel, a rechargeable battery, a light sensor, and an LED bulb in a package that costs $1–2, and the only thing preventing most people from getting more use out of them is that the plastic stake they come on limits the installation options to the ground. Removing the solar cap from the stake — it unscrews or pops off in seconds — reveals a self-contained solar light unit that sits perfectly on a wide-mouth mason jar rim and charges through the glass-free top surface all day while the LED shines down into whatever is inside the jar at night. Glass gems, marbles, frosted glass spray on the exterior, or a coiled length of copper wire inside the jar all produce different light diffusion effects; the wire hanger formed around the jar neck in two minutes costs nothing and hangs from any fence nail, shepherd's hook, or tree branch. A collection of eight to ten lanterns hung at varied heights along a fence or across a garden space produces the kind of ambient evening light that makes outdoor spaces feel magical for a total investment of $3–4 per lantern and zero ongoing electricity cost.
What You'll Need
- Dollar store solar pathway stake lights — the standard round-cap variety rather than the decorative shaped types; the round cap is what fits a mason jar rim correctly; buy several at once since they are often sold in packs of two or four; confirm the solar cap separates from the stake by twisting or popping rather than being permanently bonded — most dollar store pathway lights use a friction or thread connection that separates easily (~$1–2 each or $3–4 for a two-pack)
- Wide-mouth mason jars, quart or pint size — wide-mouth rather than regular-mouth; most dollar store solar caps fit the wide-mouth opening with the cap resting on the jar rim rather than dropping inside it; quart jars produce a more substantial lantern with more interior volume for decorative elements; pint jars produce a more delicate lantern that suits tighter hanging arrangements (~$1–2 each at dollar stores or repurposed from the kitchen)
- Decorative interior elements — choose one or combine:
- Glass gems or flat-back marbles — fill the jar one-third full; the gems refract and scatter the LED light into hundreds of small points of colored light on the jar interior walls; blue and green gems produce the most beautiful light effect with warm white LEDs
- Coiled copper wire — a length of 20-gauge copper wire coiled loosely inside the jar produces a warm metallic glow that suits a more sophisticated aesthetic than the colorful gem approach
- Sea glass or tumbled stones — frosted glass produces a soft, diffused glow rather than the point-refraction effect of clear gems
- Nothing — frosted exterior only — frosted glass spray applied to the exterior of a plain jar produces a soft, even glow that is the most elegant and minimal version of the lantern
- Frosted glass spray — optional exterior treatment; Rust-Oleum Frosted Glass Spray applied to the exterior produces the soft, even light diffusion of etched glass without the etching process; apply in two light coats to a clean, dry jar exterior; leave a clear stripe unsprayed on one side so the solar panel receives maximum direct light through the jar top (~$6–8 for a can covering many jars)
- 20-gauge wire — aluminum or copper — for forming the hanging bail around the jar neck; aluminum wire is easier to bend by hand and does not rust; copper wire develops a beautiful patina that suits the mason jar aesthetic particularly well; approximately 24 inches per lantern is sufficient for a full wrap around the neck plus the hanging loop (~$4–6 for a small spool covering many lanterns)
- Needle-nose pliers — for twisting the wire bail tight at the jar neck and forming the hanging loop at the top; pliers produce a tighter, more secure wire wrap than fingers alone, which is the difference between a bail that holds the jar securely at the neck and one that slides down the jar body when the jar is lifted
- Shepherd's hooks, fence nails, or S-hooks — for hanging the finished lanterns; shepherd's hooks placed in garden beds or along paths allow hanging positions anywhere in the garden regardless of existing fence or structure; S-hooks on fence top rails or tree branches are faster to install and reposition (~$5–8 for a pack of shepherd's hooks)
How to Make Them
- Separate the solar cap from the stake by twisting counterclockwise or applying firm upward pressure to pop the cap free from the stake collar — do this gently rather than forcefully, since the connection point also houses the wire that runs from the solar panel to the battery and LED inside the stake body in some models; confirm the cap separates cleanly with all electronics intact and the LED is visible on the underside of the cap before proceeding. Set a separated cap on the mason jar rim to confirm the fit — the cap should rest on the rim with the LED facing down into the jar interior and the solar panel surface facing up toward the sky.
- Apply frosted glass spray to the jar exterior if using that finish — clean and dry the jar completely, apply two light coats of frosted glass spray from 10–12 inches holding the can in smooth, overlapping horizontal passes, and allow each coat to dry fully before the next. Leave a clear 2-inch circle on the top of the jar where the solar cap will rest — the frosted glass on the jar sides and bottom diffuses the light through the full lantern body while the clear section at the top ensures the solar panel receives direct sunlight through the unobstructed glass. Allow the spray to cure for 24 hours before filling with decorative elements or handling the jar heavily.
- Fill the jar with the chosen decorative interior element — for glass gems, fill to approximately one-third of the jar height, which provides enough refracting material to scatter the LED light throughout the jar interior without filling so much of the jar that the light is blocked from reaching the lower gem layers. Arrange the gems with the flattest faces pointing upward toward the LED so the light strikes the maximum flat surface area; gems oriented flat-side-up produce significantly more light scatter than gems lying on their sides or stacked randomly.
- Form the wire bail around the jar neck — cut approximately 24 inches of wire and wrap it tightly around the jar neck directly below the threading where the jar lid would normally seat, completing two full wraps around the circumference. Twist the wire ends together on one side with needle-nose pliers to secure the wraps tightly against the jar surface; a bail that is not tightly secured against the neck slides down the smooth jar body when the filled jar is lifted and produces an unbalanced lantern that hangs at an angle.
- Form the hanging loop by bringing both wire ends upward from the neck wrap and twisting them together for approximately 2 inches above the jar top to create a rigid stem, then bending the twisted stem into a loop and twisting the end back around the stem base to close the loop. The loop should be large enough to accommodate the thickness of a shepherd's hook or S-hook with a small amount of clearance — approximately ¾-inch interior diameter — and should be positioned directly above the center of the jar to produce a level hang rather than a tilted one; a loop positioned off-center causes the filled jar to swing to the heavy side.
- Test the solar cap placement by setting it on the jar rim and covering the solar panel with one hand to simulate nighttime — the LED should illuminate within a few seconds of the panel being covered, confirming the light sensor is functioning correctly and the LED has sufficient charge from the factory. If the LED does not illuminate after 5 seconds of hand-covering the panel, the battery may need a full charge before the first use; place the cap on the jar and set in direct sun for 6–8 hours before the first evening display.
- Place the solar caps on the jars loosely rather than securing them permanently — the cap needs to be removable for battery replacement when the rechargeable cell eventually reaches end of life, which typically occurs after two to three seasons of daily charge-discharge cycling; a permanently adhered cap converts a maintainable lantern into one that must be fully replaced when the battery fails. The weight of the cap and the friction of the rim contact keeps it in place in all normal wind conditions; only severe wind that swings the lantern violently risks dislodging a loose cap, and lanterns should be brought inside or the caps secured with a single small strip of weatherproof tape during storm conditions.
- Hang the lanterns at varied heights along the fence, in garden beds, or from tree branches — vary the height by 12–18 inches between adjacent lanterns rather than hanging all at the same level, which produces the dimensional, layered lighting effect that makes a collection of lanterns feel like a curated light installation rather than a row of identical fixtures. Assess the full display after dark on the first evening to identify any positioning adjustments — a lantern partially shaded by adjacent foliage during the day will have less charge and glow less brightly than neighbors in full sun, and repositioning to a sunnier location during the day resolves the brightness imbalance without any changes to the lantern itself.
Outdoor lighting designers and event stylists who create ambient garden lighting installations for residential and event spaces use one placement principle that produces a lighting effect dramatically more atmospheric than lanterns hung at even spacing along a fence line: hang lanterns in clusters of three at varying heights within a 2-foot diameter zone, then leave a 4–6 foot gap before the next cluster of three. Individual lanterns spaced evenly produce a functional pathway of light; clustered lanterns with dark intervals between clusters produce the specific rhythm of light and shadow that reads as an intentional lighting design rather than installed fixtures. The dark intervals between clusters are as important as the lit clusters — they create the contrast that makes each cluster feel like a destination within the garden space rather than one of many identical light points in an unbroken sequence. Outdoor lighting designers who use this cluster-and-interval principle for lantern installations describe the result as producing ten times the visual impact from the same number of lanterns compared to even spacing, because the eye is drawn to the clusters, rests in the intervals, and travels through the garden in a designed sequence rather than following an undifferentiated line of light.














