
Sew a Bandana Quilted Table Runner for $10
Six thrift store bandanas, a quarter-inch seam, and an afternoon — the table runner that costs $10 and looks like a deliberate vintage find
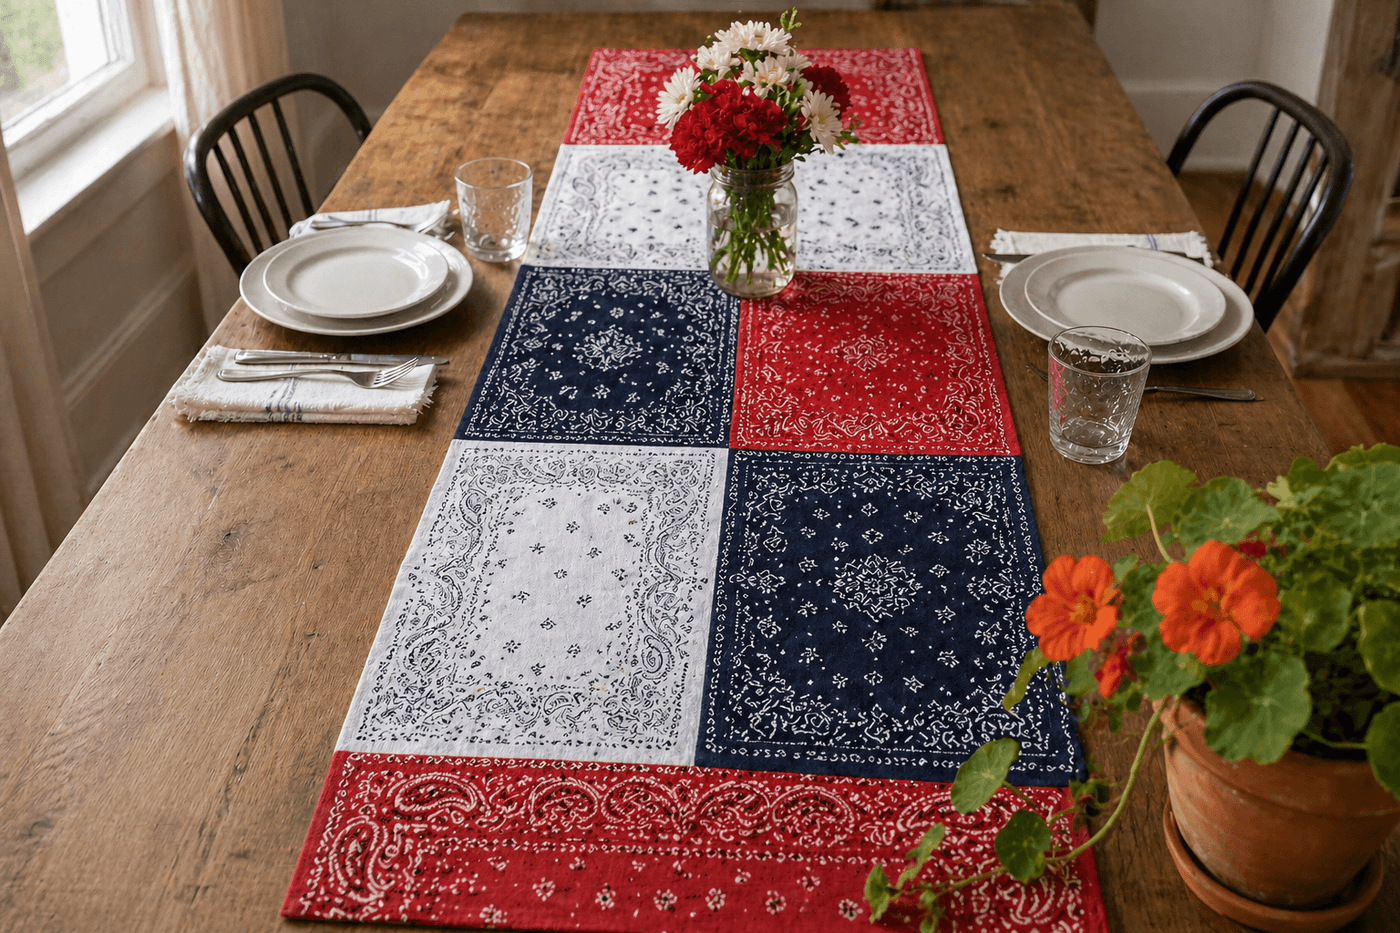
Bandanas are one of those thrift store and dollar store staples that appear in every color combination imaginable, cost almost nothing, and are already exactly the right size and shape to sew together into a table runner without cutting a single piece — the standard 22-inch bandana square slots perfectly into a two-wide running arrangement that fits most dining tables, and the classic paisley and geometric prints that cover them create a mix-and-match visual richness that would cost a textile designer significant effort to replicate from scratch. A set of six patriotic red, white, and blue bandanas assembled into a runner takes about an hour on the sewing machine, costs under $10 from a dollar store, and produces a table piece with the kind of vintage, collected character that mass-produced table runners never quite achieve regardless of price. Machine washable, completely reversible if you add backing, and genuinely impressive for something built from the fabric equivalent of loose change.
What You Need
- Bandanas in coordinating colors, qty 6–10 — standard 22×22-inch bandanas from dollar stores, craft stores, or thrift shops; aim for a mix of prints within your chosen palette — solid red alongside red paisley alongside red and white geometric creates more visual interest than six identical bandanas (~$1–2 each, $6–12 total)
- Coordinating backing fabric, ½ yard — optional but recommended for a finished, reversible runner; quilting cotton, linen, or a solid in one of the bandana colors works well (~$4–6)
- Thin quilt batting, ½ yard — optional, for a quilted runner with body and texture; a single layer of low-loft batting between the bandana top and backing fabric transforms the flat runner into something with the weight and drape of a proper quilted piece (~$5–8)
- Thread in white or coordinating neutral — a single spool handles the full runner assembly without needing color changes between bandanas (~$2–3)
- Sewing machine — for the quarter-inch seams that join bandanas into the runner top; the project can be hand-sewn but machine seams on a table runner that will be washed regularly are significantly more durable
- Iron and ironing board — for pressing seams open after each join; pressed-open seams lie flat and prevent the bulky ridges at seam lines that give handmade table runners their most common tell
- Rotary cutter, cutting mat, and ruler — optional, for trimming any bandanas that aren't quite square before assembly; most standard bandanas are close enough to square that trimming isn't necessary, but checking before sewing prevents a runner that runs slightly off-grain from one end to the other
How to Make It
- Wash all bandanas before sewing — bandanas, particularly red and deep blue ones, are notorious for bleeding color in the first wash, and a runner assembled from unwashed bandanas can develop dye transfer between adjacent blocks in its first laundering. Wash all bandanas together in warm water and check the rinse water; if it runs red or blue, wash again until the water runs clear before assembling the runner.
- Lay all washed and pressed bandanas on a flat surface and audition different arrangements before committing to any sewing — slide the bandanas into different positions and combinations until the color and pattern distribution across the full runner reads as balanced and visually interesting from a standing distance. The most common arrangement for a six-bandana runner is two bandanas wide by three bandanas long, which produces a runner approximately 43 inches wide and 66 inches long before seaming — a useful size for most dining tables.
- Photograph the final arrangement before picking up the first bandana to sew — the sequence in which bandanas need to be joined is easy to visualize when they're laid flat and easy to lose track of once you start picking them up to sew. A phone photo of the full layout takes three seconds and prevents the frustration of sewing the wrong two bandanas together and having to unpick seams to correct the sequence.
- Sew the bandanas into rows first — join the two bandanas in each horizontal row with a ¼-inch seam, right sides together, pressing the seam open flat with an iron immediately after sewing each join before proceeding to the next. Pressing seams open as you go rather than at the end of assembly is the single technique habit that most dramatically improves the flat, professional appearance of the finished runner, because an unpressed seam creates a ridge that becomes increasingly difficult to flatten once multiple layers of fabric are joined around it.
- Join the completed horizontal rows to each other with ¼-inch seams, carefully aligning the seam intersections where bandana corners meet so the four corners join cleanly at a single point rather than offsetting slightly and creating the slightly misaligned grid that reveals a handmade runner as inexpertly assembled. Pin each seam intersection precisely before sewing — a single pin through the exact junction point on both layers, perpendicular to the seam line — and remove the pin just before the machine needle reaches it rather than sewing over it.
- Finish the runner edges using one of three methods: leave the bandana hem edges as decorative fringe on the runner perimeter for a casual, textural edge; fold and press the raw outer edges inward by ½ inch twice and topstitch for a clean hemmed finish; or layer the assembled runner top with batting and backing fabric, baste all three layers together, and sew around the perimeter leaving a turning gap, then turn right-side out, press, and topstitch closed for a fully quilted, reversible runner.
- Add quilting stitches if you've assembled the three-layer version — simple straight-line quilting stitched ¼ inch inside each bandana seam line creates the characteristic grid of quilting lines that gives the piece its quilted texture and holds the batting flat and even through washing. Use a walking foot attachment if your machine has one; it feeds all layers through the machine at the same rate and prevents the shifting and puckering that occurs when quilting multiple layers with a standard presser foot.
- Press the finished runner completely with a hot iron before displaying it — a well-pressed bandana runner that lies flat and smooth on a table reads as a quality handmade piece; the same runner displayed without pressing reads as a craft project. Spray a light mist of water on the runner surface before pressing and hold the iron on each section for three to five seconds rather than gliding it quickly across the surface, which moves wrinkles along the fabric rather than eliminating them.
Textile designers who work with mixed print combinations always follow what they call the visual weight rule when arranging pattern blocks — they ensure that the busiest, most visually complex print (typically a dense traditional paisley) is always adjacent to a simpler, lower-density print (a solid or a small geometric) rather than placing two complex prints next to each other, where they compete visually and create a chaotic rather than rich appearance. In a bandana runner, this means alternating a classic paisley bandana with a simpler geometric or near-solid bandana in the same color family throughout the layout rather than clustering the most patterned bandanas together. The visual weight alternation is what produces the layered, curated quality that distinguishes a considered textile arrangement from one that merely contains interesting individual pieces.














