Set Up a Kitchen Infused Water Station for $20
A glass dispenser, sliced fruit, and five minutes every morning — the hydration habit your whole family actually keeps
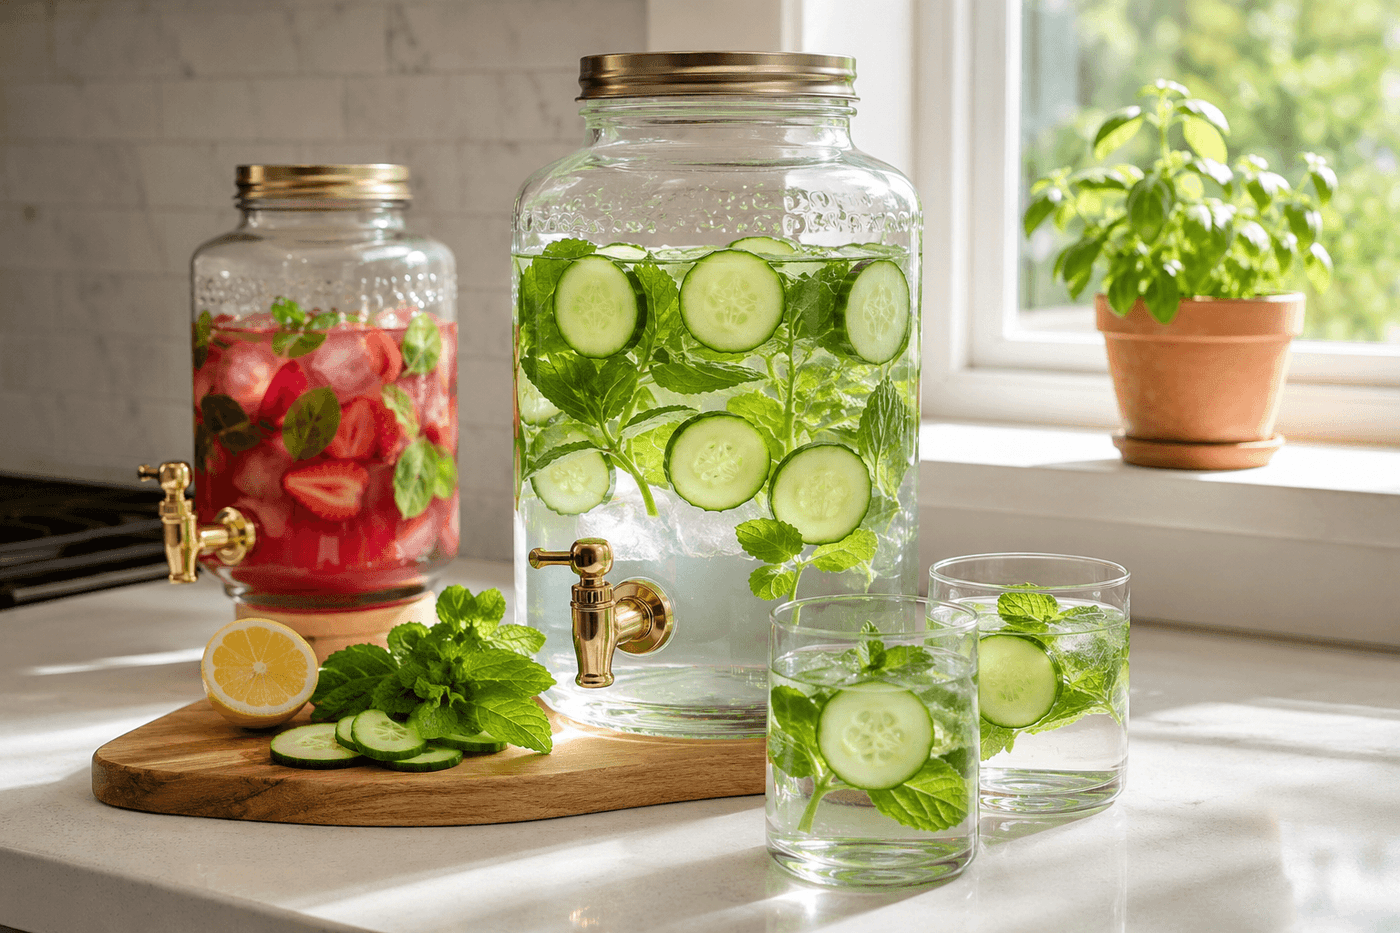
Getting a household to drink more water is almost entirely a visibility and accessibility problem — plain water sitting in a pitcher in the back of the refrigerator loses to juice every single time, but a beautiful glass dispenser on the counter filled with cucumber and mint or strawberry and basil wins before anyone has even tasted it. The visual appeal of sliced fruit and fresh herbs floating in clear water is genuinely compelling in a way that plain water never manages, and the flavor — subtle, clean, and refreshing in a way that tastes intentional rather than just wet — converts even confirmed juice drinkers with remarkable speed. A $20 glass dispenser with a spigot, five minutes of prep every morning alongside coffee, and about $3 in fresh ingredients per refill is the complete investment in a hydration habit that sticks because it is genuinely more appealing than the alternatives rather than requiring willpower to choose. The dispenser that goes on the counter in June tends to stay on the counter permanently.
What You Need
- Glass drink dispenser with spigot, 1–2 gallon — glass rather than plastic for daily infused water use; glass doesn't absorb flavors or odors between refills and doesn't leach any compounds into the water during extended infusion periods. A spigot positioned near the base allows glasses to be filled without lifting the full dispenser (~$18–25 at grocery stores, Target, or online)
- Fresh fruit for infusing — cucumber, strawberry, lemon, lime, orange, watermelon, and raspberry are the most reliably flavorful infusion ingredients; stone fruits like peaches and nectarines produce a subtler infusion and work best combined with a stronger flavor partner like ginger or mint (~$2–4 per refill from the produce section or garden)
- Fresh herbs — mint, basil, rosemary, and thyme all infuse readily into water and pair naturally with specific fruits; mint pairs with cucumber, citrus, and watermelon; basil pairs with strawberry and raspberry; rosemary pairs with lemon and citrus; thyme pairs with peach and orange (~$1–2 for a bunch that provides several days of infusions)
- Cold filtered water — filtered water produces the cleanest, most transparent infusion flavor; tap water with strong mineral or chlorine character can mute the fruit and herb flavors and produce a slightly off base note in the finished water
- Sharp knife and cutting board — for slicing fruit into thin rounds or pieces that maximize the surface area in contact with the water and produce the fastest, most flavorful infusion
- Long-handled spoon or muddler — optional, for gently pressing herbs against the dispenser wall to release their oils more quickly at the start of the infusion period
How to Set It Up
- Choose your flavor combination before slicing anything — the most reliable and crowd-pleasing starting combinations are cucumber and fresh mint, strawberry and basil, lemon and fresh rosemary, and watermelon and mint. Combinations that use one mild, watery fruit with one aromatic herb tend to produce the cleanest, most balanced infusions; combinations with two strong or sweet flavors can become cloying after a few hours of infusing and encourage overdrinking of flavored water rather than the moderate, steady hydration that makes this habit genuinely healthy.
- Slice fruit into thin rounds or small pieces rather than large chunks — thin cucumber rounds, halved strawberries, and lemon slices with the peel on all infuse significantly faster and more thoroughly than large pieces because they present more surface area to the surrounding water. Fruit cut too thick can infuse for hours without fully releasing its flavor; fruit sliced thinly typically reaches a pleasant infusion level within one hour of refrigeration.
- Prepare fresh herbs by tearing or gently crushing the leaves rather than chopping them — tearing releases the essential oils in the leaf surface without the oxidation that chopping causes, which can make herb-infused water taste slightly bitter or metallic rather than fresh and aromatic. A torn mint sprig dropped into the dispenser releases its characteristic cool fragrance into the water immediately; a finely chopped mint sprig releases chlorophyll along with the oils and can produce a faintly green tint and grassy flavor note.
- Layer the ingredients into the dispenser with fruit first and herbs on top — the fruit settles to the bottom and infuses from below, while the herbs float at the top and infuse from above, distributing flavor through the full column of water more evenly than both ingredients dropped in together and settling at the same level. For very large dispensers, add a second layer of fruit and herbs at the midpoint of the water column for the most consistent flavor from top to bottom.
- Fill the dispenser with cold filtered water poured gently over the ingredients rather than blasted from the tap — a gentle fill keeps the fruit and herb arrangement distributed throughout the dispenser rather than driving everything to one side or breaking delicate herbs apart before the infusion has begun. Fill to within two inches of the rim to leave room for adding ice cubes that will melt into the water during the infusion period without overflowing the dispenser.
- Refrigerate for at least one hour before serving — this is the minimum infusion time for a pleasantly flavored water, and two to four hours produces the peak flavor intensity for most fruit and herb combinations. Some combinations — rosemary and citrus, ginger and lemon — continue to improve in flavor for up to eight hours of cold infusion; others, particularly cucumber and mint, become slightly bitter if left infusing for more than twelve hours as the cucumber skin releases bitter compounds into the water over extended contact.
- Place the dispenser on the kitchen counter rather than in the refrigerator for serving — a beautiful dispenser on the counter is visible to everyone in the kitchen and serves itself through the spigot without requiring anyone to open the refrigerator, lift a heavy pitcher, or make any effort beyond holding a glass under the spigot. Visibility and zero-friction access are the two factors that determine whether infused water gets consumed throughout the day or sits ignored in the back of the refrigerator until it's time to refill it.
- Refresh the infusion by removing spent fruit and herbs and adding fresh ingredients every 24 hours — fruit that has been infusing for more than a day begins to break down in the water and can produce a slightly fermented or off flavor, and herbs that have been submerged for extended periods lose their fresh character and contribute increasingly bitter notes to the water. A daily five-minute refresh while making morning coffee keeps the dispenser consistently appealing and makes the habit genuinely sustainable rather than requiring periodic recovery from a batch that went past its peak.
Registered dietitians who work with families on hydration habits always recommend running a weekly rotation of three to four different flavor combinations rather than sticking with a single favorite — variety prevents flavor fatigue, which is the primary reason infused water stations that start strong in June quietly disappear from counter use by August. A simple weekly rotation posted on the refrigerator — Monday cucumber mint, Wednesday strawberry basil, Friday lemon rosemary, Sunday watermelon mint — keeps the habit novel enough that household members actively look forward to the next combination rather than treating the dispenser as a fixture they no longer consciously notice. The rotation costs no more than a single repeated combination and produces sustained hydration improvement that a single-flavor station eventually loses as the novelty fades.