
DIY Projects

Recent Content

Shoe Bench Build: The Cubby Depth That Keeps Pairs Upright

Shoe Bench Build: The Cubby Depth That Keeps Pairs Upright

Build a wooden entryway shoe bench for $35—the cubby depth is what keeps boots standing instead of toppling into a pile every morning.

Style a Layered Nightstand Vignette in 1 Hour for $35

Style a Layered Nightstand Vignette in 1 Hour for $35

Turn a cluttered nightstand into a cozy styled vignette with the height-rule trick—1 hour, $35, instant bedroom upgrade.

The Cafe Rod Trick for a Fake Built-In Vanity

The Cafe Rod Trick for a Fake Built-In Vanity

Fake a built-in bathroom vanity shelf with a tiny cafe rod and basket—zero drilling, zero suction cups, full deposit intact.

Tension Rod Shelf: The Rod Width That Won't Slip

Tension Rod Shelf: The Rod Width That Won't Slip

Build a hidden double-decker shelf under your sink for $6—the rod tension width is what keeps it from crashing down on cleaning day.

Mulch Perennial Beds for Winter in 1 Hour for $25

Mulch Perennial Beds for Winter in 1 Hour for $25

Tuck your perennials in right! A 3-inch mulch blanket now saves roots from winter heave for about $25.

logo
  • Home Improvement
  • DIY Projects
  • Interior Design
  • Gardening & Outdoor
  • Real Estate
  • Home Improvement
  • DIY Projects
  • Interior Design
  • Gardening & Outdoor
  • Real Estate
  • ​

Personalized Trick-or-Treat Bags: Custom Halloween Magic

Transform plain canvas totes into cherished keepsakes with names and spooky designs
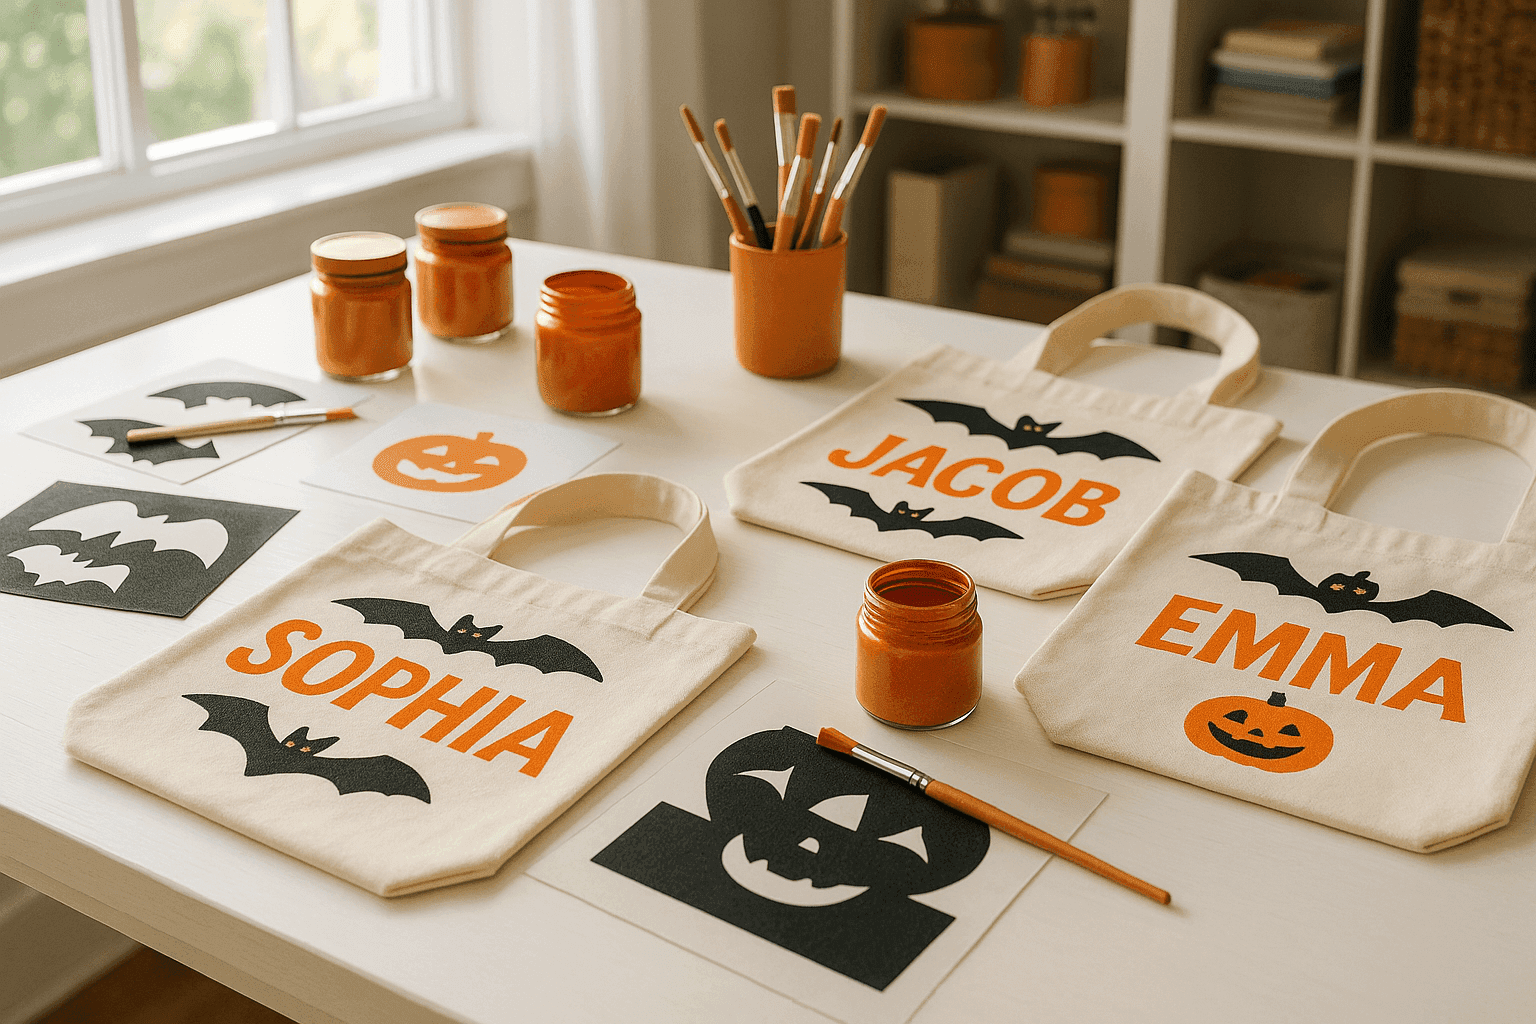
Canvas tote bags with hand-painted Halloween designs and children's names in orange and black paint on craft table with brushes and supplies
DIY PROJECTS

There's something incredibly special about watching your child's face light up when they see their very own personalized trick-or-treat bag with their name painted in bold Halloween colors. Custom canvas bags transform an ordinary Halloween accessory into a treasured keepsake that kids will want to use year after year, long after they've outgrown their costumes. Creating these personalized bags is surprisingly simple with fabric paint and a few creative techniques, costing less than $10 per bag while delivering the kind of thoughtful touch that makes Halloween feel truly magical. The best part is that these bags become family heirlooms – sturdy enough to handle heavy candy loads and meaningful enough to save for future generations.

Crafting Supplies

  • Base Materials: Plain canvas tote bags (natural color works best), cardboard inserts to prevent paint bleed-through
  • Paint Supplies: Fabric paint in Halloween colors (orange, black, purple, green), fine-tip brushes, foam brushes
  • Design Tools: Pencil for sketching, stencils or letter templates, painter's tape for clean lines
  • Decoration Add-ons: Fabric markers, iron-on patches, glitter fabric paint for extra sparkle
  • Workspace Setup: Newspaper or plastic tablecloth, water containers, paper towels, hair dryer for quick drying

Design Process

  1. Prepare your workspace and insert cardboard inside each bag to prevent paint from seeping through to the back
  2. Sketch the design lightly in pencil, planning where the child's name and decorative elements will be positioned
  3. Paint the background elements first, like pumpkins or ghosts, using foam brushes for smooth coverage
  4. Add the child's name using stencils or freehand lettering, choosing bold fonts that are easy to read
  5. Layer additional details like bat silhouettes, spider webs, or candy corn patterns around the name
  6. Highlight with contrasting colors or glitter paint to make key elements pop and catch streetlight
  7. Seal the design by heat-setting with a hair dryer or iron (follow fabric paint instructions)
  8. Personalize further with the child's favorite Halloween character or costume theme incorporated into the design
DESIGNER TIP

Professional fabric artists use the "shadow lettering" technique to make names really pop on dark Halloween nights – paint the child's name in bright orange, then add a black outline or drop shadow slightly offset to create depth and visibility. This technique ensures the names can be easily spotted by parents keeping track of multiple trick-or-treaters, while adding a professional-looking dimension that makes the bags feel store-bought quality. The contrast also photographs beautifully for those precious Halloween memory shots.


Related Content

DIY Projects

04 November 2026

Post

Shoe Bench Build: The Cubby Depth That Keeps Pairs Upright

Build a wooden entryway shoe bench for $35—the cubby depth is what keeps boots standing instead of toppling into a pile every morning....

DIY Projects

03 November 2026

Post

Tension Rod Shelf: The Rod Width That Won't Slip

Build a hidden double-decker shelf under your sink for $6—the rod tension width is what keeps it from crashing down on cleaning day....

DIY Projects

01 November 2026

Post

Sew Flannel Pajama Pants in 3 Hours for $25

Ditch store PJs! Sew cozy flannel pajama pants with an elastic waist in 3 hours for about $25 — perfect for chilly November nights....

DIY Projects

31 October 2026

Post

Build a Trick-or-Treat Bucket Lantern in 1 Hour for $15

Light up Halloween night with a glowing trick-or-treat bucket lantern—1 hour, $15, and way safer than a candle in a pumpkin....

DIY Projects

30 October 2026

Post

Pour Pumpkin Spice Candles in 1 Hour for $15

Ditch the $28 mall candle—pour your own pumpkin spice soy candles at home for $15 and fill your house with fall in an hour....

DIY Projects

29 October 2026

Post

Tabletop Zen Garden: The Sand Depth That Holds Lines

Build a calming tabletop zen garden for $15—the sand depth is the one thing that decides if your rake lines actually hold or vanish....

DIY Projects

28 October 2026

Post

Wooden Dish Rack: The Dowel Angle That Drains Right

Build a slatted wood dish rack for $18—the dowel tilt angle is what actually drains water into the tray instead of pooling on your counter....

DIY Projects

27 October 2026

Post

Pool Noodle Knife Block: The Slice Depth That Stops Wobble

Turn a $1 pool noodle into a safe knife block—the slice depth is what keeps blades from wobbling loose or slicing through the foam....

DIY Projects

27 October 2026

Post

Build a Wooden Pie Carrier in 2 Hours for $25

Never smash a pie in the car again! Build a snug wooden pie carrier in 2 hours for $25—perfect timing for fall potlucks....

DIY Projects

26 October 2026

Post

Make Herb-Infused Honey in 30 Minutes for $12

Turn raw honey into a cold-season secret weapon—infuse it with thyme and ginger in 30 minutes for about $12, no fancy gear needed....

DIY Projects

25 October 2026

Post

Make Homemade Fire Cider in 20 Minutes for $15

Steep this spicy apple cider vinegar tonic now so it's ready to fight off fall colds in 4 weeks—20 minutes, $15, zero cooking skills....

DIY Projects

23 October 2026

Post

Build a Freestanding Coat Rack in 2 Hours for $35

Sick of coats piled on chairs? Build a sturdy freestanding coat rack in 2 hours for $35 — no wall drilling, just solid joinery....

DIY Projects

22 October 2026

Post

Window Frame to Pet Gate: The Hinge Set That Holds

Turn an old wooden window frame into a swinging pet gate for $22 — the hinge mortise depth is what keeps it from sagging open over time....

DIY Projects

22 October 2026

Post

Make Spiced Homemade Applesauce in 1 Hour for $12

Turn a bag of fall apples into silky spiced applesauce in an hour for $12 — no peeling required if you've got the right tool....

DIY Projects

21 October 2026

Post

Floating Nightstand: The Bracket Depth That Holds Weight

Build a wall-mounted wooden nightstand for $25 — the bracket depth inside the wood is what stops it from sagging under a lamp and books....
Terms and ConditionsDo Not Sell or Share My Personal InformationPrivacy PolicyPrivacy NoticeAccessibility NoticeUnsubscribe
Copyright © 2026 DIY HomeBoost












