Gardening/Outdoor

Recent Content

Wooden Dish Rack: The Dowel Angle That Drains Right

Wooden Dish Rack: The Dowel Angle That Drains Right

Build a slatted wood dish rack for $18—the dowel tilt angle is what actually drains water into the tray instead of pooling on your counter.

Install a Fireplace Draft Stopper in 20 Minutes for $25

Install a Fireplace Draft Stopper in 20 Minutes for $25

Stop your chimney from sucking heat right out of the house—an inflatable draft stopper seals it in 20 minutes for about $25.

The Shower Rod Trick That Fakes a Walk-In Closet

The Shower Rod Trick That Fakes a Walk-In Closet

Steal spare closet space with a second shower-curtain rod—zero holes, zero fuss, and your full deposit stays safe.

Pool Noodle Knife Block: The Slice Depth That Stops Wobble

Pool Noodle Knife Block: The Slice Depth That Stops Wobble

Turn a $1 pool noodle into a safe knife block—the slice depth is what keeps blades from wobbling loose or slicing through the foam.

Build a Wooden Pie Carrier in 2 Hours for $25

Build a Wooden Pie Carrier in 2 Hours for $25

Never smash a pie in the car again! Build a snug wooden pie carrier in 2 hours for $25—perfect timing for fall potlucks.

logo
  • Home Improvement
  • DIY Projects
  • Interior Design
  • Gardening & Outdoor
  • Real Estate
  • Home Improvement
  • DIY Projects
  • Interior Design
  • Gardening & Outdoor
  • Real Estate
  • ​

Painted Patio Umbrella: Bold Color, No New Buy

Regular acrylic paint cracks and flakes off outdoor fabric within a season — the one ingredient that actually makes this hold up through rain and sun is a $4 bottle most people skip.
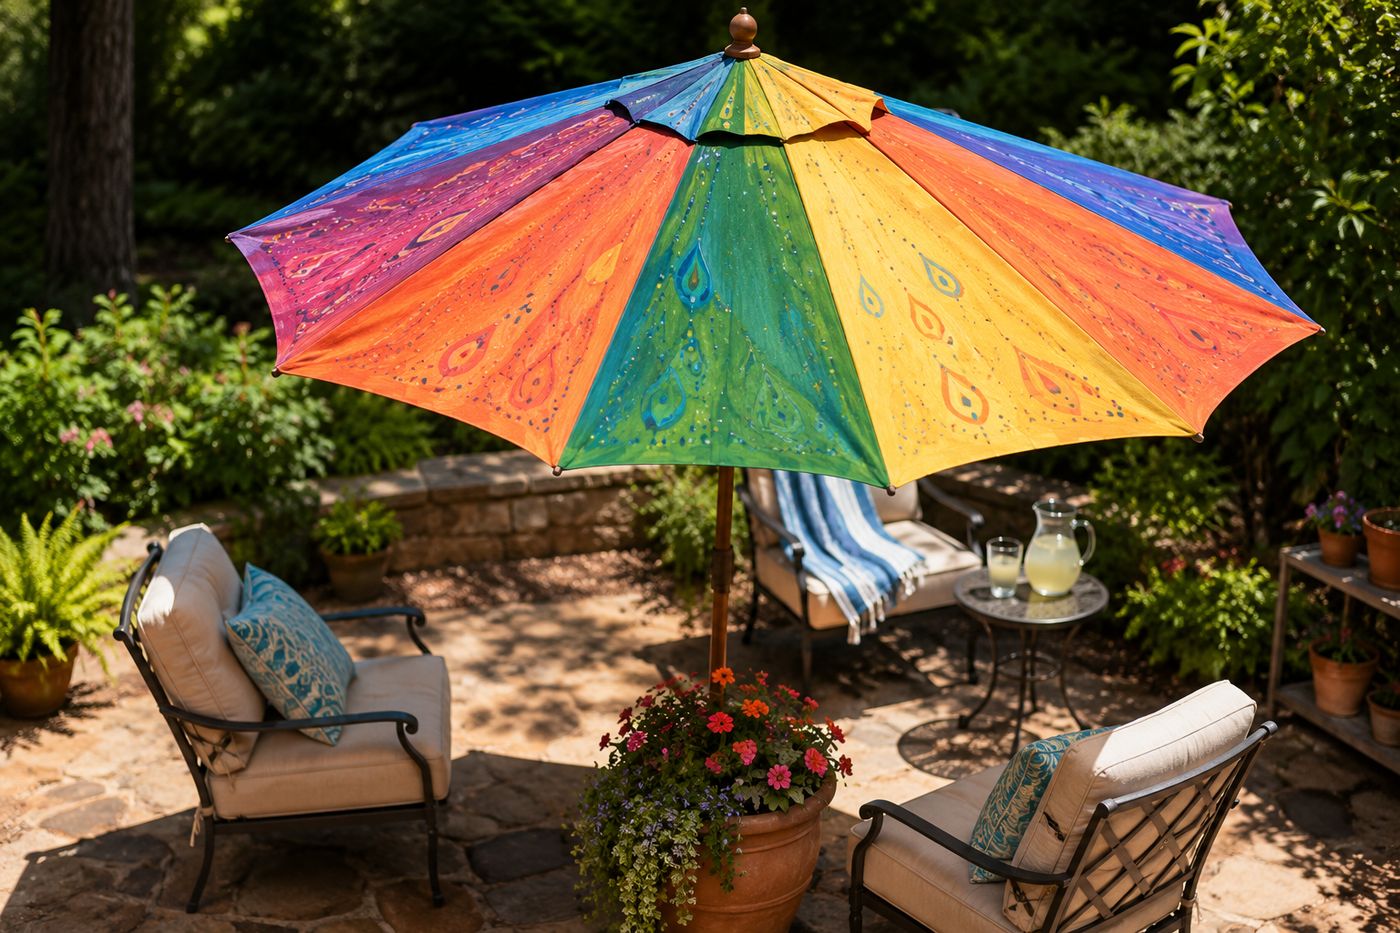
Patio umbrella with bold hand-painted rainbow triangle panels, opened over an outdoor seating area
Gardening/Outdoor

Straight acrylic paint dries into a stiff, brittle film that has no give, and umbrella fabric flexes every single time the umbrella opens, closes, or moves in the wind — which means paint without any flexibility built in starts cracking and flaking within a season no matter how many coats you apply. The distinction between a painted umbrella that still looks crisp after a full summer outdoors and one that's peeling by July comes down to one ingredient: fabric medium mixed into the acrylic paint, which lets the paint bend with the fabric instead of fighting against it. Skip that step and you're painting a design that's guaranteed to fail; mix it in and the same bold pattern survives being folded shut a hundred times and rained on repeatedly. Once that foundation is right, the actual painting is the easy, fun part — a $20-35 investment in paint and supplies turns a tired, faded umbrella into the centerpiece of your patio instead of the $80-150 you'd spend replacing it.

What You'll Need

  • Outdoor fabric paint, or acrylic craft paint plus fabric medium — about $15-25 total depending on how many colors
  • Fabric medium (if using regular acrylic paint) — about $4, and non-negotiable for outdoor durability
  • Painter's tape, for crisp geometric lines — about $3
  • Assorted paintbrushes, sizes for both large panel fills and fine detail
  • Clear fabric protectant spray, to guard against sun fading and rain once paint is fully dry — about $8
  • Drop cloth or old sheet, to protect your work surface
  • Something to prop the umbrella open and taut while you work (its own stand, or a sturdy base)

How to Do It

  1. Clean the umbrella thoroughly and let it dry completely — any dirt, pollen, or residue left on the fabric will sit underneath your paint and can cause it to lift or peel later.
  2. Open the umbrella fully and secure it so the fabric sits taut, since a slack or shifting surface makes clean lines and even coverage much harder to achieve.
  3. Mix fabric medium into your acrylic paint according to the product's ratio if you're not using paint labeled specifically for outdoor fabric — this is the step that determines whether your design survives one summer or five.
  4. Plan your design and apply painter's tape for any geometric pattern — rainbow panels, a scalloped border, oversized polka dots — or work freehand if you're going for an organic, loose look.
  5. Paint one panel or section at a time, working in a full first coat before moving to the next area.
  6. Let the first coat dry completely, then apply a second coat over each area for solid, saturated color that won't look streaky or thin once the umbrella is back outside.
  7. Remove painter's tape once the final coat is dry to the touch but still slightly soft, which gives the cleanest edge without pulling up cured paint.
  8. Let the entire umbrella cure fully before closing it, then seal the whole surface with clear fabric protectant spray to guard against fading and moisture going forward.
DESIGNER TIP

Outdoor stylists who design statement patio spaces often paint the underside of an umbrella in a bold pattern while leaving the top a single solid color, because the underside is what people actually see while sitting beneath it, and a surprising pop of pattern overhead reads as far more custom and intentional than matching top and bottom.


Related Content

Gardening/Outdoor

24 October 2026

Post

Divide and Replant Perennials in 90 Minutes for $15

Overgrown hostas and daylilies? Split them now for free plants and healthier beds—90 minutes, $15, zero green thumb required....

Gardening/Outdoor

18 October 2026

Post

Wrap Tree Trunks for Winter Protection in 30 Minutes for $15

Rabbits and frost cracks love bare bark—wrap young tree trunks now to save them from winter damage for just $15....

Gardening/Outdoor

17 October 2026

Post

Winterize Your Outdoor Fountain in 1 Hour for $15

Don't let ice crack your fountain! Drain, clean, and seal it right in an hour for $15 before the first hard freeze hits....

Gardening/Outdoor

08 October 2026

Post

Winterize Your Rain Barrel in 45 Minutes for $20

Don't let freezing water crack your rain barrel! Drain, disconnect, and store it right in 45 minutes for about $20 before the first hard freeze....

Gardening/Outdoor

05 October 2026

Post

Broken Umbrella Planter: The Drainage Cut That Saves It

Turn a busted umbrella canopy into a hanging garden planter—the drainage slits you cut first are what stop root rot before it starts....

Gardening/Outdoor

02 October 2026

Post

Sow a Cover Crop in Your Garden Beds in 1 Hour for $20

Skip the bare dirt this fall! Sow a cheap cover crop now and let it build free, crumbly soil for next spring's garden....

Gardening/Outdoor

28 September 2026

Post

Overwinter Tender Bulbs Indoors in 1 Hour for $20

Dig up dahlias and cannas before frost hits! Cure and pack them right so they wake up healthy again next spring....

Gardening/Outdoor

22 September 2026

Post

Build a Leaf Mulch Cage in 1 Hour for $25

Stop bagging leaves for the curb! A wire mulch cage turns fall leaf drop into free garden gold by spring....

Gardening/Outdoor

19 September 2026

Post

Plant Spring Bulbs in 1 Hour for Under $25

Plant tulip and daffodil bulbs the right way this fall—pointy-end-up depth and drainage make all the difference come spring!...

Gardening/Outdoor

17 September 2026

Post

Build a Root Vegetable Storage Bin in 2 Hours for $35

Stash your fall harvest right! A DIY sand-layered storage bin keeps carrots and beets crisp for months, no root cellar needed....

Gardening/Outdoor

16 September 2026

Post

Pumpkin Display Stand: Weight First, Then the Angle

Put your biggest pumpkin on the wrong tier and this stand becomes a tipping hazard. Build it right....

Gardening/Outdoor

31 August 2026

Post

Hanging Herb Jars: The Pebble Layer Isn't Optional

Jars have no drainage hole — skip the pebble layer and your herbs slowly rot. Mostly free, 90 min....

Gardening/Outdoor

29 August 2026

Post

Faded Cushions: The Prep Step Everyone Skips

A real scrub + fabric spray paint = faded cushions that look genuinely refreshed, not resprayed...

Gardening/Outdoor

18 August 2026

Post

Shoe Organizer Herb Wall: 30 Plants, One Fence Spot

Loose soil is why most pocket herb walls fail — pack it firmly and this $16 setup thrives all season....

Gardening/Outdoor

12 August 2026

Post

Hexagon Planter: One Angle Is the Whole Trick

One 30-degree angle is the entire secret to this cedar hexagon planter — and it beats the $150 version....
Terms and ConditionsDo Not Sell or Share My Personal InformationPrivacy PolicyPrivacy NoticeAccessibility NoticeUnsubscribe
Copyright © 2026 DIY HomeBoost