
Paint Decorative Rocks for Garden Accents for Free
Smooth stones, acrylic paint, and a rainy afternoon — the garden accents that cost nothing and make every bed feel more alive and personal
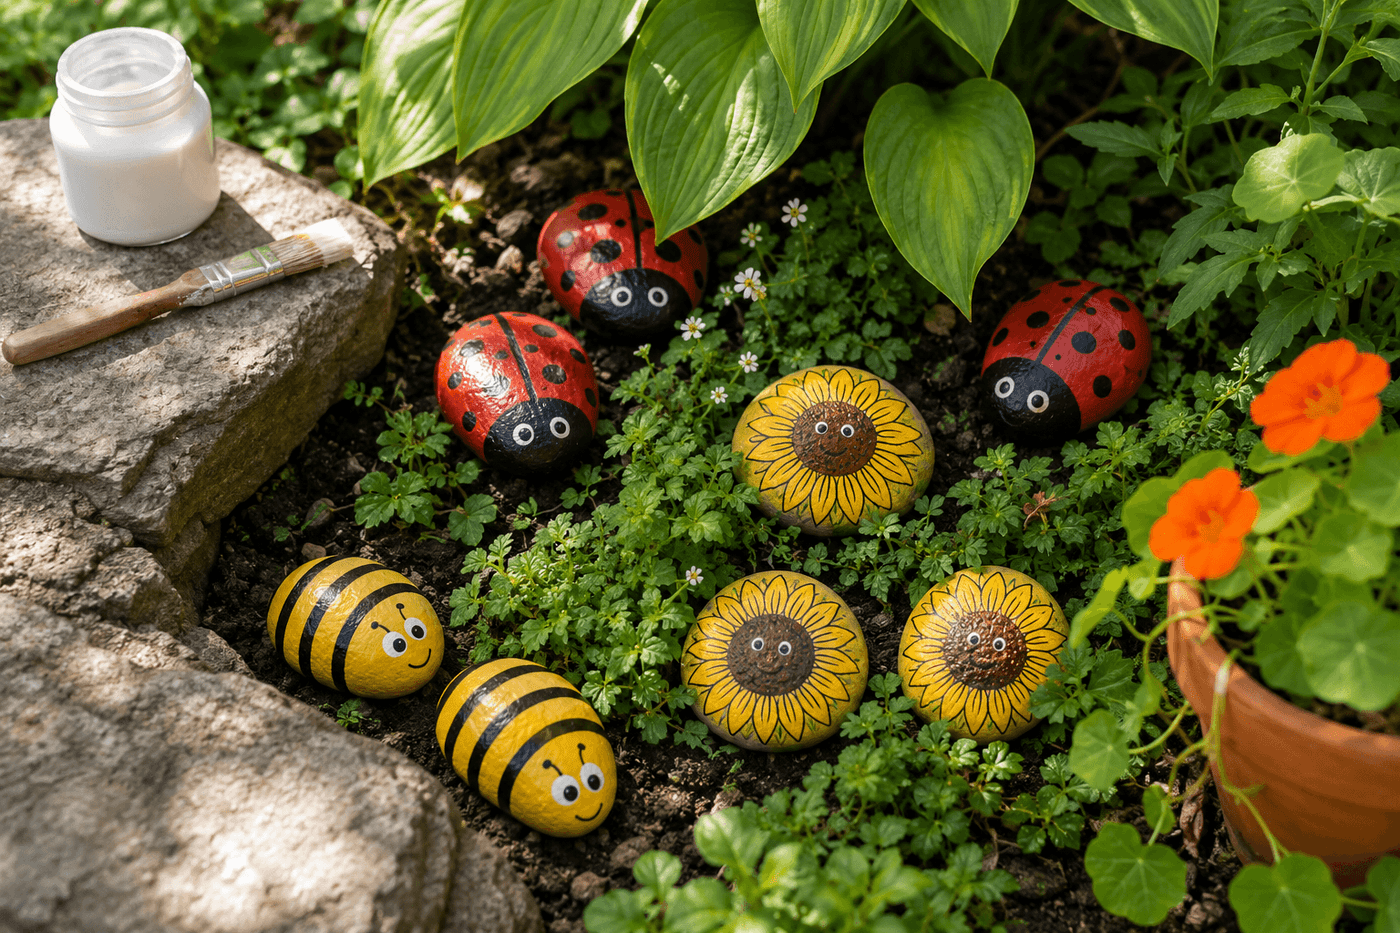
There is a specific kind of garden delight that only comes from something unexpected and personal tucked into a bed — a painted ladybug peeking out from under a hosta leaf, a bumblebee nestled against a border stone, a tiny sunflower face painted on a river rock that catches morning light in exactly the right way. Painted garden rocks cost essentially nothing if you already own acrylic paint and have access to smooth stones, take ten to thirty minutes each depending on the design, and produce the kind of whimsical, handmade character that no purchased garden ornament at any price point manages to replicate. The technique is genuinely accessible at every skill level — a red oval with black dots and a dividing line is a ladybug that looks absolutely charming in the garden, and a yellow circle with painted petals is a sunflower that makes children crouch down to look at it more closely every time. Seal each finished rock with outdoor Mod Podge and it lives happily through rain, frost, and full seasons outdoors. The best garden accent you have ever added to your beds is probably an afternoon and a few strokes of paint away.
What You Need
- Smooth rocks in varying sizes — collected from garden beds, creek beds, or gravel driveways; the flatter and smoother the painting surface, the cleaner and more detailed the finished design. Palm-sized rocks between 2 and 5 inches across are the most versatile canvas size for ladybugs, bees, and flower designs (free from any natural source)
- Acrylic craft paint in basic colors — red, black, yellow, white, and green cover the full range of ladybug, bumblebee, and flower designs; standard craft store acrylic in small bottles adheres to smooth stone surfaces well and dries quickly between coats (~$1–2 per bottle if purchasing, or use whatever is already on hand)
- Paintbrushes in two sizes — a flat ½-inch brush for base coats and a fine detail brush for dots, lines, and small design elements; the detail brush is the tool that makes the difference between designs that look careful and ones that look rushed (~$3–6 for a basic set if not already owned)
- Paint pens in black and white — optional but excellent for fine details like antennae, outlines, and small dots that are difficult to control with a brush; Posca paint markers in fine tip produce the crispest detail lines on stone surfaces (~$3–5 each)
- Outdoor Mod Podge or clear exterior sealer — the essential protective coat that locks acrylic paint against rain, frost, and UV fading; without sealer, even high-quality acrylic paint on stone begins to chip and fade within the first outdoor season (~$6–8 for a bottle that seals dozens of rocks)
- Soft brush for sealer application — a dedicated brush kept only for Mod Podge application; acrylic paint residue in a sealer brush can streak the clear coat and create a cloudy finish over the painted design
How to Paint Them
- Select rocks with the design in mind — a smooth, slightly oval rock is a perfect ladybug body; a rounder, flatter rock works better for a sunflower face; an elongated oval suits a bumblebee. Holding each rock and considering what it already resembles before choosing a design produces painted rocks that look like they were meant to be exactly what they became, which is the quality that makes them look considered rather than randomly decorated.
- Clean each rock with a damp cloth and allow it to dry completely before painting — smooth stones carry a fine layer of mineral dust and soil residue on their surface that prevents acrylic paint from bonding cleanly, and a quick wipe before the first base coat is what allows the paint to adhere to the stone surface rather than lifting with the debris layer beneath it when the rock is handled.
- Apply the base coat color over the full rock surface or the portion that will become the design — a solid red oval for a ladybug, solid yellow circle for a sunflower, alternating yellow and black stripes for a bumblebee body. Apply two thin coats rather than one heavy coat, allowing full drying time between coats; thick single-coat base coats dry with an uneven, slightly textured surface that makes detail painting more difficult and shows brush strokes more visibly in the finished piece.
- Paint ladybugs by adding a black head half-circle at the top of the red oval, a thin black dividing line running from head to base, and round black dots — three on each side for a classic six-spotted ladybug — using the detail brush or a paint pen. The dots are the element most people overthink; simply dip the handle end of a brush into black paint and press it against the rock surface for a perfect circle every time. Add two tiny white dots to each black dot for the dimensional highlight that makes the finished ladybug look genuinely three-dimensional rather than flat.
- Paint bumblebees by alternating yellow and black stripe bands across an elongated oval body, adding a small rounded black head, two almond-shaped white or pale blue wings on either side, and thin black antennae extending from the head with a tiny dot at each tip. The wings are the most visually important element of a bumblebee rock and the one that most rewards a slow, careful brushstroke — a wing painted in a single confident ellipse stroke looks lighter and more natural than one built from multiple overlapping marks.
- Paint sunflowers by applying a yellow circle base coat in the center of a flat rock, then adding elongated yellow petal shapes radiating outward from the circle in a single ring — eight to twelve petals spaced evenly around the center circle produces the most recognizable sunflower silhouette. Fill the center circle with a contrasting brown or dark orange, add small black dots scattered across the center for the seed pattern, and outline each petal with a fine line of darker yellow or orange for definition against the stone surface.
- Allow all paint layers to cure fully for at least two hours before applying sealer — acrylic paint that feels dry to the touch at thirty minutes is not fully cured, and sealer applied over incompletely cured paint can cause the paint layer to lift, wrinkle, or develop a milky appearance where the sealer and uncured paint interact chemically. A two-hour minimum wait before sealing, extended to overnight for rocks with multiple heavy paint layers, produces the cleanest, most durable sealed finish.
- Seal each finished rock with two coats of outdoor Mod Podge applied with a soft brush in smooth, even strokes — one coat in each direction — allowing full drying time between coats. Place finished rocks in the garden by partially pressing them into the soil so they appear to be emerging from the bed naturally rather than sitting on top of the surface, tucking them under plant leaves and against border stones where they will be discovered rather than immediately obvious — the element of discovery is what makes painted garden rocks so consistently delightful to everyone who encounters them.
Art educators who use rock painting as a creative project with children and adults always recommend establishing a limited palette of three to four colors per session rather than opening every paint bottle available — a rock painted with too many colors loses the visual clarity and immediate readability that makes a painted garden rock charming rather than busy. A ladybug needs only red, black, and white. A bumblebee needs yellow, black, and white. A sunflower needs yellow, orange-brown, and black. The constraint of a limited palette produces cleaner, more confident designs and significantly better results for beginners than the overwhelming freedom of an unlimited color selection, and it teaches the color economy that experienced painters use intuitively to make small decorative objects read clearly and beautifully at garden viewing distance.














