Mindful Pinch Pots: Clay Meditation for $10
Cool clay, two hands, and a slow rotating pinch — one of the oldest calming practices available to human beings, requiring nothing more than an afternoon and a block of air-dry clay.
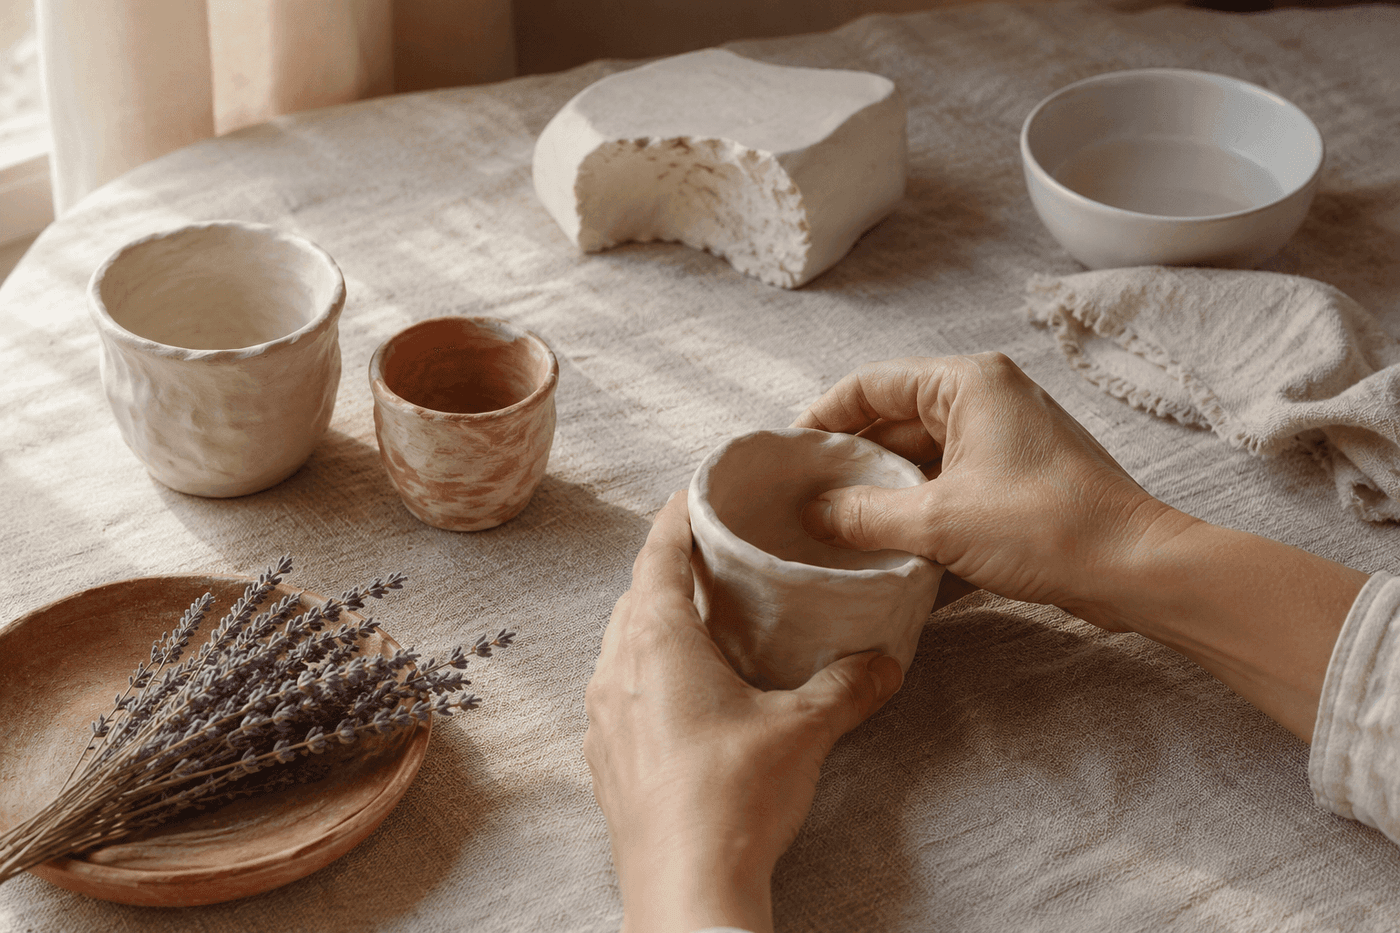
Pinch pot pottery is the oldest hand-building technique in human history — it predates wheels, kilns, and every other clay-forming method — and the reason it has endured for thousands of years is not only that it works, but that the process of doing it is inherently settling in a way that is difficult to fully explain before the experience and immediately obvious during it. Cool clay responding to gentle pressure, the slow rotation of the ball in the palm, the gradual thinning of the walls as the vessel opens — these are not complicated actions, and the absence of complexity is precisely what makes them meditative. There is nothing to figure out, no pattern to follow, no technique to master before the calm arrives. A block of air-dry clay costs $8–12 at any craft store, requires no kiln and no wheel and no studio, and makes several pots in a single afternoon session. The finished pots are genuinely useful — small enough for a ring dish, a succulent, a collection of paper clips — and the organic, slightly uneven character that handmade pinch pots always have is not a defect but the specific quality that makes them beautiful and irreplaceable in a way that manufactured ceramics cannot be. This is the Therapeutic Thursday craft that asks nothing of you except to be present with your hands and the clay.
What You'll Need
- Air-dry clay — DAS, Crayola Air-Dry, or Amaco white or terra cotta air-dry clay; choose a smooth, non-gritty formula for pinch pot work — clay with visible fiber or aggregate filler is harder on fingers during extended pinching sessions; one 2.2 lb block makes four to six orange-sized pinch pots (~$8–12)
- Small bowl of water — for keeping fingers lightly damp during shaping; wet fingers smooth the clay surface and prevent cracking at the rim as the walls thin; do not over-wet, which weakens the clay structure and causes the walls to slump rather than hold their shape
- Linen or canvas work surface — clay sticks less to natural fiber surfaces than to plastic or glass; a folded pillowcase or a piece of burlap provides the ideal work surface that allows the pot to be rotated easily during shaping without sticking; avoid newspaper, which transfers ink to light-colored clay
- Wooden clay tool or butter knife — optional, for smoothing interior walls and refining the rim after hand shaping; the tool is supplementary to the hands rather than the primary instrument — pinch pot making is intentionally a hands-only practice for the first several pots
- Small piece of plastic wrap or damp cloth — for covering partially worked clay that needs a rest period; air-dry clay begins to firm as moisture evaporates, and covering it during breaks of more than a few minutes keeps it workable for the full session
- Acrylic paint and brushes — for decorating dried pots after the 24–48 hour drying period; the natural clay color (white or terra cotta depending on the clay brand) is also beautiful left unpainted, particularly when sealed with a matte varnish that deepens the color slightly (~$3–5 for a small paint set if not already owned)
- Matte or satin varnish spray or brush-on sealer — for sealing painted or natural pots after decoration; air-dry clay is not waterproof without sealing and should not hold water directly; sealed pots can hold dry items, succulents in well-draining soil, or a small glass liner for fresh flowers (~$5–8 for a small can)
- Wire rack or egg carton — for drying finished pots with airflow underneath; a pot dried flat on a solid surface develops a damp, slow-drying underside that cracks unevenly compared to a pot with airflow on all sides
How to Make Them
- Prepare the space and your hands before touching the clay — clear the work surface of everything except the water bowl and the canvas mat, wash hands, and sit in a comfortable position that allows you to hold the clay at a relaxed mid-torso height rather than hunching over a low table. The physical preparation is the beginning of the meditative practice rather than a preamble to it; the intentional arrangement of the space signals the shift from reactive daily mode to the receptive state that clay work requires and produces.
- Tear a piece of clay approximately the size of an orange from the block and work it briefly in both hands to warm it and increase its pliability — knead it gently for one to two minutes until it feels consistent throughout with no cold, stiff spots in the center. Cold clay from a refrigerated block or a cold garage resists the thumb insertion that begins the pot and produces early cracking at the opening; warm, pliable clay yields smoothly and cooperates with gentle rather than forceful pressure.
- Shape the clay into a smooth ball by rolling it between both palms with even pressure — any surface irregularities in the ball become magnified as the walls thin during pinching, and a smooth starting ball produces a more even final form than a lumpy one. The ball should feel uniform and have no visible cracks on the surface; surface cracks at this stage indicate the clay is too dry and needs a small amount of water worked in before proceeding.
- Press your dominant thumb into the center of the ball to a depth of approximately two-thirds the ball's height — stop before reaching the bottom, which would pierce through and create a hole rather than a base. The initial thumb insertion is the foundational action of pinch pot making; going too deep thins the base beyond repair, while staying too shallow leaves a base so thick the pot feels bottom-heavy and takes much longer to dry evenly.
- Pinch the wall between thumb inside and fingers outside with gentle, even pressure, rotating the ball one small increment between each pinch — this is the meditative core of the practice. The rotation moves the work rather than the hands, which maintains consistent pressure around the full circumference rather than working one section heavily and another lightly. Work from the base upward toward the rim in gradually ascending rows of pinches, thinning the walls progressively with each pass rather than attempting to reach final thickness in a single circuit.
- Smooth the surface with lightly damp fingers after each full rotation — drag a damp fingertip along the interior and exterior wall surfaces to close any small cracks that appear as the clay thins, and to blend the pinch marks into a more uniform surface if a smoother finish is preferred. Many makers deliberately leave the pinch marks visible as a record of the making process and a textural feature of the finished pot; both approaches are entirely valid and the choice is a matter of what feels most satisfying in the moment rather than a correctness question.
- Refine the rim by gently compressing it between two fingers and running them around the full circumference — the rim is the most visible and most structurally vulnerable part of the pot, and a compressed, slightly thickened rim is more resistant to chipping during drying than a thin, unworked one. Shape the rim into whatever form feels right — straight, slightly flared, or gently rolled inward — at this stage when the clay is still fully workable rather than attempting to refine a rim that has begun to firm.
- Dry the finished pot on a wire rack or egg carton for 24–48 hours without attempting to speed the process — air-dry clay that dries too quickly develops surface cracks as the exterior shrinks faster than the interior, while slow, even drying allows the full form to shrink gradually and uniformly. Cover loosely with plastic wrap for the first 12 hours if the ambient environment is very dry or the climate is low-humidity, which slows the initial drying rate enough to prevent cracking without creating the condensation that causes sticking when clay is covered tightly.
- Decorate the fully dried pot with acrylic paint in whatever manner feels right — the simplest and most beautiful treatments are often a single color painted solidly over the full exterior, a dipped color where the lower half of the pot is a contrasting shade to the upper half, or an intentionally imprecise abstract brush mark pattern that reflects the handmade character of the form. Seal the finished painted or natural pot with matte varnish once the paint is fully dry, and allow the sealer to cure fully before placing the pot in its intended location.
Art therapists and ceramics instructors who teach pinch pot making in therapeutic and wellness contexts consistently recommend one intentional practice that deepens the meditative quality of a clay session significantly beyond what unguided making produces: work without looking at the clay for one full rotation between every two rotations that involve visual guidance. Closing or averting the eyes while pinching and rotating transfers full awareness from visual monitoring — which activates the analytical, corrective mode of attention that keeps the mind busy — to pure tactile sensation, which is the mode of attention that produces the grounded, present quality that makes hand-building clay genuinely therapeutic rather than merely absorbing. Ceramics therapists who introduce this eyes-closed interval to clients describe it as the moment the practice shifts from making something to being somewhere — the experiential quality that distinguishes therapeutic craft from productive craft. The pots made with closed-eye intervals are not necessarily less uniform than those made with full visual attention; the hands develop a tactile sensitivity within minutes that guides the form as effectively as the eyes, and the experience of trusting that sensitivity rather than monitoring it is precisely the practice that most practitioners come back to the clay for.