
Mindful Paper Weaving: Pattern and Calm for $3
Lift, tuck, slide down, snug it up — the over-under rhythm of paper weaving produces focus and calm in the same motion, and something genuinely beautiful at the end of it.
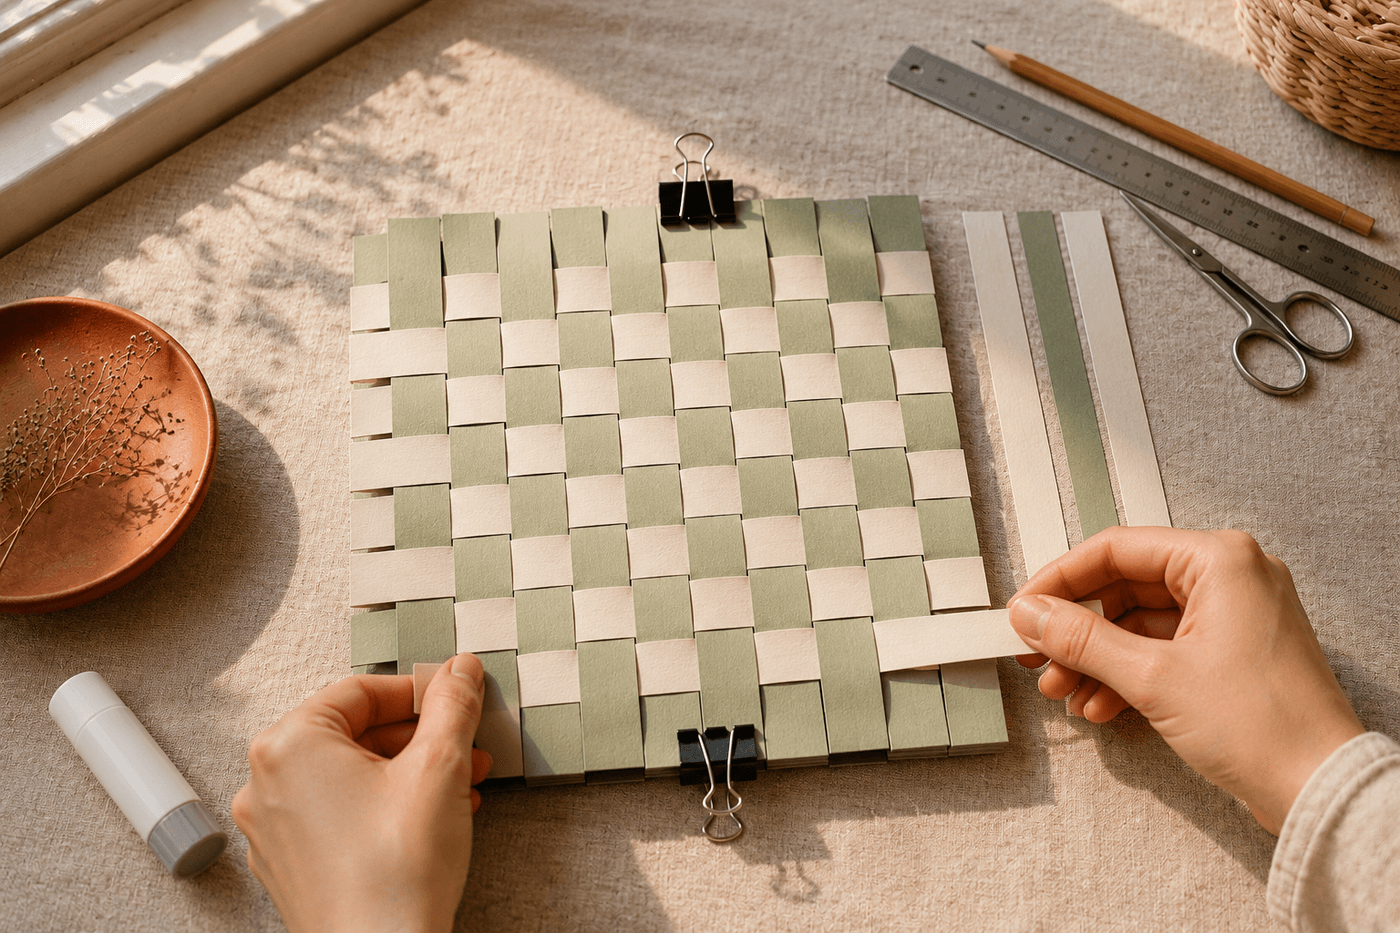
Paper weaving is one of those crafts that most people encountered in early childhood and then entirely forgot about — which means returning to it as an adult carries a particular quality of recognition, the sense of a familiar motion rediscovered in a context where it produces something more considered and more beautiful than the elementary school version. The technique has not changed: a base sheet with evenly cut slits becomes the loom, strips of a contrasting color weave over and under through those slits, and the pattern builds one strip at a time in a rhythm that is genuinely meditative in the specific way that repetitive manual tasks that require just enough attention to quiet the analytical mind are meditative. There is no counting required, no pattern to follow if you do not want one, no way to make a mistake that cannot be corrected by sliding the strip back out and repositioning. Two or three dollars in cardstock, a pair of scissors, a ruler, and an afternoon produce something that hangs on a wall, serves as a placemat, or covers a journal — and a sustained period of the focused, present attention that a busy mind rarely finds without something specific to organize itself around.
What You'll Need
- Cardstock in two coordinating colors — heavier cardstock (65–80 lb) produces a more satisfying weave that holds its shape and stands up as wall art; standard printer paper works for a first practice piece but is too lightweight for a finished piece that will be displayed or used as a placemat; craft stores sell single sheets in every color for $0.25–0.50 each (~$1–2 total)
- Color palette guidance:
- Calming palette: sage green and cream, dusty blue and warm white, soft terracotta and natural kraft
- Graphic palette: matte black and bright white, deep navy and pale gold
- Warm palette: rust and mustard, blush and copper, forest green and warm tan
- Scissors or craft knife and cutting mat — scissors work well for cutting the warp slits in the base sheet and for trimming the weft strips to consistent width; a craft knife and metal ruler on a cutting mat produces more precise, consistent strips that weave more evenly and produce a more regular finished pattern (~$0 if scissors are already owned)
- Metal ruler — for marking consistent slit spacing on the base sheet and for cutting straight strips; consistency in slit spacing and strip width is what produces the even, satisfying pattern rather than a variable grid that reads as imprecise
- Pencil — for lightly marking the slit lines on the base sheet before cutting; marks are hidden within the folded base and do not appear in the finished piece
- Glue stick or craft glue — for securing the strip ends at the base and top of the finished weave; a light application at each strip end prevents the weave from loosening during handling and display
- Binder clips or small weights — for holding the base sheet flat and stable during the weaving phase; a base sheet that shifts during weaving produces uneven tension across the strips and a finished piece that does not lie flat
- Optional: watercolor or acrylic paint — applied to white cardstock before cutting produces an ombré or gradient color effect in the finished weave that a solid-color sheet cannot achieve; paint one sheet in a wash of two blending colors, dry completely, then cut and weave for the most visually sophisticated paper weaving result available from basic materials
How to Weave It
- Prepare the space before cutting anything — clear a flat work surface larger than the finished piece, position good lighting directly over the work area, and choose the two paper colors by holding them together and assessing the combination from arm's length rather than close up, since the finished weave is viewed from a distance and the color relationship that reads beautifully at arm's length is sometimes different from the combination that seems most appealing when the sheets are side by side on the table.
- Create the loom from the base sheet by folding it in half with the short edges together, then using the ruler and pencil to mark evenly spaced lines from the fold toward the open edges, stopping approximately 1 inch from the open edge on all marks — these marks become the cuts that create the vertical warp channels the horizontal strips weave through. For a standard 8½x11 sheet folded to 8½x5½, marks every ½ inch produce 16 warp channels and a finished checkerboard with ½-inch squares; marks every ¾ inch produce a bolder, more visible pattern with 11 warp channels.
- Cut along each marked line from the fold to within 1 inch of the open edge — cut through both layers of the folded sheet simultaneously, which ensures all warp channels are identical in length. A clean cut that stops consistently 1 inch from the edge on every slit is what produces the uncut border that frames the finished weave and prevents it from falling apart when the warp channels are spread open for weaving; a slit that runs all the way to the edge produces a loose warp strand that cannot maintain tension during weaving.
- Open the base sheet flat after cutting all slits and secure it to the work surface with binder clips at the top and bottom edges — the flat, secured base is the stable working surface that allows consistent strip tension during the weaving phase. Spread the warp strips gently apart by running a finger across them from left to right to confirm all slits have cut cleanly through both paper layers; any slit that did not cut through can be completed with a single scissor snip before weaving begins.
- Cut the weft strips from the second color sheet — long strips running the full sheet length at the same width as the warp channel spacing, which produces the consistent square pattern of a standard checkerboard weave. For a diagonal or herringbone variation, cut strips at twice the warp channel width and offset the over-under sequence by one channel with each new strip; for a random improvised pattern, vary strip widths across the set and alternate the starting position freely.
- Begin weaving the first strip from the left edge of the base, working from bottom to top or top to bottom consistently — choose one direction and maintain it through the full piece, which produces even tension across all strips. The over-under sequence for the first strip: over the first warp channel, under the second, over the third, continuing alternately to the right edge. Slide the strip gently down to the bottom border, snugging it against the uncut margin without pulling tight enough to buckle the warp channels.
- Weave each subsequent strip in the reverse sequence of the one before it — if the first strip went over-under-over, the second goes under-over-under — which is the alternating sequence that produces the interlocking pattern rather than a stack of parallel strips lying on top of each other. The meditative quality of the weaving is most fully present in this alternating over-under rhythm: the motion is the same for every strip, requires just enough attention to maintain the correct starting position, and produces a visible, growing pattern with each completed strip that provides the quiet satisfaction of tangible, accumulating progress.
- Secure the finished weave by applying a small amount of glue stick or craft glue to the left and right ends of each strip where they extend beyond the warp border — fold the extending end over the warp border edge and press firmly until the glue bonds. Trim any uneven strip ends with scissors along the warp border for a clean, finished edge on all four sides, and allow the glue to cure for 15 minutes before removing the binder clips and lifting the finished piece to assess it at arm's length from the primary viewing angle.
Art therapists and mindfulness educators who use paper weaving in structured therapeutic and wellness sessions consistently observe one session design choice that significantly deepens the meditative quality of the practice beyond what unguided weaving produces: work in silence with no music, podcast, or screen for the duration of the weaving — treating the session as a dedicated period of single-task presence rather than a background activity to accompany other content. Paper weaving requires just enough attention — the over-under sequence, the consistent tension, the positioning of each new strip — to occupy the portion of the mind that generates rumination and anxious thought loops, while leaving the deeper quality of attention free to settle into a quieter, more receptive state. This is the specific cognitive load profile that mindfulness researchers identify as most conducive to the stress-reducing and attention-restoring benefits of focused manual activity. When weaving is used as a background activity while consuming other content, the cognitive occupation that produces the benefit is split between the weaving and the other input, and neither provides the full meditative effect that the dedicated single-task version reliably delivers. Art therapists who structure weaving sessions as silent, single-focus periods report consistently deeper calm and more sustained post-session wellbeing in participants than those who allow concurrent media consumption during the craft.














