
Make Wine Bottle Tiki Torches for $20
Three beautiful bottles, a wick kit, and twenty minutes — the patio ambiance that makes guests ask where you found them
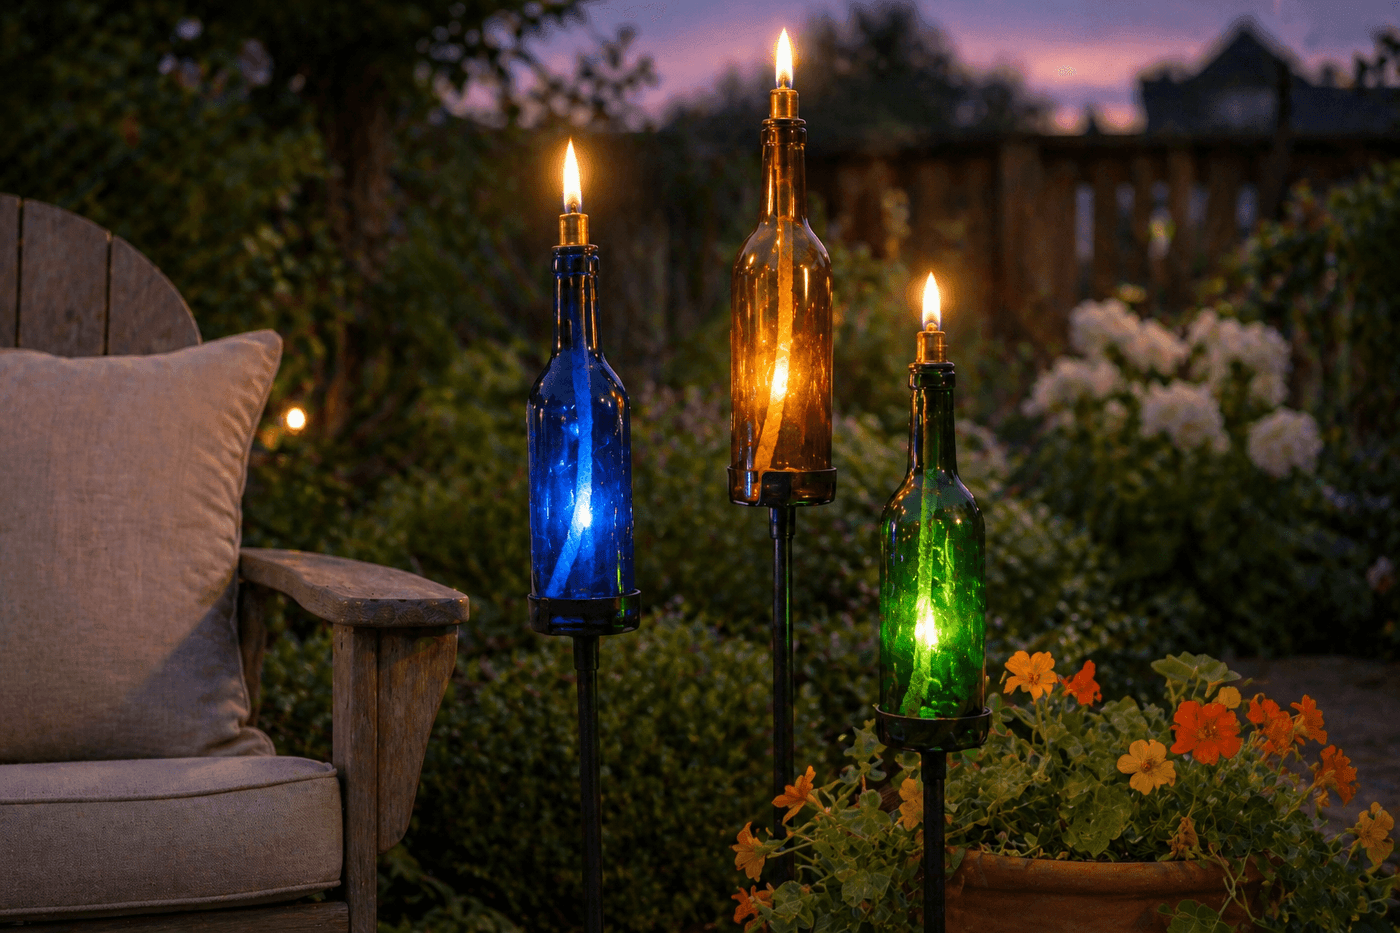
Standard bamboo tiki torches are functional and completely forgettable — they do the job and disappear into the background of a patio the moment they're not lit. Wine bottle tiki torches are entirely different: the colored glass glows in warm amber, deep cobalt, and rich green tones when the flame is behind it, the weight of the bottle makes them dramatically more stable than anything made of bamboo, and the finished effect is so genuinely elegant that guests consistently assume you sourced them from a boutique outdoor living shop. A pack of conversion wick kits from Amazon for about $12, a bottle of citronella lamp oil for $8, and three beautiful wine bottles you were already holding onto produces a set of three torches in about twenty minutes — from opening the package to watching the first flame settle into a steady, gorgeous glow. This is the project where the most beautiful material is already in your recycling bin.
What You Need
- Wine bottles with interesting colored glass, qty 3 — cobalt blue, amber, and dark green are the most visually dramatic when backlit by flame; standard 750ml wine bottles with a consistent neck diameter work with all standard conversion kits (free from your collection or recycling)
- Tiki torch wick conversion kit, pack of 3–6 — each kit includes a metal or brass stopper sized for standard wine bottle necks, a cotton wick, a wick holder, and a snuffer cap; search "wine bottle torch wick kit" on Amazon for packs that include everything needed (~$10–14 for a 3-pack)
- Citronella lamp oil or tiki torch fuel — citronella oil serves double duty as torch fuel and mosquito deterrent; use only purpose-made torch fuel rather than improvised alternatives, which can produce unpredictable flame behavior (~$7–10 for a quart that fills multiple bottles)
- Garden stakes or copper pipe sections — for mounting the torches at varying heights near the seating area; bamboo garden stakes work well and keep the aesthetic cohesive, or copper pipe sections capped at the bottom give a more refined look (~$4–6 for a bundle of stakes)
- Wire or hose clamps — for securing each bottle to its stake at the correct height; electrical wire wrapped several times around the bottle neck and the stake provides a secure, adjustable mount (~$2–3)
- Funnel — for filling the bottles with lamp oil without spillage; lamp oil spilled on the bottle exterior is both a fire safety concern and leaves a residue that dulls the glass finish (~$1–2 for a small plastic funnel)
How to Make Them
- Clean each wine bottle thoroughly inside and out — remove all labels by soaking in hot soapy water, scrub any adhesive residue with a baking soda paste, and rinse the interior completely to remove any wine residue. Residual wine or label adhesive on the bottle exterior dulls the glass finish and affects how cleanly the colored glass glows when lit; a completely clean bottle transmits light with the saturated, jewel-toned quality that makes these torches so visually striking.
- Thread the cotton wick through the wick holder component of the conversion kit, pulling enough wick through the holder that approximately one inch extends above the holder top — this is the exposed wick length that will light and sustain the flame. Too little exposed wick produces a flame that struggles to establish and extinguishes easily in the slightest breeze; too much exposed wick produces an oversized, sooty flame that burns through fuel too quickly and produces more smoke than light.
- Assemble the stopper by threading the wick-and-holder assembly through the center of the metal bottle stopper, then test-fit the assembled stopper in the bottle neck before adding any fuel. The stopper should seat firmly in the bottle neck with no wobble and no gap around the perimeter — a loose stopper allows fuel vapor to escape around the bottle neck, which is a fire safety issue that the correct-sized kit for standard wine bottle necks prevents entirely.
- Fill each bottle with citronella lamp oil using a funnel, pouring slowly and stopping when the oil level is approximately three inches below the bottle neck — leaving this headspace allows the wick to draw fuel upward effectively without overflow when the stopper is inserted. Never fill the bottle completely to the neck, which leaves no room for the stopper assembly and creates spillage risk during insertion and handling.
- Insert the stopper assembly firmly into the filled bottle neck, pressing it in with a steady downward pressure until it seats completely with the wick holder sitting flush against the bottle mouth. Wipe any oil that transferred to the bottle exterior during stopper insertion with a clean cloth before allowing the wick to soak — external oil on a lit torch creates an uncontrolled burn risk that the tight stopper seal is designed to prevent.
- Allow the wick to soak in the lamp oil for a full ten minutes before attempting to light it — a dry wick that hasn't absorbed sufficient fuel lights briefly and then extinguishes, leaving a charred wick tip that is more difficult to light on subsequent attempts. The ten-minute soak is the single step that most people skip in their impatience to see the first flame, and it's what separates a torch that lights reliably on the first match from one that requires five attempts to establish.
- Mount each bottle on a garden stake by pushing the stake firmly into the ground at your chosen location, then securing the bottle to the upper section of the stake using wire wrapped several times around both the bottle neck and the stake, twisted tight enough that the bottle cannot rotate or slide downward. Mount the three torches at varying heights — one high, one mid, one low — for the layered, dimensional torch cluster that reads as designed rather than simply placed. Stagger the heights by approximately eight to twelve inches between each torch for the most visually satisfying arrangement.
- Light the soaked wick with a long lighter or match, holding the flame to the wick tip until it catches and settles into a steady, even burn — typically five to ten seconds of contact with the lighter flame. The flame will initially be slightly larger as surface fuel burns off, then settle to its characteristic steady glow within thirty seconds. Always use the snuffer cap provided in the kit to extinguish the flame rather than blowing it out, which can scatter burning fuel droplets from the wick onto surrounding surfaces.
Outdoor event designers who use wine bottle torches for professional installations always position the cluster so the tallest torch is set slightly back from the viewing line rather than at the front — placing the tallest bottle at the rear of the cluster and the shortest at the front creates a sense of depth and layering when viewed from the seating area, while placing the tallest at the front flattens the visual effect and blocks the glow of the bottles behind it. They also orient the cluster so no torch is directly downwind of another during prevailing evening breezes, because a torch in the wind shadow of another burns unevenly and produces significantly more smoke than a torch with clear airflow on all sides. Both adjustments take thirty seconds at setup and produce a torch cluster that performs and looks substantially better through the full evening.














