
Dresser to Potting Bench: Garden Station, $25
A beat-up thrift store dresser, exterior paint, galvanized metal sheeting, and a weekend — and the most organized and characterful potting station in the neighborhood is yours.
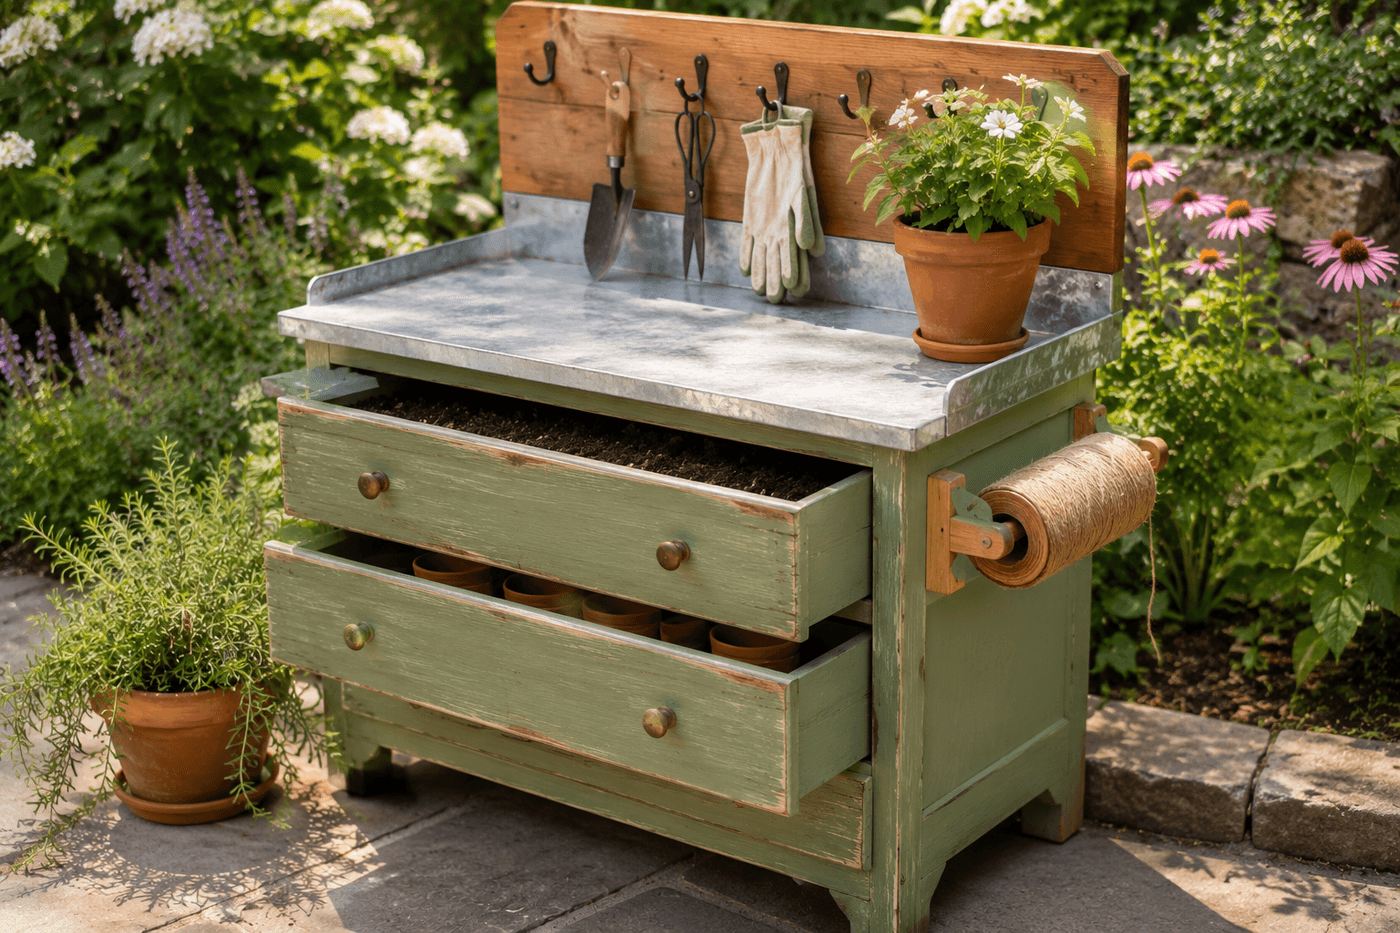
Every serious gardener eventually arrives at the same frustration: the potting session that requires assembling soil, tools, pots, gloves, and seeds from four different locations before any actual gardening happens, and then reassembling the scattered aftermath afterward. A dedicated potting bench solves this completely, and a thrift store dresser converted with exterior paint, a galvanized metal work surface, and a few hardware additions solves it with the kind of personality and storage capacity that a purchased potting bench at three times the cost rarely delivers. The dresser already has everything the conversion needs — drawers for organized storage of every garden supply category, a flat top surface that accepts the work surface addition, and the structural depth and weight that keeps a loaded potting station from tipping. The beat-up condition that makes a dresser unsellable as furniture is irrelevant when it is headed outdoors under paint and metal sheeting; the more character and patina it already has, the more interesting the finished potting bench looks in a garden setting. Cost runs $15–40 depending on the dresser source and the supplies needed, and the finished station makes every subsequent gardening session faster, more organized, and noticeably more enjoyable than the previous scattered approach.
What You'll Need
- Wooden dresser — three to five drawer dresser in any condition; solid wood construction preferred over particle board which swells and fails outdoors; confirm the dresser frame is structurally sound — drawers that open and close and a base that does not rock — before purchasing, as structural repairs add time and cost; confirm the dresser height works as a standing work surface (standard potting bench height is 36–38 inches) (~$0–20 at thrift stores, yard sales, or curbside)
- Exterior paint — chalk paint in outdoor formula or exterior latex; sage green, sunny yellow, deep navy, and warm white are the most garden-appropriate color choices; chalk paint adheres to most wood surfaces without primer and produces a beautiful matte finish that weathers gracefully outdoors (~$10–15 for a quart covering the full dresser in two coats)
- Exterior polyurethane or outdoor sealant — two coats over the finished paint on all exterior surfaces; seals the paint against moisture, soil contact, and the UV degradation that fades outdoor paint within one season if left unsealed (~$8–12 for a small can)
- Galvanized metal sheeting or weather-resistant plywood — cut to fit the dresser top as the work surface:
- Galvanized sheet metal — most durable and easiest to clean; hardware stores cut to size; bends at the back edge to form an integrated backsplash; requires metal snips and a bending brake or careful hammer work (~$10–15 cut to size)
- Pressure-treated plywood, ¾-inch — more budget-friendly; seal with exterior epoxy or polyurethane on all faces before installation; requires more maintenance than metal (~$8–12 for a half sheet)
- Backsplash board — a 1x6 cedar or pine board cut to dresser width and mounted vertically at the back of the work surface; provides the backing for cup hooks and keeps soil from falling behind the dresser during potting (~$4–6)
- Cup hooks, 6–8 — for hanging hand tools, gloves, and small implements on the backsplash board; stainless or brass cup hooks resist rust in an outdoor garden environment (~$3–5 for a pack)
- Towel bar or dowel with end brackets — mounted to one dresser side for a roll of garden twine or a hand towel; a standard 18-inch towel bar or a length of ½-inch dowel between two cup hooks serves equally well (~$5–8 or free from scrap)
- Liner for top drawer converted to soil bin — a plastic bin or galvanized tray sized to fit the top drawer opening creates a removable, cleanable soil-mixing container; a cut piece of pond liner or heavy-duty plastic sheet stapled inside the drawer also works (~$5–10)
- Heavy-duty locking casters — optional; four casters rated for the loaded dresser weight make the potting station repositionable without lifting (~$12–18 for a set of four)
How to Transform It
- Assess the dresser structurally before any cleaning or modification — open and close every drawer to confirm the slides function correctly, press firmly on the top surface to check for flex indicating a weak or delaminated top, press on the sides and back panel to confirm the frame is rigid rather than racking, and inspect the bottom for soft spots or rot that would compromise caster installation if that option is planned. A dresser that fails any of these checks needs structural repair before conversion or should be passed over for a structurally sound alternative.
- Remove the top drawer completely to create the soil-mixing bin opening — pull the drawer out fully, disconnect the drawer slides from the dresser interior if they protrude into the opening, and set the drawer aside. The opening left behind is the built-in soil bin that is the most practical feature of this conversion; it holds a plastic tray or liner for mixing potting soil directly at the work surface height without requiring a separate container to be lifted and positioned.
- Clean all exterior surfaces thoroughly with a degreaser and allow to dry completely before painting — thrift store and yard sale dressers accumulate furniture polish, wax, and surface oils that prevent exterior paint from adhering without primer. Wipe all painted surfaces with a tack cloth after cleaning and confirm the surface is completely dry before applying the first paint coat; moisture trapped under paint causes bubbling and adhesion failure within the first outdoor season.
- Paint the full dresser exterior — all four sides, the top surface, drawer fronts, and the interior of the soil bin opening — in two coats of exterior paint with full drying time between coats. Paint the interior of the remaining drawers as well if they will hold soil-contact items like pots and gloves; painted drawer interiors resist moisture absorption that causes untreated wood drawers to swell and stick in humid outdoor conditions. Allow the final coat to cure fully — at least 24 hours — before applying sealer.
- Seal all painted exterior surfaces with two coats of exterior polyurethane or outdoor sealant, paying particular attention to the top surface where the work surface will be installed and where water contact is most sustained during potting sessions. Seal the soil bin interior specifically with an extra third coat — the combination of moisture, soil acids, and direct water contact in this zone is the most aggressive environment the dresser will experience and warrants additional protection beyond the standard two-coat exterior sealant application.
- Install the work surface by cutting galvanized sheet metal or pressure-treated plywood to fit the dresser top dimensions, then securing it from underneath with screws driven up through the dresser top into the work surface material — driving from below rather than through the work surface keeps fastener heads off the working area where they catch soil and tools. For galvanized metal, bend a 3–4 inch lip at the back edge using a metal bending brake or careful hammer work over a straight edge to create an integrated backsplash that prevents soil from falling behind the dresser during active potting.
- Mount the backsplash board at the back of the work surface by drilling through the dresser back panel and driving screws into the backsplash board from behind — the board stands vertically behind the work surface and provides the mounting surface for cup hooks and hanging tools. Sand the backsplash board face smooth before mounting and apply the same exterior paint and sealant used on the dresser so the board reads as part of the unified piece rather than an obvious addition.
- Install cup hooks across the backsplash board at comfortable reaching heights for the tools they will hold — large hooks at wider spacing for long-handled tools like trowels and pruners, small hooks at closer spacing for gloves, twine, and small implements. Install the towel bar or dowel on one dresser side at a height that keeps a hanging twine roll or hand towel from dragging on the ground, and line the soil bin opening with a plastic tray or galvanized liner before loading the dresser with its full supply complement and rolling or carrying it to its garden station position.
Garden designers and outdoor living stylists who create potting bench installations for residential garden photography and high-end garden design projects use one organizational principle for the drawer storage system that makes the converted dresser genuinely more functional than most purpose-built potting benches: assign each drawer a single category of garden supply and label it on the drawer front so the system can be used correctly by every member of the household without instruction. A top drawer designated as the soil bin, second drawer for hand tools and gloves, third drawer for empty pots and saucers, and bottom drawer for seeds, bulbs, and fertilizer creates a complete potting station supply system where every item has a designated location — and the labeled drawer fronts mean that anyone doing garden tasks returns items to the correct location without asking or guessing. Garden designers who implement this single-category-per-drawer system for clients report that the potting bench remains organized through an entire season rather than reverting to the accumulated chaos of the previous ungrouped approach within two weeks of setup — because the labeled category system is more friction-free to use correctly than incorrectly, which is the organizational standard that produces sustained rather than temporary order.














