Corner Patio Bench: L-Shape Build for $60
Two simple rectangular bench sections sharing one corner post — and the most neglected spot on the patio becomes the most sought-after seat in the yard.
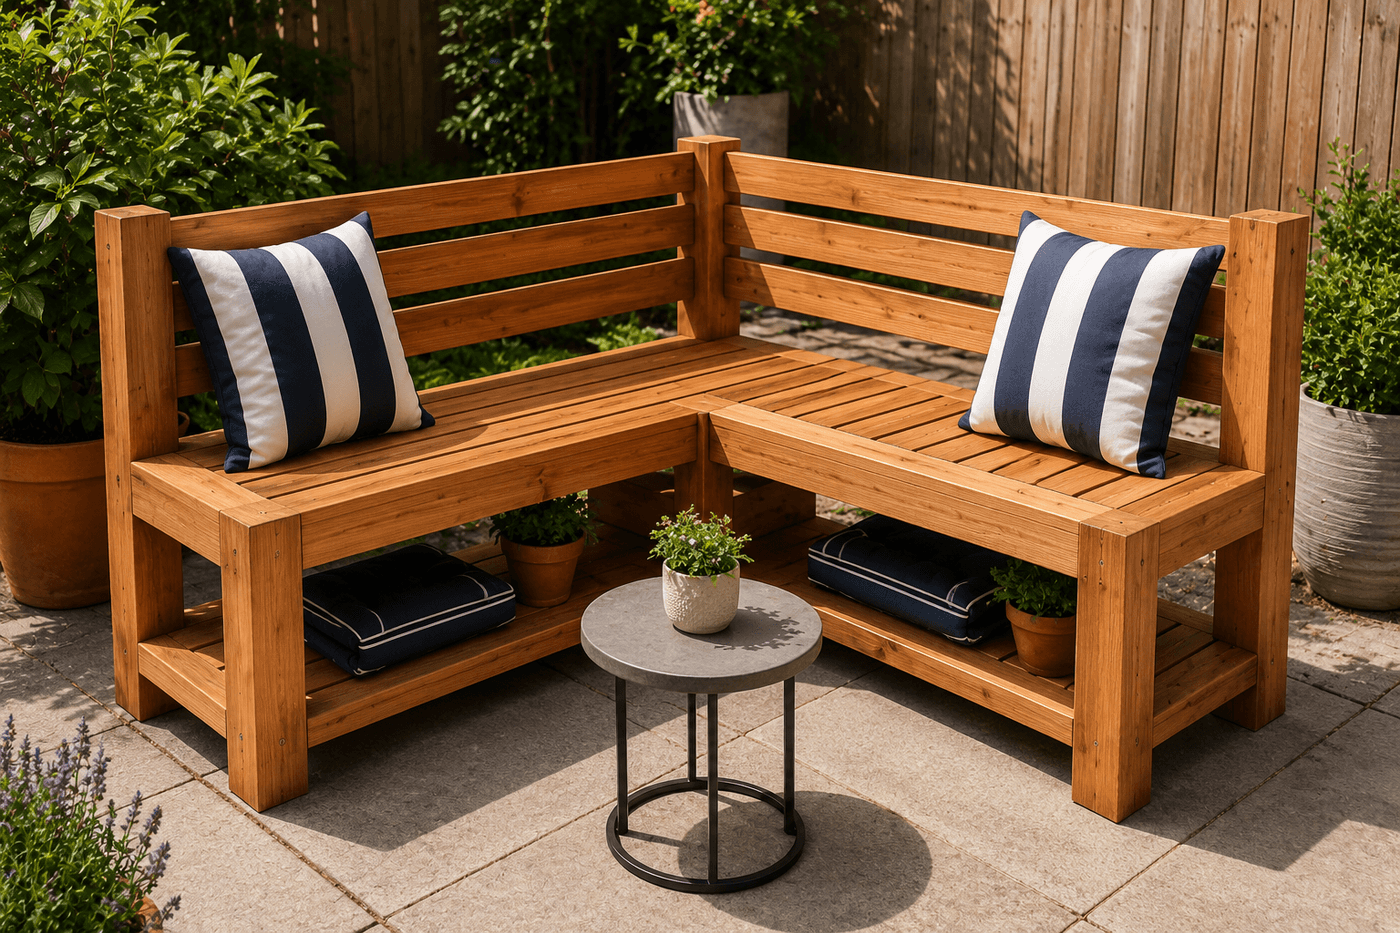
The awkward patio corner is one of those outdoor spaces that becomes a passive storage zone by default — the place where empty pots accumulate, tools get leaned and forgotten, and the vague intention to do something useful with it eventually stops feeling like a plan and starts feeling like the corner's permanent condition. A corner bench built to fit the angle exactly transforms this dynamic completely, and the L-shaped design that achieves it is significantly more approachable than it initially appears: two simple rectangular bench sections built identically to each other, joined at their inside corner by a single shared post that locks both sections into a rigid, unified structure. That shared corner post is the key insight that makes the whole project click — it is not two benches leaning against each other but one bench with a structural center that gives the finished piece its solidity and its satisfying, purposeful presence in the corner. Cedar lumber, exterior hardware, and teak oil finish run about $60; the build takes four hours including the angle cut calculations that make the sections meet cleanly; and the finished bench seats four people comfortably, has a lower shelf on each section for cushion and plant storage, and turns three years of accumulated corner clutter into the gathering spot that everyone migrates toward at every outdoor occasion.
What You'll Need
- 4x4 cedar posts, 8 feet — three posts yield five legs at 17½ inches each (18-inch finished seat height minus the seat board thickness); the corner post is shared between both bench sections and is the most structurally critical piece in the build; cedar resists ground contact rot naturally (~$12–14 each, two boards needed for five legs with efficient cutting)
- 2x4 cedar boards, 8 feet — for the front and back rails of each bench section that connect the legs and support the seat slats; four boards yield all rails for both sections with efficient cutting (~$5–6 each, four boards needed)
- 1x4 cedar boards, 8 feet — for the seat slats across both bench sections and the lower shelf boards on each section; six boards yield the seat slats and shelf boards for both sections (~$4–5 each, six boards needed)
- Exterior structural screws, 2½" and 3" — 3-inch for leg-to-rail connections; 2½-inch for seat slat and shelf board attachment; stainless or coated exterior screws prevent rust streaking on cedar (~$6–8 per box of each size)
- Metal connector brackets — four L-brackets and two post cap connectors for reinforcing the rail-to-leg joints at the corner post where both bench sections meet; the corner post connection bears the most structural load in the full bench and benefits from metal reinforcement beyond screws alone (~$8–12 for a set)
- Exterior wood glue — Titebond II or similar water-resistant formula applied at all rail-to-leg joints before screwing; the glue joint carries the primary load and the screws maintain alignment during cure
- Teak oil or danish oil — two coats on all surfaces before assembly for complete coverage including interior joint faces; penetrating oil finishes soak into cedar rather than sitting on the surface and will not peel or chip through seasons of outdoor use (~$8–10 per quart)
- Sandpaper, 80- and 220-grit — for smoothing all boards before finishing; particularly the seat slat top edges which should be rounded slightly with 220-grit to prevent the sharp arris that is uncomfortable under bare legs in warm weather
- Circular saw or miter saw — for the 45-degree angle cuts at the corner post ends of each section's rails where the two bench sections meet; consistent 45-degree cuts on matching pieces produce the clean mitered joint at the corner that makes the bench read as a single designed piece rather than two benches pushed together
- Drill, impact driver, speed square, tape measure, and clamps
How to Build It
- Measure the corner angle before cutting any lumber — most patio corners are 90 degrees but some are not, and building for a 90-degree corner that is actually 92 degrees produces a bench that does not sit flush in the corner regardless of how well it is built otherwise. Confirm the corner angle with a speed square or angle finder before the rail cuts are planned; a true 90-degree corner means each rail end that meets at the corner post is cut at 45 degrees; a non-square corner requires calculating the bisecting angle from the actual corner measurement.
- Cut all lumber to dimension before any finishing or assembly — five legs at 17½ inches from the 4x4 posts, front and back rails for both sections at the planned bench lengths (typically 48–60 inches per section depending on the patio corner size), and seat slats and shelf boards cut to span the rail width of 17 inches. Cut all the 45-degree rail ends that meet at the corner post at this stage, confirming the angle on scrap wood before cutting the full-length rails.
- Sand all pieces through 80- and 220-grit and apply two coats of teak oil to all surfaces before any assembly — individual flat boards are finished completely and efficiently on all six faces; the same surfaces after assembly have inaccessible interior joint faces and corners where oil application is incomplete. The seat slat top edges specifically benefit from a slight roundover with 220-grit at this pre-assembly stage when the boards are still flat and easy to work on all edges simultaneously.
- Build the corner post assembly first — this is the structural heart of the bench and the element that both sections attach to. The corner post is a single 4x4 leg with rails from both bench sections meeting at its two adjacent faces at 45-degree mitered ends. Attach the first section's rails to two adjacent faces of the corner post with glue and 3-inch screws, confirm square, and allow to cure before attaching the second section's rails to the remaining two faces; working one section at a time prevents the assembly complexity of trying to join all four rails to the post simultaneously.
- Complete each bench section by attaching the outer legs — one leg at each far end of each section's front and back rails. Apply glue to the rail end faces, clamp the leg squarely against the rail ends, and drive 3-inch screws through the rails into the leg face at two points per connection; check diagonal measurements on each completed section frame before the glue sets to confirm square, and clamp the long diagonal if any racking is present until the glue achieves initial set.
- Install the lower shelf rails between the legs of each section at approximately 6 inches above the ground — position them at the same height on both sections so the shelf presents as a consistent horizontal element across the full bench length when viewed from the side. The shelf rails are the same 2x4 cedar as the seat rails, cut to the interior dimension between the leg faces and attached with glue and screws through the leg faces into the rail ends.
- Attach seat slats across the top rails of both sections with consistent ¼-inch spacing between slats — use a scrap piece of ¼-inch plywood as a physical spacer between each slat during installation rather than measuring individually, which produces perfectly consistent gaps across the full bench length. Drive two 2½-inch screws per slat per rail through countersunk pilot holes, confirming all screws are driven to the same depth so no heads protrude above the seat surface to catch bare legs or cushions.
- Install the lower shelf boards across both sections' shelf rails using the same ¼-inch spacing technique as the seat slats — the shelf provides storage for outdoor cushions when the bench is not in use and visual weight at the lower bench level that makes the full piece read as substantial and purposeful rather than spindly. Confirm the shelf boards are level across their full length before driving any screws; a level shelf is the specific detail that reads as crafted rather than constructed from any viewing angle around the bench.
- Install metal connector brackets at all four rail-to-corner-post joints as an additional structural reinforcement — the corner post is the point where the full weight of two bench sections and their occupants transfers to the ground, and the mechanical reinforcement of L-brackets at these joints provides the lateral rigidity that makes the bench feel solid under dynamic loading rather than slightly flexible. Apply a second coat of teak oil to any cut ends and raw surfaces exposed during assembly before placing the bench in its corner position.
Landscape architects and outdoor living designers who specify built-in corner seating for residential patio designs use one design dimension that most first-time corner bench builders underestimate and that significantly affects how comfortable and how frequently the finished bench is actually used: build the seat depth to a minimum of 20 inches rather than the 16–17 inches that feels proportionally correct when the lumber is on the ground rather than at sitting height. A 17-inch deep seat is technically adequate for upright sitting but feels cramped when leaning back against outdoor cushions or sitting cross-legged on a warm evening — the two positions that outdoor seating is most actually used in rather than the formal upright position that most seat depth calculations assume. Landscape designers who specify corner bench seating for outdoor rooms consistently use 20–22 inches of seat depth as the minimum for the kind of comfortable, stay-a-while seating that makes a patio corner the gathering spot rather than the overflow seating — and the additional 3–4 inches of depth requires only slightly wider seat slats and rails at negligible additional lumber cost, while producing a bench that everyone gravitates toward rather than sits on briefly and leaves.