
Can Do: Turn Tin Cans into Hanging Herb Planters
Free cans, a few dollars in rope and plants, and one afternoon — that's all it takes to build a fresh herb garden that hangs anywhere
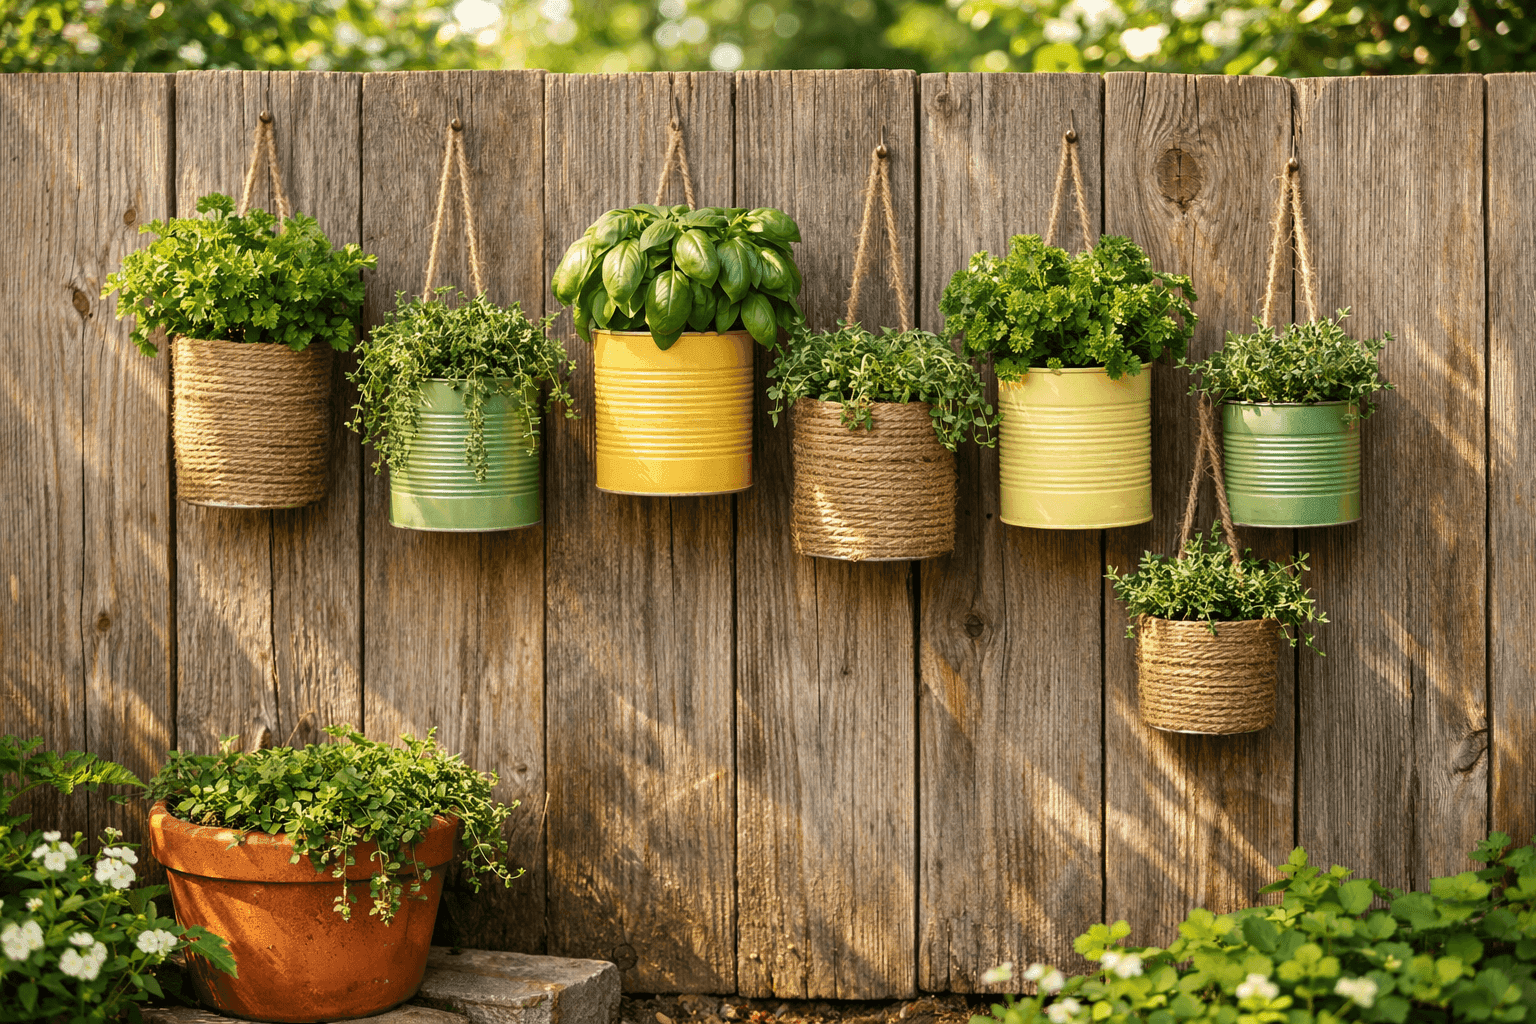
There's something genuinely satisfying about turning something destined for the recycling bin into something you'll use and look at every single day — and tin can herb planters are one of the best examples of that transformation you can pull off in a single afternoon. The cans are free, the materials cost $5–$8 total, and the finished display — a cluster of jute-wrapped or painted cans hanging at varying heights with fresh herbs spilling over the rims — looks like something you'd find in a curated garden shop for $60. Beyond the aesthetics, this project solves a real problem: fresh herbs within arm's reach of your kitchen, growing vertically so they take up zero counter or ground space, in a setup that works equally well on a fence, a patio wall, or under a porch overhang. Basil for your pasta, mint for your drinks, cilantro for your tacos — all right there, and all grown in cans that were headed for the bin anyway. This is the Makeover Monday project that keeps giving all season long.
What You'll Need
- The Cans
- Assorted empty tin cans in a variety of sizes — soup cans (10 oz), tomato cans (28 oz), and coffee cans (39 oz) all work beautifully and create great size variation in the finished display
- Remove labels completely and wash thoroughly with hot soapy water — soak stubborn label glue residue in cooking oil for 10 minutes then wipe clean
- Check the interior for any sharp edges from the lid removal and use a rubber mallet to tap them flat before planting
- Finishing Options — Pick One or Mix Both
- Natural jute twine or jute rope (3mm or thicker) for wrapping — one 100-yard spool covers 4–5 cans depending on size — ~$4–$6
- Hot glue gun and glue sticks for securing the twine wrap
- OR outdoor acrylic craft paint in spring tones — soft sage, butter yellow, robin's egg blue — ~$2–$3 per bottle, one bottle per can
- Clear outdoor sealer for painted cans — ~$6–$8 per can (covers all your planters)
- Hanging Hardware
- Heavy-gauge craft wire (18–20 gauge) or strong jute twine for hanging loops — ~$3–$4
- Outdoor screw hooks or cup hooks for mounting to fence, wall, or overhang — ~$3–$5 for a pack of 10
- Hammer and sturdy nail (or drill with small bit) for punching drainage holes and hanging holes
- Planting Supplies
- Quality potting mix — not garden soil, which compacts in containers and drains poorly — ~$6–$8 for a small bag that fills many cans
- Small gravel or broken pottery pieces for layering over drainage holes to prevent soil loss
- Individual herb plants or seed packets — basil, mint, cilantro, parsley, and thyme are all excellent choices — ~$2–$4 per plant
- Slow-release fertilizer granules to mix into soil for season-long feeding
How to Make Them
- Prep your cans by removing all labels, washing thoroughly, and checking for sharp interior edges from the lid cut — run a finger carefully around the interior top rim and use a rubber mallet or the back of a spoon to tap down any raised points before anyone's hands go near them during planting. A smooth interior edge is a five-second fix now versus a nasty cut later.
- Punch drainage holes in the bottom of each can using a hammer and sturdy nail, making 3–4 holes spaced evenly across the base — place the can on a piece of scrap wood so the nail has somewhere to go and the can bottom doesn't just dent instead of puncture. Proper drainage is what keeps herb roots healthy in a metal container, which holds heat and moisture very differently than a clay or plastic pot.
- Create hanging holes near the top rim of each can by punching or drilling two holes directly opposite each other about ½ inch down from the top edge — these need to be large enough for your wire or twine to thread through easily but not so large that the hanging material cuts through the metal edge under the weight of a soil-filled can. Reinforce each hole by placing a small metal washer behind the wire loop if you're using heavy cans.
- Finish the exterior using your chosen method — for twine wrapping, apply a line of hot glue at the base of the can and press the twine end firmly into it, then wrap tightly upward row by row with a small dab of glue every few rows to keep tension even and prevent unraveling. For painted cans, apply two thin coats of outdoor acrylic in your chosen color, let dry completely between coats, then seal with clear outdoor sealer for weather resistance.
- Thread the hanging loop by cutting an 8–10 inch length of wire or strong twine, threading each end through one of the two rim holes from the outside in, and twisting or knotting each end securely on the inside of the can so it can't pull back through under load. Tug firmly on the loop before trusting it with a planted, soil-filled can — a hanging loop failure means a broken planter and a mess on your patio.
- Install your hooks at varying heights on your chosen wall, fence, or overhang before filling any cans with soil — it's much easier to adjust hook placement and spacing with empty cans than with planted ones. Space hooks at different heights and slight offsets rather than in a perfectly level row, since a staggered arrangement looks intentionally styled while a perfectly straight line of cans reads as rigid and institutional.
- Plant each can by adding a small layer of gravel over the drainage holes first, then filling with potting mix blended with a pinch of slow-release fertilizer granules to about an inch below the rim. Plant one herb per can — resist the urge to crowd two herbs into a single small can, as they'll compete for nutrients and water and both will underperform within a few weeks. Give each planted can a thorough watering and let it drain completely before hanging.
- Hang and style the display by arranging your cans with larger ones lower and smaller ones higher for a visually balanced composition, mixing jute-wrapped and painted cans if you used both finishes for a collected, layered look. Step back after hanging each one to check the overall arrangement before committing — a minute of adjusting now beats reorganizing a full display of planted cans later when everything is heavy and dripping.














